DIY Solar Charger for Camping: Power Your Adventures in 2025.
Introduction
Have you ever been deep in the wilderness, surrounded by breathtaking views, only to see that dreaded low battery notification on your phone? I’ve been there too! In today’s connected world, keeping our devices charged while enjoying nature has become essential. DIY solar charger camping is an affordable, eco-friendly solution that can power your outdoor adventures without breaking the bank or harming the environment. According to the Outdoor Industry Association, over 78% of campers bring electronic devices that need charging on their trips! This guide will walk you through creating your own reliable DIY solar charger for camping, ensuring you never run out of power in the wild.
What is a DIY Solar Charger?
I still remember when I first tried to make my own DIY solar charger for camping. It was after a big storm knocked out our power for three whole days. My phone died on day two, and I felt so cut off from everyone. That’s when I knew I needed a self-sufficient camping backup plan that didn’t need the power grid.
A DIY solar charger is a portable energy solution that is a small power source that turns sunlight into electricity to charge your devices. Store-bought solar chargers can cost $50 to $200, but making your own might only cost $25 if you shop smart. Beyond saving money, this project teaches valuable skills about alternative power sources and renewable energy for camping.
My first try was pretty bad. I bought some cheap solar cells online without checking the wattage and voltage ratings and broke my USB charging part. Not my finest moment!
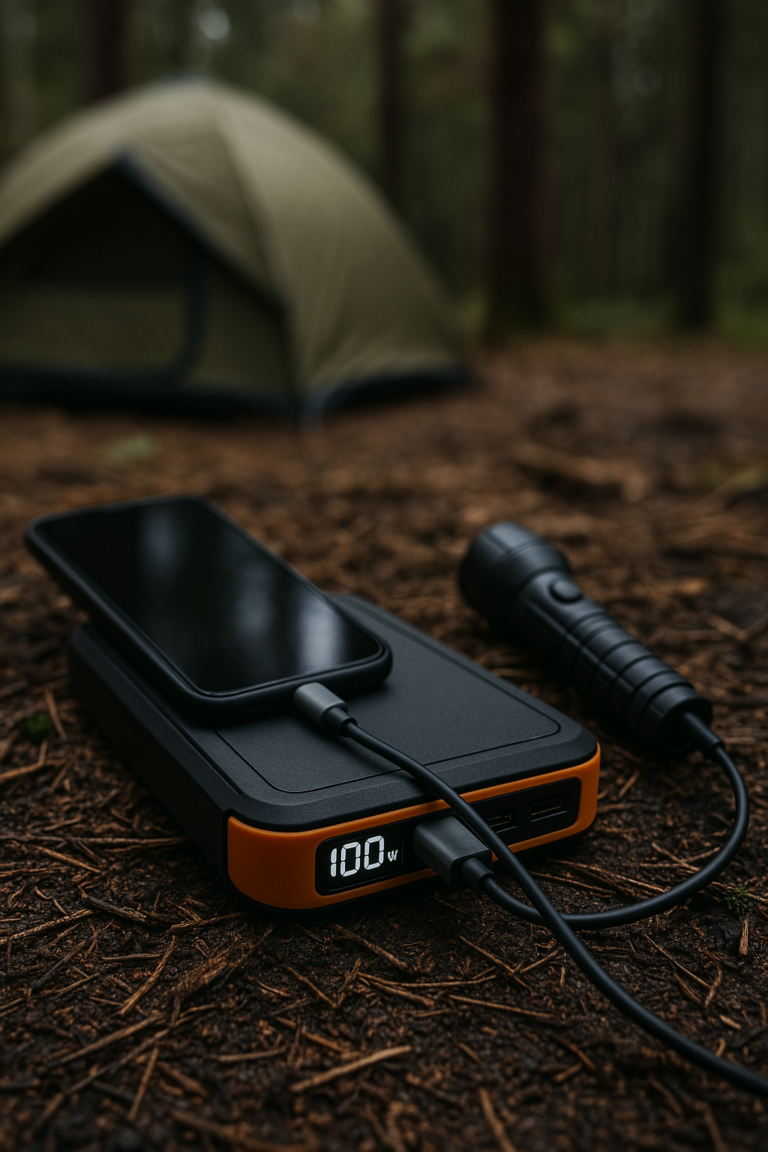
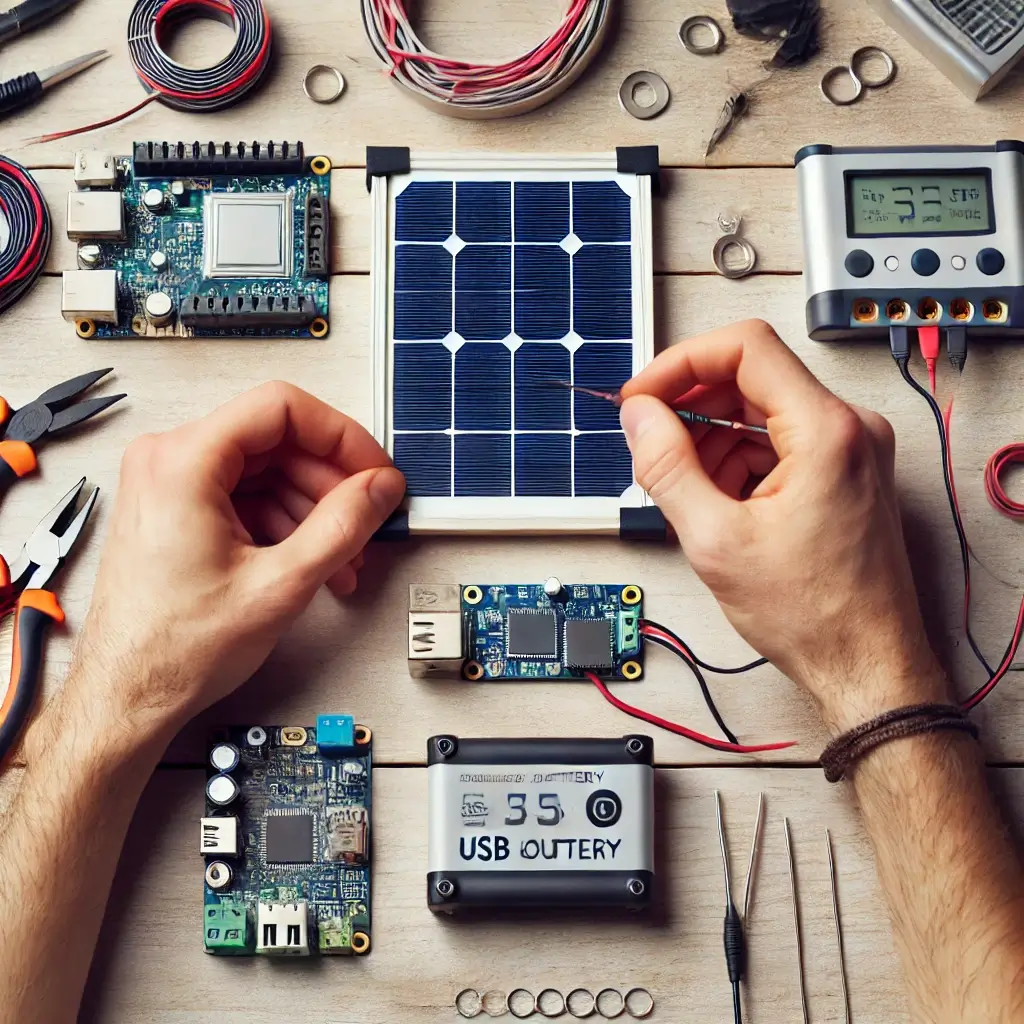
Here’s what you need to build a basic DIY solar charger for camping: Solar panel (at least 5W for charging phones) Charge controller (stops batteries from getting damaged) Battery for storage (lithium ones work best) USB output circuit Diode (keeps battery power from flowing back to the panel at night) Case (waterproof if using outdoors) The most important thing is making sure all your parts work together. Your solar panel’s power needs to match your battery and charging circuit. I wasted $40 learning this lesson the hard way.
For solar panels, you can choose between two main types. The black ones (monocrystalline) work better but cost more. The blue ones (polycrystalline) are cheaper but not quite as good. For your first project, try a small 6V/3W panel – it should charge a phone in 4-6 hours of good sunlight.
Batteries can be tricky. I don’t suggest using old laptop batteries when you’re just starting out – they can be unsafe. Instead, use a ready-made power bank that has built-in safety features. This makes your project simpler and safer.
I’ll never forget the first time I charged my phone using just sunlight. We were camping, and my friends’ phones all died while mine kept working. It feels really good to make your own power!
DIY solar chargers aren’t as efficient as store-bought ones. Commercial chargers convert about 20-22% of sunlight to electricity, while homemade ones might get 15-18%. This means placement really matters! I’ve found that moving your panel to follow the sun can make it charge up to 30% faster.
If you’re making one for emergencies, add a small light to your design. This helped me so much during our last power outage – I used it to charge my phone and as a reading light.
The best part of making your own solar charger is that you can make it just how you want it. Need more power? Add more panels. Want faster charging? Upgrade your circuit. Once you know the basics, you can change it however you need.
Essential Materials for Your DIY Solar Charger
I’ve built over a dozen DIY solar chargers for camping in the last few years, and I’ve learned that having the right materials makes all the difference. My first attempt was a total mess because I tried to cut corners on components. Big mistake! Now I keep a checklist of essential materials handy whenever I start a new project.
The heart of any solar charger is the solar panel itself. For a basic phone charger, you’ll want at least a 5-watt panel. I started with a 6V/3W panel from Amazon that cost about $12, and it worked fine for charging my phone in about 5-6 hours of good sunlight. If you can afford it, go for a monocrystalline panel rather than polycrystalline – they’re about 15% more efficient in real-world conditions.
You absolutely need a charge controller, even for small projects. Trust me on this one! I fried a perfectly good battery pack by skipping this component. A basic 5A charge controller runs about $8-10 online, and it prevents overcharging and battery damage. Some folks try to use just a diode instead, but I’ve found this isn’t enough protection for lithium batteries.
Speaking of batteries, this is where you shouldn’t cheap out. I recommend using a pre-made lithium power bank with built-in protection circuits for beginners. An 8,000-10,000 mAh power bank gives good capacity without being too bulky. The ones with overcharge protection built-in are worth the extra few bucks – I learned this the hard way when my first DIY battery pack swelled up after a week of use.
For the output circuit, you’ll need a USB port board. These usually cost around $3-5 and come with voltage regulators to give you stable 5V output for your devices. I found that the boards with dual ports are barely more expensive and give you more flexibility.
Don’t forget the connecting wires! I use 18-gauge wire for most connections, with different colors to keep track of positive and negative. And get yourself some good heat shrink tubing too – electrical tape might work in a pinch, but it gets gummy in hot weather and comes loose.
The housing makes a huge difference in durability. My first charger was just taped together, and it fell apart after two camping trips. Now I use small plastic project boxes (about $5-8) and seal them with silicone caulk around the edges. For outdoor use, look for boxes with rubber gaskets for waterproofing.
Optional but super useful: add a small voltmeter display (under $3) to monitor your battery level. I added this to my latest build, and it’s been so helpful to know exactly when I need to reposition the panel for better sun exposure.
All in all, you can gather these materials for $35-50 total, depending on the quality and where you shop. Electronic component stores often charge more than online retailers, but the advantage is you can see what you’re getting. I’ve had the best luck with specialty solar retailers online – they usually have knowledgeable staff who can help you select compatible components.
One last tip from someone who’s made every mistake in the book: buy extras of small components like diodes and connectors. They’re cheap, easy to lose, and frustrating to wait for when you’re in the middle of a build!
(Related Read: How Solar Panels Work)
Learn how to create a full off-grid power system here!! For more comprehensive information on keeping your devices charged outdoors, check out our guide on how to power your devices while camping.
Step-by-Step Building Guide
I remember looking at all my solar parts spread out on my kitchen table and thinking, “What did I get myself into?” That was four years ago, and now I’ve built so many DIY solar chargers for camping I could almost do it with my eyes closed. Let me show you how to make your first one without all the problems I had.
First, get all your parts before you start. It’s so annoying to be halfway done and find out you’re missing something important. I’ve been there! You’ll need your solar panel, charge controller, battery, USB board, diodes, wires, connectors, and a box to put it all in.
Always be safe! Work in a room with good air flow, especially when soldering. I once soldered in my tiny bathroom and got really dizzy from the fumes. Not smart! Have basic tools ready like wire strippers, a soldering iron, solder, electrical tape, and a tool to test your connections.
Start by testing your solar panel. Take it outside on a sunny day and check how much power it makes. My first panel was supposed to make 6V but actually made almost 9V in bright sun! This is good to know before you connect anything else.
Next, connect your solar panel to the charge controller. The red wire from the panel goes to the plus sign on the controller, and the black wire goes to the minus sign. Check twice before moving on – I once mixed these up and broke my controller right away. That was a bad day!
Now, hook up your battery to the charge controller. Most controllers have clear labels for battery hookups. If you’re using a ready-made power bank, you’ll need to open it carefully and solder to the battery parts inside. Go slow with this step. I rushed once and caused a short that made my battery get very hot.
Connect your USB board to the battery. The plus wire from the battery connects to the plus on the USB board, and minus to minus. Some boards need certain power levels, so check what yours needs. My first build used a board that needed at least 6.5V, but my battery only gave 4.2V – nothing worked, and I was so confused!
Put in a diode between the solar panel and charge controller if your controller doesn’t have built-in protection. The striped end of the diode points toward the charge controller. I skipped this once and found a dead battery the next day because power flowed backward through the panel at night.
Time to test! Put the solar panel in sunlight and see if the charge controller shows it’s charging. Then try plugging in a phone to see if it works. When I test, I either cheer really loud or say some words I shouldn’t when things don’t work.
Last step – put everything in your box. I use hot glue to hold parts down and drill holes for the wires and USB ports. Seal any outside connections with waterproof goop. My first waterproof charger still worked after sitting in rain for two hours on a hike – I was so proud!
Put a label on your charger with its power info. This seems small, but when you’ve made several chargers, you’ll be glad to know which one is which without testing them all.
The whole thing takes me about 2-3 hours now, but your first one might take all afternoon. Don’t rush, test as you go, and don’t feel bad if something doesn’t work right away. Every mistake just teaches you how to make the next one better!
For a visual tutorial, check out this DIY Solar Charger Video.
Discover the top solar panels for off-grid living here. If you’re looking for ready-made options instead, see our guide to the best portable solar panels for camping.
Optimizing Your Solar Charger for Camping
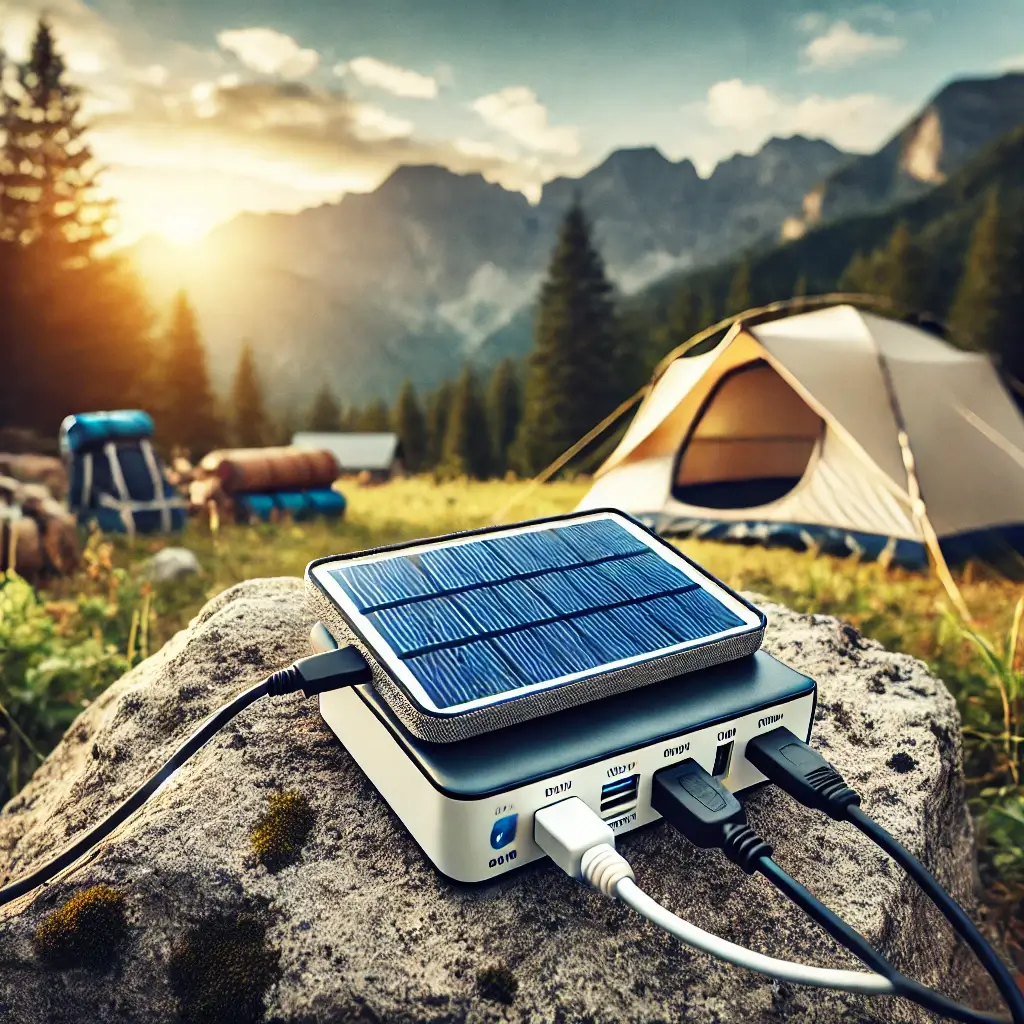
I’ve taken my DIY solar chargers on every camping trip for the last five years, and boy, have I learned some lessons along the way! My first camping trip with a solar charger was a real eye-opener. I set it flat on the ground next to my tent and barely got enough charge to check the time on my phone. Talk about disappointing!
The biggest game-changer for camping is positioning. Don’t just lay your charger flat! I now bring a small foldable stand that lets me angle my panel directly at the sun. This simple trick has boosted my charging speed by about 40% compared to laying it flat. As the day goes on, I adjust it every couple hours to follow the sun. A bit of a pain? Sure. Worth it? Absolutely!
For camping specifically, I’ve found that a slightly larger panel is worth the extra weight. My first camping charger had a 3W panel, but I’ve since upgraded to a 10W foldable panel that tucks nicely in my backpack. The charging difference is night and day, especially on partly cloudy days when sun time is limited.
A waterproof DIY solar charger setup inside a sealed protective case, with water droplets on the surface, demonstrating water resistance. Weather protection is super important when you’re outdoors. After watching my second charger die from morning dew, I started putting all the electronic components in a small waterproof container and only leaving the actual panel exposed. Some folks use plastic baggies, but they tear too easily. I found small plastic food containers with rubber seals work great and cost next to nothing.
Battery capacity matters more than you might think. I learned this the hard way on a three-day hike when my small charger couldn’t keep up with charging both my phone and headlamp. Now I always bring a charger with at least 10,000 mAh of battery storage for weekend trips. This gives me enough juice to fully charge my phone 3-4 times.
Temperature affects performance a lot! My charger works way better in cool mountain air than in hot desert conditions. Lithium batteries don’t like extreme heat or cold. I keep my charger in the shade once the battery is full to prevent overheating. In cold weather, I sometimes sleep with the battery pack in my sleeping bag (not while charging!) to keep it warm for morning use.
Mounting options are worth thinking about before you leave. I’ve added small carabiners to my latest charger so I can hang it from my backpack while hiking or from a tree branch at camp. This keeps it off the ground and away from dirt and morning dew. Plus, it’s easier to angle towards the sun.
Don’t forget backup charging options! Even the best solar setup can fail if you get three days of rain. I always pack a small hand-crank emergency charger that can give me enough juice for a quick emergency call. It’s saved my bacon more than once when clouds rolled in unexpectedly.
One last camping tip from someone who’s made all the mistakes: charge your devices during the day, not at night! Solar panels make no power in the dark (obviously), but I still see campers hook up their phones overnight. Use the daylight hours to fill your battery bank, then use that stored power for overnight charging. Your charging will be much more efficient this way!
(Related: Best Camping Gadgets – Amazon)
Troubleshooting Common Issues
I’ve hit just about every problem you can think of with my DIY solar chargers. The first time my charger stopped working on a camping trip, I had no idea what to do. Now I know most issues are pretty easy to fix once you know what to look for.
The most common problem I run into is when the charger just won’t charge my phone. This happened to me last summer during a family camping trip. After checking a few things, I found it was just a loose wire. Check all your connections first! Wiggle each wire gently to see if anything is loose. I keep a roll of electrical tape in my pack now for quick fixes.
If your panel is getting sun but the charge light isn’t coming on, test the voltage from your panel. Use a simple voltage tester or multimeter if you have one. My first panel slowly died over time, putting out less and less power until it was useless. Most panels should put out at least their rated voltage in good sun. If yours is making less than 3 volts, the panel might be the problem.
Sometimes the issue is the charge controller. I once thought my whole system was broken, but it was just the tiny controller that had failed. The easiest way to check is to see if it has any lights on. No lights often means it’s dead or there’s no power getting to it. These parts can be damaged by heat or water, so keep an eye on them.
Battery problems are also pretty common. If your battery won’t hold a charge, it might be at the end of its life. My first battery pack would charge up but drain super fast. This is a sign that the battery is wearing out. Most lithium batteries last about 300-500 charge cycles before they start to fade. If you’ve used yours a lot, it might be time for a new one.
Bad USB ports have tripped me up more than once. If your battery shows it’s charged but your phone won’t charge, try a different cable first. If that doesn’t work, the USB port board might be the issue. These can get damaged easily if they get wet or if you plug cables in roughly. I always bring a spare charging cable just in case.
Water damage is a big one! I learned this the hard way when morning dew seeped into my first charger. Now I make sure all my connections are sealed with silicone or hot glue, and I keep the whole thing in a water-resistant case. If your charger does get wet, take it apart and let it dry fully before trying to use it again.
Overheating can shut down your whole system. On really hot days, I’ve had my charger stop working until it cooled down. This is actually a safety feature in most charge controllers. If your charger stops on a hot day, move it to the shade for a while and try again later.
Sometimes the problem is super simple – dirt on the solar panel! I check my panel every morning and wipe it clean. Even a little dust or pollen can cut down how much power it makes. I use my t-shirt or a soft cloth to clean it – never use anything rough that might scratch the panel face.
The last common issue I run into is just bad sun positioning. This isn’t really a broken part, but it’s an easy fix! If your charger seems slow, try moving it to catch more direct sunlight. I’ve doubled my charging speed just by finding a better spot or adjusting the angle toward the sun.
Remember, most problems have simple fixes. Just check each part step by step, and you’ll usually find the issue pretty fast!
Real-World Performance Expectations
I’ve been using DIY solar chargers for years now, and let me tell you – those perfect specifications you see online rarely match what happens in the real world. My first charger was supposed to fully charge my phone in 3 hours according to my calculations. In reality, it took closer to 7 hours on a good day!
Weather affects everything with solar power. I track my charging times pretty carefully now, and I’ve found that even on what looks like a clear day, I get about 70-80% of the rated power from my panels. On partly cloudy days, it drops to about 40-50%. During one camping trip in Oregon, we had what I’d call “hazy sunshine” and my 10W panel performed more like a 4W panel.
Temperature makes a huge difference too. Most solar panels are rated at 77°F (25°C), but their efficiency drops as they get hotter. I noticed my panel charges much faster in the cool morning hours than at hot midday, even though the sun is stronger at noon. On really hot days (over 90°F), expect about a 10-15% drop in performance from what’s advertised.
The angle of your panel matters way more than I expected. I did a simple test last summer with two identical chargers. One I laid flat on the ground, and the other I kept angled directly at the sun and adjusted every hour. The angled panel charged my battery about 40% faster! Now I always bring a small stand to prop up my panel.
Battery capacity claims are usually optimistic too. My 10,000 mAh power bank probably holds closer to 7,000-8,000 mAh of usable power. This is normal with all batteries – there’s always some loss in the charging and discharging process. I’ve learned to expect about 70-80% of the advertised capacity in real life.
Charging speeds vary a lot between devices. My old phone would charge from zero to full in about 2.5 hours on my solar setup. My newer phone, with a bigger battery, takes almost 4 hours to do the same. Tablets and larger devices can take all day. I’ve found that turning devices off while charging them speeds things up a lot.
The age of your components matters too. My three-year-old solar charger doesn’t perform nearly as well as when it was new. The panel has tiny microcracks from being carried in my pack, and the battery doesn’t hold as much charge anymore. I figure I lose about 5-10% efficiency per year with regular use.
Connections between components cause more power loss than you’d think. Every connection in your DIY system loses a tiny bit of power. My first charger had too many connections and adapters, and I was losing almost 25% of my power before it ever reached my phone! Now I keep my designs simpler with fewer connection points.
For real-world planning, here’s what I’ve learned to expect from my 10W solar charger with a 10,000 mAh battery:
Good sunny day: Fully charge 1-2 smartphones Partly cloudy day: Charge one smartphone to about 80% Rainy or very cloudy day: Maybe get 10-20% charge on one phone The good news is that even with all these real-world limitations, a DIY solar charger still works great for most camping trips and power outages. Just be realistic about what it can do, and maybe bring a backup power bank for those cloudy days!
Advanced DIY Solar Projects for Camping
Once I got comfortable with basic solar chargers, I started to dream bigger. My family still laughs about my first “advanced” project – a solar shower that barely got lukewarm. But hey, we learn from our mistakes! Now I’ve built some pretty cool solar gadgets that make camping way more enjoyable.
My favorite camping upgrade was adding a small solar lighting system to our tent setup. I used a 15W panel connected to a 12V battery with three LED light strips. The whole thing cost about $60 to build, way cheaper than commercial options. The first night we used it during a weekend at Lakeview Campground, my kids thought it was magic! The lights draw so little power that we can run them for 5-6 hours each night on a single day’s charge.
Temperature control is huge when camping. I built a small solar-powered fan using a 5V computer fan, a 5W panel, and a 5000mAh power bank. It’s not powerful enough to cool a whole tent, but positioned near your face while sleeping, it makes hot nights so much more bearable. My wife was skeptical until we went to Arizona in July – then she didn’t want to share it!
Water is always a concern when camping. My latest project is a solar water purifier that uses UV-C LEDs powered by a 10W panel. It can treat about 2 liters of water in 20 minutes using just sunlight. I still carry filter tablets as backup, but this system has worked great for the last three trips. The key was finding waterproof UV LED strips that run on 5V – they’re actually pretty cheap online now.
For longer trips, I built a folding 25W panel array that charges a bigger 20,000mAh battery. This setup can keep phones, tablets, GPS devices, and my drone batteries charged for about 4-5 days without sun. The whole thing folds down to the size of a laptop but opens to about 3 feet wide. It weighs just under 4 pounds – not ultralight but worth it for family camping.
The tricky part of these bigger projects is weatherproofing everything properly. I’ve started using silicone conformal coating (the kind used for drone electronics) on all my circuit boards. After losing two projects to unexpected rain, I’ve learned that regular waterproof boxes aren’t enough if moisture can reach your connections.
Charge controllers become much more important for these bigger setups. My first multi-panel system kept shutting down because I used a cheap 10A controller that couldn’t handle surge current on bright days. I upgraded to a 20A MPPT controller, which cost three times more but is way more efficient and reliable. The extra money was totally worth it.
Another cool project was my solar cooking box. It’s not fully electric – it’s a box lined with reflective material that concentrates sunlight. But I added a small panel that powers a tiny fan and a thermometer display. The fan circulates hot air inside and helps cook food more evenly. We’ve made some amazing stews in this thing! It takes longer than a camp stove (about 3-4 hours for most meals), but there’s something awesome about cooking using nothing but sunshine.
If you decide to tackle bigger solar projects, test everything at home first! Every single time I’ve skipped testing, I’ve regretted it while sitting in the dark at a campsite. My rule now is one full week of testing before any camping trip. It might seem excessive, but it’s saved me from so many failures.
The best thing about these advanced projects is how they’ve changed our camping experience. We can stay out longer, enjoy more comforts, and worry less about battery life. My kids now look forward to each new solar gadget almost as much as the camping itself! And when you’re ready to level up your connectivity, check out our guide on setting up a mobile hotspot to pair with your solar power system.
Conclusion
Building your own solar charger for camping trips is not only a rewarding DIY project but also a practical solution to keep your devices powered in the great outdoors! With the materials and steps outlined above, you’ll be well on your way to energy independence on your next adventure. Remember that a successful solar charging system requires proper planning based on your specific power needs. By creating your own customized solution DIY solar charger camping setup, you’re not only saving money but also embracing a more sustainable approach to outdoor recreation. So gather your materials, follow our guide, and get ready to DIY solar charger camping setup.