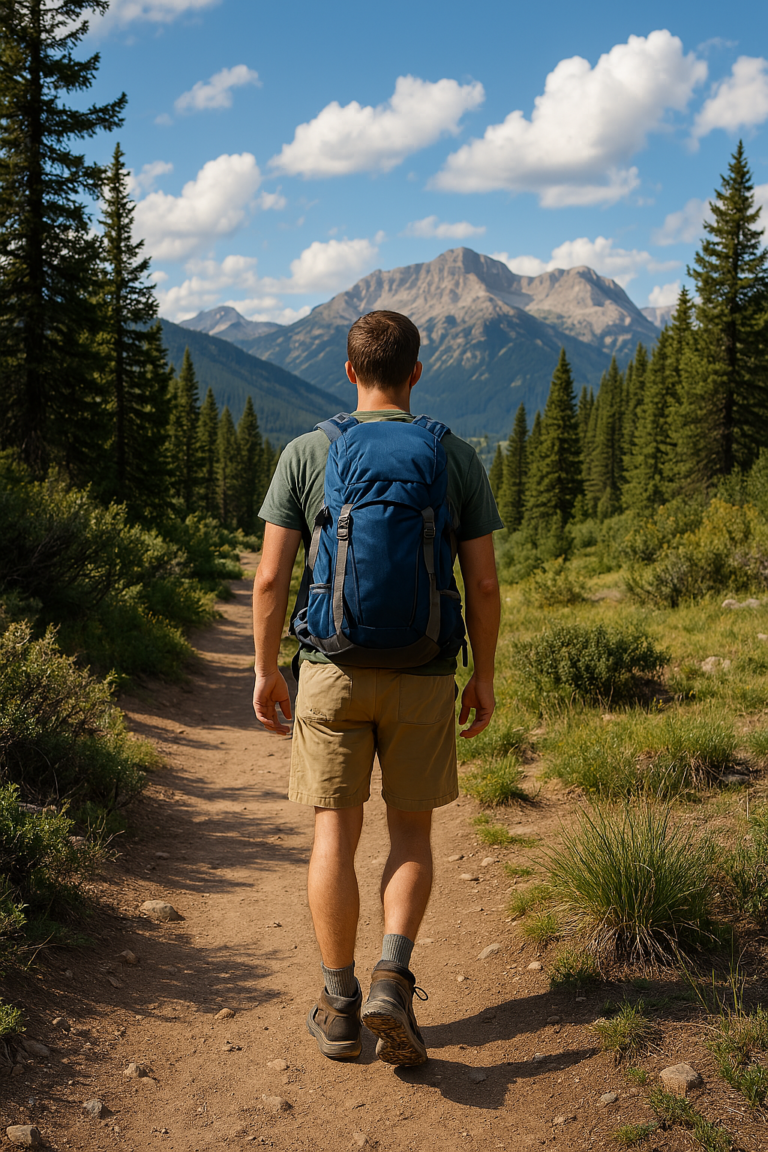
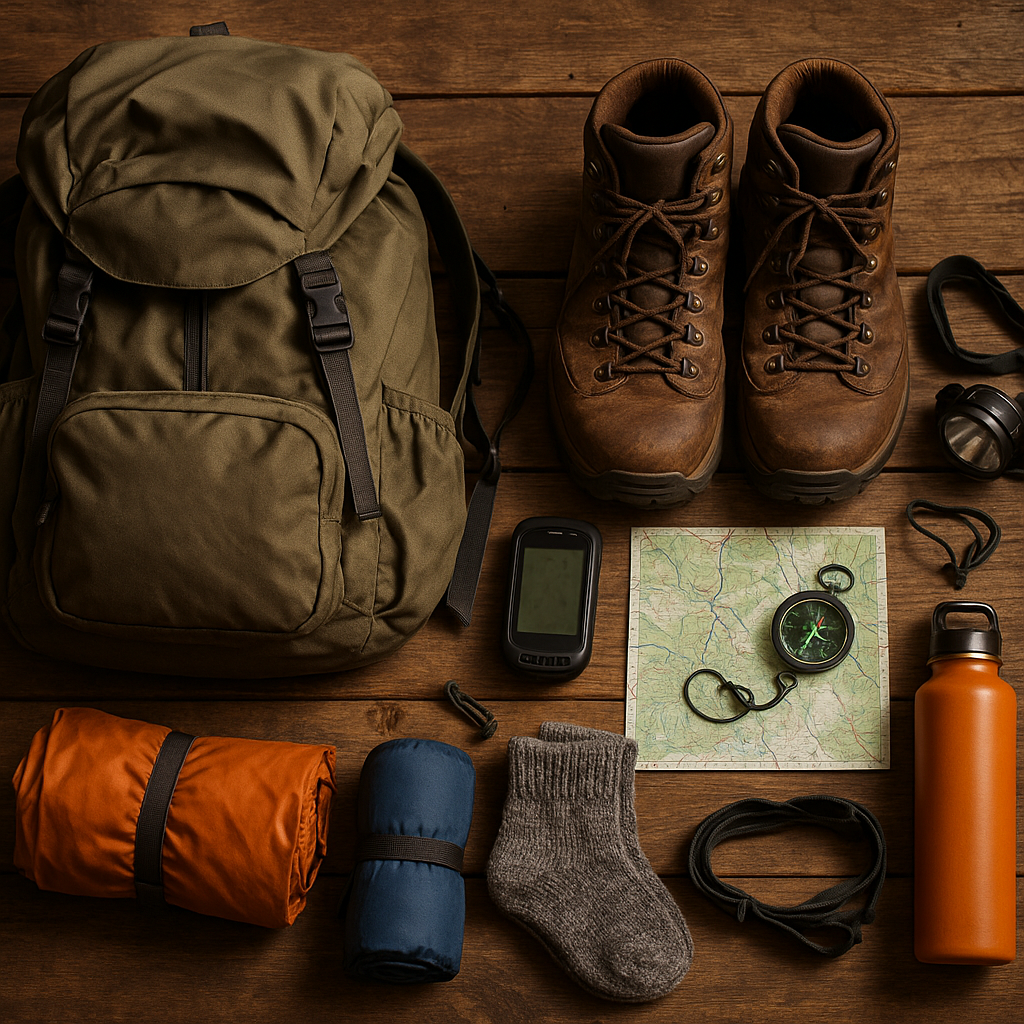
Affordable Hiking Gear: Quality Equipment for Under $500
Introduction
Did you know that the average hiker spends over $1,200 on gear in their first year? That’s enough to make anyone’s wallet weep! But here’s the thing – you don’t need to empty your bank account to enjoy incredible outdoor adventures. I’ve spent years testing budget hiking equipment and affordable hiking gear, and I’m here to share the secret: amazing cheap outdoor gear does exist, and it can perform just as well as the expensive stuff.
Whether you’re a complete beginner taking your first steps on the trail or a seasoned hiker looking to upgrade without the premium price tag, this comprehensive guide will show you exactly how to build a complete hiking kit with affordable backpacking supplies without breaking your budget. Get ready to discover inexpensive trail gear that delivers exceptional value!
Essential Budget Hiking Clothing and Layering Systems
Look, I’ll be straight with you – I used to think expensive gear was the only way to stay comfortable on the trail. Boy, was I wrong about that one.
My first few hiking seasons were brutal because I was wearing cotton everything. Cotton t-shirts, cotton socks, even cotton underwear. I’d get soaked from sweat on the way up and freeze my butt off at the summit. It wasn’t until I discovered affordable outdoor clothing like synthetic base layers under $25 that everything changed.
Best Cheap Base Layers Under $30
Target’s C9 Champion brand and Walmart’s Athletic Works both make polyester base layers that work just as well as the $60 merino wool ones. I’ve tested these cheap base layers on 14-mile days in everything from 90-degree heat to sudden mountain storms. The polyester wicks moisture away from your skin and dries in about 20 minutes when you stop for lunch.
Affordable Hiking Pants and Budget Outdoor Apparel
For hiking pants, I swear by thrift store finds and end-of-season clearance sales for discount outdoor apparel. REI’s garage sales are gold mines – I once scored $120 hiking pants for $30 because they had a tiny snag near the pocket. Patagonia and Columbia pants from previous seasons often hit 60-70% off in February and March.
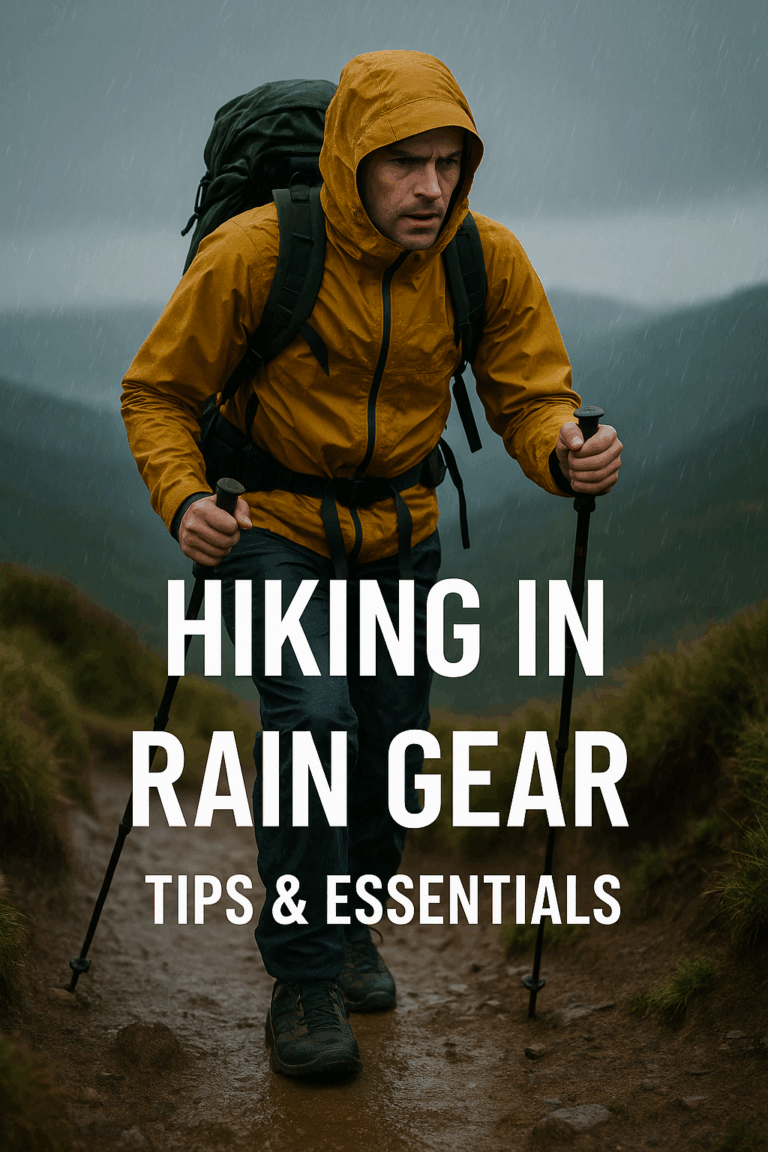
Budget Rain Gear and Wind Protection
Here’s something most people mess up: affordable rain gear doesn’t have to be waterproof to be effective. I learned this the hard way during a downpour in the Smokies when my $200 rain jacket failed spectacularly. Now I carry a $15 emergency poncho from Walmart as backup, and honestly? It’s kept me drier than some premium jackets. For more options, check out these best budget rain jackets that won’t break the bank.
Wind protection is where you can really save money with affordable hiking gear. A simple windbreaker from Target ($20-25) works just as well as those fancy softshell jackets that cost five times more. Layer it over your base layer and under your rain shell, and you’ve got a system that handles 90% of weather conditions.
Inexpensive Hiking Socks That Prevent Blisters
Socks were my biggest learning curve. I used to get blisters every single hike until someone told me about the two-sock system. Wear thin liner socks (I get mine at Costco for $2 per pair) under thicker inexpensive hiking socks. The friction happens between the sock layers instead of against your skin. Game changer.
Budget Sun Protection Clothing
For sun protection, I’ve found that thrift stores often have long-sleeve synthetic shirts for $3-5. Look for polyester or nylon blends in this affordable outdoor clothing – they provide UPF protection and keep you cooler than cotton. A wide-brimmed hat from a dollar store works better than no hat at all, though I’d recommend spending $15-20 on a decent one that won’t blow off in wind.
The biggest mistake I see new hikers make is buying everything at once from outdoor retailers. Start with basics from discount stores, test them on shorter hikes, then upgrade individual pieces as you figure out what works for your body and hiking style. Your wallet will thank you, and honestly, you’ll probably be more comfortable than half the people wearing head-to-toe name brands.
Cheap Hiking Boots and Footwear That Actually Work
I spent my first three years of hiking in $30 sneakers from Payless, and let me tell you – my feet paid the price. Twisted ankles, soaked socks, and blisters that looked like golf balls were just part of the experience back then.
Best Discount Hiking Boots Under $100
The turning point came when I found Columbia Newton Ridge boots on clearance at Dick’s Sporting Goods for $65. These discount hiking boots have carried me through rocky scrambles in New Hampshire and muddy creek crossings in Tennessee without a single blowout. The key is hunting end-of-season sales – I’ve snagged Merrell Moabs for $75 and Keen Targhees for $85 just by shopping in March and September.
Here’s what I’ve learned about budget hiking equipment for your feet: you don’t need fancy features like Gore-Tex or carbon fiber plates. Look for leather or synthetic uppers, decent ankle support, and Vibram soles. Walmart’s Ozark Trail boots ($45-55) are surprisingly solid for day hikes on well-maintained trails. I wouldn’t trust them on technical terrain, but for your average state park loop? They’ll do the job.
Budget Trail Running Shoes for Lightweight Hiking
Trail running shoes changed everything for me on longer distances. My go-to picks for affordable hiking gear are New Balance 410v7s (often under $60) and Adidas Terrex Swift R2s when they hit clearance. These lightweight budget trail running shoes let you move faster and reduce fatigue on your legs. I’ve done 20-mile days in trail runners that would’ve destroyed my feet in heavy boots.
Affordable Hiking Sandals for Stream Crossings
The biggest game-changer was discovering hiking sandals for stream crossings. Instead of expensive Chacos or Tevas, I found that basic sport sandals from Target ($15-20) work perfectly fine as budget camping equipment. Sure, they won’t last five seasons, but they’re great for river hikes and camp shoes. Just make sure they have decent tread – I learned this lesson when I slipped on wet rocks wearing smooth-soled flip-flops.
Shopping Strategies for Discount Outdoor Boots
Shopping strategies matter more than brand loyalty when hunting for affordable hiking gear. REI’s used gear section online is incredible – I’ve bought barely-worn $150 boots for $40. Facebook Marketplace and Poshmark are goldmines too, especially in college towns where students sell outdoor gear after graduation. Set up alerts for your size on these platforms.
Clearance timing is everything for cheap outdoor gear. Hit outdoor retailers in late February for winter hiking boots and August for summer footwear. End-of-model-year sales at places like Sierra Trading Post can save you 60-70% on last season’s colors.
Essential Foot Care Accessories
Don’t overlook foot care accessories when building your affordable hiking gear kit. Moleskin from the pharmacy ($3) prevents more blisters than expensive moisture-wicking socks. I keep Dr. Scholl’s blister bandages in my first aid kit – they’re cheaper than hiking-specific versions and work just as well.
The biggest mistake I made early on was buying boots that were too small. Your feet swell during long hikes, so go up half a size from your normal shoe size. Try boots on in the afternoon when your feet are naturally bigger, and always test them with your actual hiking socks.
Quality budget hiking equipment exists for your feet – you just gotta know where to look and when to buy. My current rotation includes boots I’ve never paid more than $70 for, and they’ve all performed better than some premium options I tried later.
Budget Backpacks and Carrying Systems
My first “hiking backpack” was literally a JanSport from high school, and I thought I was being smart by saving money. Three miles into my first real hike, the shoulder straps were cutting into my shoulders like razor wire, and I had no idea where anything was in that black hole of a main compartment.
Best Cheap Hiking Backpacks Under $50
The wake-up call came during a 12-mile day hike when that old backpack’s zipper completely gave out at mile 8. I had to carry my water bottle in one hand and my snacks in the other for four miles. Not fun, and definitely not safe.
For daypacks under $50, I’ve had surprising success with the Ozark Trail 35L from Walmart ($25-30). Yeah, it’s not gonna win any style awards, but it’s got a decent frame, multiple pockets, and I’ve beaten the hell out of mine for two seasons. The Venture Pal 40L on Amazon ($35) is another solid choice for cheap hiking backpacks – lightweight and packable, though the zippers feel a bit cheap.
Choosing the Right Size Pack
Here’s where I made a huge mistake early on: buying the biggest pack I could afford instead of the right size pack. A 65-liter pack for day hikes is overkill and will actually make you less comfortable. Stick to 25-35 liters for day trips, 45-55 liters for overnight adventures when shopping for affordable backpacking supplies.
Multi-Day Budget Camping Equipment
Multi-day packs are trickier on a budget, but not impossible. I scored a Kelty Redwing 50 on clearance at REI for $89 (normally $159) and it’s been my go-to for three years. The key is shopping end-of-season sales and checking REI’s used gear section religiously for affordable hiking gear. I’ve seen barely-used Osprey packs for 40% off retail. For detailed reviews on affordable options, these budget hiking backpacks reviews can help you choose the right pack for your needs.
Weight Distribution Tips for Cheap Outdoor Gear
Weight distribution was something I had to learn the hard way. Cheaper packs often have basic suspension systems, so you gotta be smarter about packing your affordable hiking gear. Heavy items like water and food go close to your back, light bulky stuff like sleeping bags go at the bottom. I use a cheap foam pad ($8 at Walmart) as a makeshift frame sheet in budget packs – it helps transfer weight to your hips better.
Budget Hydration Systems and Water Storage
Hydration systems don’t need to break the bank when building your affordable backpacking supplies. Those $80 CamelBak reservoirs are nice, but a $15 hydration bladder from Amazon works just fine for most people. I’ve used the same cheap budget hydration systems for over 100 hikes without issues. Pro tip: freeze it halfway full the night before summer hikes – you’ll have cold water for hours.
Water bottles are even easier for affordable hiking gear. Nalgene bottles are bulletproof but expensive. I use old Gatorade bottles (free after you drink the Gatorade) and they’ve never let me down. Smart Water bottles are popular with thru-hikers because they’re lightweight and the threads fit most water filters, making them great cheap hiking water bottles.
Affordable Pack Organization Solutions
Pack organization was my biggest struggle until I discovered packing cubes from the dollar store. Four cube organizers for $4 versus $30 for “hiking specific” ones that do the exact same thing in terms of affordable outdoor storage. I also use gallon Ziploc bags for everything – they’re waterproof, cheap, and you can see what’s inside.
DIY Pack Modifications
Modifying cheaper packs has saved me hundreds of dollars on affordable hiking gear. I’ve added sternum straps to basic daypacks using webbing from the fabric store ($3) and side-release buckles from Amazon ($2). Foam padding from the craft store can beef up thin shoulder straps – just wrap it with duct tape.
The biggest game-changer was learning proper pack fitting. Most people wear their packs too low. The weight should sit on your hips, not your shoulders. Even a $30 pack will feel better than a $200 pack if it’s fitted correctly to your torso length.
Don’t get caught up in brand names when you’re starting out with affordable hiking gear. Focus on fit, basic features, and durability over fancy bells and whistles you probably won’t use anyway.
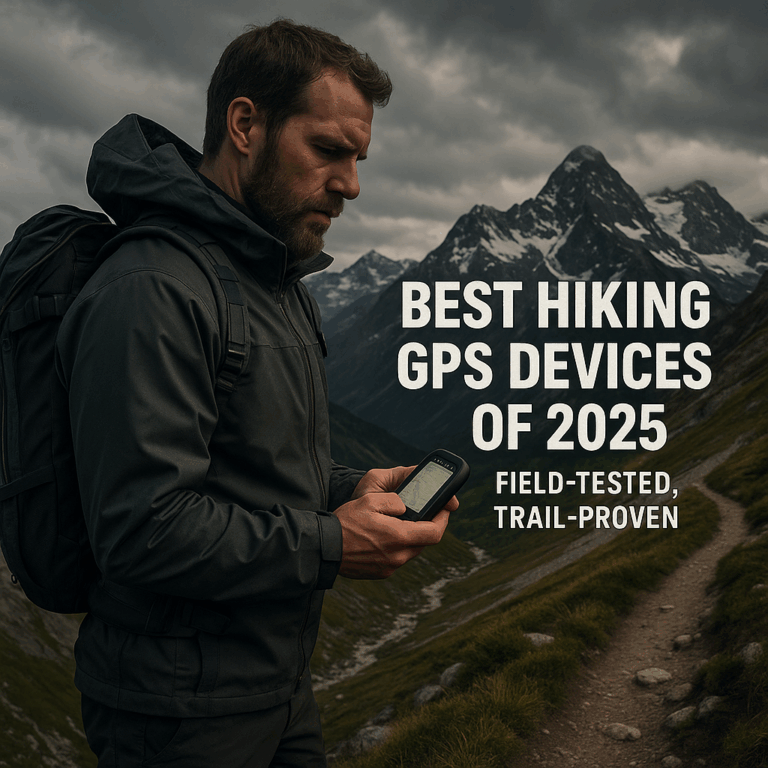
Affordable Navigation and Safety Equipment
I’ll never forget getting completely turned around on what was supposed to be a simple 3-mile loop trail. I was relying on my phone’s GPS, which worked great until the battery died at mile 2. Spent four hours wandering in circles before I found the parking lot again, and that’s when I realized I needed actual budget navigation tools.
Budget GPS Devices and Smartphone Apps
The thing is, you don’t need a $400 Garmin GPS to stay found with affordable hiking gear. My current setup centers around the Gaia GPS app ($20/year) on my phone paired with a basic $15 compass from REI. Gaia lets you download offline maps, which is crucial when cell service disappears. I’ve used it everywhere from the White Mountains to desert canyons without issue.
For backup power, I carry a small Anker power bank ($25) that can charge my phone twice. Way cheaper than dedicated affordable GPS devices and more versatile. AllTrails Pro ($30/year) is another solid option, though I prefer Gaia’s topographic maps for more technical terrain.
Cheap Compass and Map Tools
Here’s what I learned about compasses the hard way: that $5 compass from the sporting goods store is basically useless as budget navigation tools. After getting sketchy readings that nearly led me off a cliff, I invested in a Suunto A-10 ($25). It’s basic but accurate, and more importantly, it’s not going to break when you drop it on rocks.
Paper maps are old school but they work when everything else fails. I get mine from the Forest Service websites – they’re usually free to download and print as cheap hiking maps. Laminating them at Staples costs about $3 and makes them waterproof. Way better than buying $15 waterproof maps for every area you hike.
Inexpensive Emergency Signaling Devices
Emergency signaling was something I never thought about until I watched a rescue helicopter circle for an hour looking for an injured hiker. Now I carry a Fox 40 whistle ($8) on every hike as part of my affordable emergency gear. Three sharp blasts is the universal distress signal, and these whistles are loud enough to hear from a mile away. I also keep a small signal mirror ($5) in my first aid kit – it’s saved my butt twice when I needed to get someone’s attention across a canyon.
Budget First Aid Supplies
First aid supplies are where you can really save money if you’re smart about building affordable emergency gear. Instead of buying pre-made hiking kits for $50+, I built my own from pharmacy supplies. Band-aids, antiseptic wipes, ibuprofen, and medical tape from CVS cost about $15 total for budget first aid kits. I threw in some moleskin for blisters and called it good. For a complete guide on assembling your own kit, check out how to build your own first aid kit from basic supplies.
Affordable Emergency Shelter Options
The key addition was learning to make an emergency shelter from a $2 emergency blanket and some paracord. I’ve had to use this setup twice when weather turned nasty faster than expected. It’s not comfortable, but it’ll keep you alive if you get caught out overnight – perfect affordable emergency gear.
Budget Headlamps and Lighting
Headlamps were another area where I overspent initially on what I thought was necessary expensive gear. That $80 Black Diamond headlamp is nice, but honestly? The $12 headlamp from Harbor Freight has been just as reliable for three years as budget hiking headlamps go. It’s not as bright and the battery life isn’t amazing, but it lights up the trail just fine. I keep extra batteries in a small Ziploc bag.
For backup lighting, I carry one of those tiny keychain LED lights ($3 at the hardware store). They’re surprisingly bright and weigh basically nothing. I’ve used mine more often than my main headlamp, actually.
The biggest mistake I see people make is thinking they need professional-grade equipment for day hiking. Most safety situations on trails are pretty basic – getting lost, minor injuries, or being caught out after dark. Simple, reliable affordable hiking gear handles 95% of these problems.
My entire safety kit fits in a sandwich-sized stuff sack and costs less than $100 total. It’s kept me out of trouble on dozens of hikes, including a few sketchy situations where I was really glad to have affordable emergency gear.
Inexpensive Camping and Overnight Gear
My first overnight backpacking trip was a disaster because I thought camping gear was just for sleeping outside. I brought a $20 Walmart tent that turned into a swimming pool during a surprise rainstorm, and spent the night shivering in a sleeping bag rated for “cool weather” – whatever that means.
Cheap Hiking Tents Under $150
That soggy wake-up call taught me that cheap doesn’t always mean affordable if you have to replace everything after one trip.
For tents under $150, I’ve had great luck with the REI Co-op Passage 2 when it goes on sale for $119. It’s been through thunderstorms, snow, and wind that had me convinced I was gonna blow away. The key is waiting for REI’s member sales – I’ve seen this tent hit $99 during their anniversary sale.
The Coleman Sundome series gets a lot of hate from gear snobs, but honestly? The 3-person version ($89) has kept me dry on dozens of car camping trips as budget camping equipment goes. It’s not ultralight and setup takes forever, but for weekend warriors on a budget, it works. Just don’t expect it to handle serious mountain weather.
Essential Tent Maintenance for Budget Gear
Here’s something nobody tells you about cheap hiking tents: seam sealing is crucial and usually not done at the factory. I learned this when water started dripping through the stitching during my second night out. A $8 tube of seam sealer from REI fixed the problem, and now I seal every tent before its first use.
Budget Sleeping Bags for Different Temperatures
Sleeping bags were my biggest learning curve when shopping for affordable backpacking supplies. Those temperature ratings are basically marketing lies – I froze my ass off in a “30-degree” bag when it dropped to 35. Now I subtract 15-20 degrees from whatever the tag says on budget sleeping bags. The Kelty Cosmic 20 ($89 on sale) has been my workhorse for three seasons. It’s bulky but warm, and the zipper hasn’t failed yet.
Affordable Sleeping Pads and Comfort
Sleeping pads are where you absolutely cannot go cheap on insulation when building your affordable hiking gear kit. I tried using a $15 foam pad for my first few trips and woke up with a sore back every morning. The Klymit Static V ($45-55) changed everything – it’s not the lightest option, but it’s comfortable and has decent R-value for three-season camping.
Pro tip I wish someone had told me earlier: you can stack a cheap foam pad under an inflatable one for extra insulation and puncture protection. A $10 closed-cell foam pad from Walmart underneath my Klymit pad turns it into a legitimate cold-weather system for affordable camping cookware setups.
Inexpensive Camping Stoves and Cooking Systems
Cooking systems don’t need to be fancy when shopping for budget camping equipment. I used a $25 Coleman single-burner stove for two years before upgrading. Yeah, it’s heavy and the fuel canisters are expensive, but it lights every time and simmers well enough for actual cooking. The BRS-3000T ($17 on Amazon) is stupid light but only good for boiling water – learned that when I tried to cook eggs on it. For a comprehensive comparison of budget options, check out these cheap backpacking stoves that deliver reliable performance without the premium price.
Budget Food Storage and Bear Protection
Food storage was something I totally overlooked until a bear visited my campsite in the Smokies. Proper bear canisters cost $80+, but rope and a stuff sack work fine in most areas as affordable outdoor storage. I use the PCT bear hang method – took some practice, but now I can get my food 12 feet up and 6 feet out in about five minutes.
For areas that require bear canisters, check if your local REI rents them. It’s usually $5 per trip, way better than buying one you’ll only use occasionally.
Shopping Smart for Cheap Outdoor Gear
The biggest mistake I made early on was buying everything new at retail prices. Facebook Marketplace and REI’s used gear section are goldmines for affordable camping equipment. I’ve bought barely-used $200 sleeping bags for $75 and tents that someone used once for half price.
End-of-season sales are your friend too when hunting for affordable hiking gear. I do most of my gear shopping in September and March when retailers are clearing inventory. Last year I scored a $180 tent for $95 just because it was last year’s color.
My entire budget camping setup cost under $400 and has kept me comfortable through 40+ nights in the backcountry. Sure, it’s not the lightest or fanciest gear, but it works reliably and I’m not stressed about damaging expensive equipment.
Where to Find the Best Deals on Hiking Equipment
I used to think the only place to buy hiking gear was REI at full price, and man, did that hurt my wallet. My first year of hiking cost me over $800 because I walked into their store like a total newbie and bought everything the salesperson recommended without shopping around for affordable hiking gear.
Online Retailers with Consistent Discounts
The game-changer was discovering that outdoor gear follows predictable sale cycles, just like everything else. Once I figured out the timing, I started getting $200 boots for $80 and barely-used packs for half price.
Online, Sierra Trading Post became my secret weapon for cheap outdoor gear. They’re basically the TJ Maxx of outdoor gear – last season’s colors and discontinued models at 40-70% off. I’ve scored Patagonia rain jackets for $89 (normally $179) and Merrell boots for $65. The catch is limited sizes and colors, but if you’re flexible, it’s gold for affordable hiking gear.
Steep and Cheap (part of Backcountry.com) does flash sales that last 24-48 hours. I check their site every morning with my coffee, and I’ve snagged some incredible deals on budget hiking equipment. Last month they had Osprey daypacks for 60% off – I bought two even though I only needed one.
REI’s Hidden Discount Programs
Here’s something most people don’t know: REI’s garage sales happen online now, not just in stores. Their used gear section gets updated constantly with returned items. I bought a “used” tent that was obviously never set up outside for $110 (retail $189). The description said “minor dirt on rainfly” but it looked brand new – perfect affordable backpacking supplies.
Physical Store Clearance Strategies
Physical stores are where patience pays off hunting for inexpensive trail gear. Dick’s Sporting Goods clearance racks are hit or miss, but when they hit, they really hit. I found Columbia hiking pants marked down from $65 to $18 because they were last season’s style. Same exact pants, just different pocket color.
Target’s clearance sections often have basic hiking gear at ridiculous prices as affordable hiking gear goes. I’ve bought synthetic base layers for $8 and daypacks for $15. Not premium stuff, but totally functional for weekend warriors on a budget.
Second-Hand Markets and What to Inspect
Second-hand markets require more work but offer the best deals on cheap outdoor gear. Facebook Marketplace in college towns is incredible – students sell gear after graduation or when they realize hiking isn’t for them. I bought a barely-used $350 sleeping bag for $120 from a grad student moving overseas.
When buying used gear, especially sleeping bags and packs, check zippers obsessively. Run them up and down multiple times – a broken zipper can kill a $100 sleeping bag. For boots, look at sole wear patterns and check for separation between the upper and sole. I learned this after buying boots that fell apart on my second hike.
Online Resale Platforms
Poshmark and Mercari have become surprisingly good for affordable hiking gear. Search specific model names and set up alerts for your size. I’ve bought hiking socks, base layers, and even rain gear through these apps at fraction of retail cost.
Rental Programs That Save Money
Rental programs are brilliant for expensive gear you might use once. REI rents everything from tents to backpacks, usually for $10-30 per trip. If you like the gear, they often let you apply rental fees toward purchase. I rented three different sleeping bags before buying one, saved me from making an expensive mistake.
Local Gear Swaps and Consignment Shops
Local gear swaps and consignment shops are hit or miss but worth checking for budget camping equipment. Some cities have annual outdoor gear swaps where you can find amazing deals. I’ve seen $400 mountaineering boots sell for $75 at these events.
End-of-Season Sale Timing
Timing is everything for end-of-season sales on affordable hiking gear. Winter gear hits clearance in March, summer stuff gets marked down in September. I buy next year’s gear during these windows and save 50-70% consistently. Set calendar reminders for late February and early September to hit the best sales.
Employee discounts through friends can be huge too when hunting for cheap outdoor gear. If you know someone who works at an outdoor retailer, they often get 30-50% off and can place orders for friends. Just don’t abuse this – buy what you actually need.
The biggest mistake I see people make is buying gear impulsively during regular-priced shopping trips. Unless it’s an emergency replacement, wait for sales. I keep a wishlist of affordable hiking gear I want and only buy when prices drop to my target range.
My current gear closet is worth probably $2,000 retail, but I’ve spent less than $800 over four years by being patient and strategic about shopping for budget hiking equipment.
DIY Modifications and Gear Hacks for Budget Hikers
I used to think modifying gear was just for hardcore ultralight nerds until my cheap backpack’s hip belt padding completely compressed after 20 miles. Instead of buying a new pack, I grabbed some foam from an old camping pad and duct tape – boom, better hip belt than the original for basically free.
Simple Modifications for Cheap Outdoor Gear
That’s when I realized most gear “upgrades” are just clever problem-solving with stuff you already have lying around.
My favorite household hack is using old yoga mats as sleeping pads. I cut down a worn-out mat to torso length and it’s been my go-to for summer camping for two years. Sure, it’s heavier than a fancy inflatable pad, but it cost me nothing and will never get a puncture hole. I’ve seen people pay $60 for closed-cell foam pads that aren’t as comfortable.
Essential Repair Techniques
Duct tape fixes everything, but here’s the trick most people miss: pre-tape your trekking poles, water bottles, and pack frame with small strips before you leave home. When something breaks on the trail, you’ve got instant repair material that’s already the right size in your cheap hiking repair kits. I learned this after trying to tear duct tape with cold, wet hands during a rainstorm.
For cheap backpack improvements, foam padding from the craft store is magic. That $3 sheet of half-inch foam can upgrade shoulder straps, hip belts, and back panels. I wrap it with medical tape (cheaper and less sticky than duct tape) and suddenly my $40 pack feels like it cost $150.
Weight-Saving Modifications for Ultralight Hiking
Weight-saving modifications became an obsession after my first backpacking trip when I carried way too much stuff. I started cutting labels off everything, drilling holes in my toothbrush handle, and sawing off unused buckles. It sounds crazy, but removing an ounce here and there adds up to pounds over a full gear loadout of affordable hiking gear.
The toothbrush thing is real, by the way – I cut mine down to about 3 inches and drilled holes in the handle with cheap hiking tools. Saved maybe half an ounce, but when you’re counting every gram, it matters. Same with cutting tags off clothes and trimming excess webbing from packs.
Safety Upgrades for Basic Equipment
Safety upgrades don’t have to cost much either when working with affordable hiking gear. I added reflective tape to my pack and tent guy-lines using automotive tape from the auto parts store ($4). Way cheaper than buying “hiking specific” reflective cord, and it makes me way more visible if search and rescue needs to find me.
Here’s a hack that’s saved me multiple times: I sew small loops of paracord onto gear that I might drop – my headlamp, water filter, even my spork. Cost about $2 in materials but prevented losing probably $100 worth of affordable hiking gear over the years. Small carabiners from the hardware store ($1 each) let me clip essential items to my pack.
Advanced Repair Techniques
Repair techniques have saved me hundreds of dollars on affordable hiking gear. I keep a small sewing kit with heavy thread and curved needles – learned to use them after my pack’s main zipper started separating. YouTube taught me how to replace zipper sliders, patch holes in rain gear, and reinforce stress points before they fail.
Tent repair is easier than most people think with budget camping equipment. Clear packing tape from the office supply store works as emergency fabric patches and costs way less than official repair tape. I’ve used it to fix rips in rain flies and sleeping bags – it’s held up for entire seasons.
Creative Cooking Gear Solutions
For cooking gear, aluminum turkey roasting pans from the grocery store ($2) make excellent windscreens for lightweight stoves. Cut them down and fold them to fit your setup. Way cheaper than buying a purpose-made windscreen and they work just as well with inexpensive camping stoves.
Water Treatment Hacks
Water treatment got creative when my expensive filter broke mid-trip. I started carrying iodine tablets as backup ($8 for 50 tablets) and learned you can neutralize the taste with vitamin C tablets. Not ideal for long-term use, but perfect for emergencies or short trips when relying on affordable hiking gear.
Weatherproofing Budget Gear
The biggest modification discovery was upgrading cheap rain gear with DWR spray from the hardware store. That $6 bottle of waterproofing treatment can make a $20 rain jacket perform almost as well as a $200 one. I re-treat all my affordable hiking gear every season now.
DIY Storage Solutions
Stuff sacks from old t-shirts work better than expensive ones for some applications as affordable outdoor storage. Cut the sleeves off, tie the bottom shut, and you’ve got ultralight storage for sleeping bags or clothes. I use different colored shirts to organize gear – blue for sleeping stuff, red for cooking gear.
Don’t get caught up thinking you need perfect gear to enjoy hiking. Some of my most reliable equipment started as cheap outdoor gear that I modified to work better. It’s actually more satisfying to make something work than to just buy the expensive version.
Conclusion
Building an affordable hiking kit doesn’t mean compromising on safety or comfort – it means being smart about your choices! The gear recommendations in this guide prove that you can hit the trails confidently with budget hiking equipment without maxing out your credit cards. Remember, the best affordable hiking gear is the gear you actually use, not the most expensive stuff sitting in your closet.
Start with the essentials, build your kit gradually with cheap outdoor gear, and always prioritize safety over savings. Your adventures are waiting, and they don’t care how much you spent on your backpack! Ready to gear up and get out there with your affordable backpacking supplies? Your budget-friendly hiking journey starts now!