Hiking Gear Repair: Quick DIY Fixes on the Trail
Introduction
Did you know that 73% of outdoor enthusiasts throw away gear that could be easily repaired at home? That’s wasteful and expensive! A torn tent or broken boot sole doesn’t have to end your adventure. Knowing hiking gear repair saves trips and money.
I’ve been tackling hiking gear repair for over a decade. There’s nothing more satisfying than bringing beloved gear back to life. This comprehensive hiking gear repair guide covers professional outdoor equipment repair techniques. You’ll save hundreds of dollars and stay prepared for trail mishaps. From emergency field fixes to detailed camping gear restoration, we’re covering everything. You’ll become your own gear repair expert!
Essential Hiking Gear Repair Tools and Supplies
I learned this lesson the hard way about three years ago when I was halfway through a week-long backpacking trip in the Cascades. My trusty rain jacket tore along the shoulder seam during a nasty storm. I had nothing to fix it except duct tape wrapped around my trekking poles.
That soggy experience taught me something important. Having the right hiking gear repair supplies isn’t just convenient. It can literally save your trip.
The Complete Trail Repair Kit That Actually Works
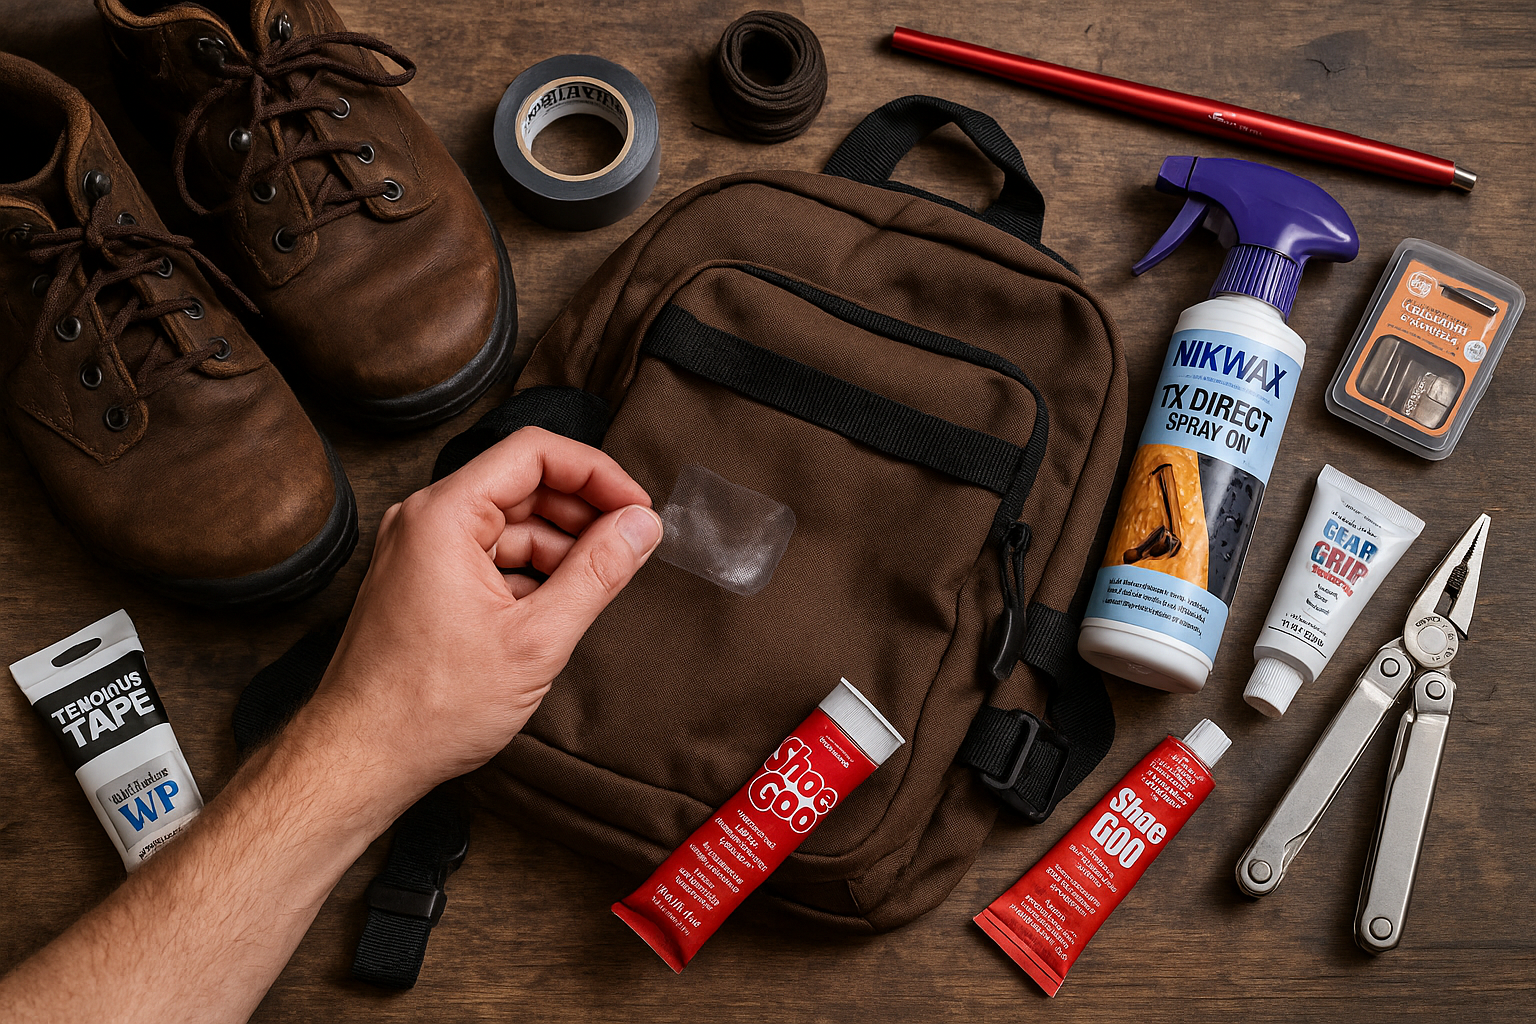
Here’s what I keep in my home hiking gear repair workshop and trail emergency stash. At home, I’ve got the full arsenal. Seam Grip urethane sealant, Gear Aid Tenacious Tape in multiple colors, heavy-duty thread, curved needles, and fabric scissors for outdoor equipment repair.
For the trail, I had to get smart about weight. My ultralight trail repair kit weighs just 2.3 ounces. It includes pre-cut outdoor gear patches, dental floss, one curved needle, and about six feet of Gear Aid Seam Grip. The dental floss trick came from an old-timer I met on the PCT. Apparently it’s what they used for outdoor equipment restoration back in the day.
Gear Repair Tools and Outdoor Gear Adhesives That Won’t Let You Down
Here’s where I messed up for years. I bought cheap camping gear patches and wondered why they’d peel off after one rain storm. Gear Aid Tenacious Tape is worth every penny for hiking gear repair. I’ve had patches last through entire hiking seasons. The clear version works on almost everything. I keep black and green outdoor equipment patches for gear that needs to blend in.
Seam Grip is my go-to for waterproof gear repair. It takes 12 hours to fully cure, which sucks when you need a quick fix. But it creates a permanent seal that’s stronger than the original material. You can get Seam Grip WP waterproof sealant for the best results. Pro tip: apply it the night before you hit the trail if you know there’s damage requiring hiking gear repair.
Multi-Tool Magic for Field Repair Techniques
I used to carry a separate sewing kit until I discovered the Leatherman Style PS. The scissors are sharp enough for fabric. The tweezers grab tiny splinters or thorns. The knife works for cutting cordage. It’s only 1.5 ounces and replaces about four separate hiking gear repair tools I used to lug around. Check out the Leatherman Style PS for yourself.
For folks on a budget, a basic Swiss Army knife with scissors does 80% of what you need for basic outdoor equipment repair. Just make sure the scissors actually close properly. I’ve seen too many cheap ones that barely cut paper, let alone ripstop nylon.
Organization That Actually Makes Sense for Hiking Gear Maintenance
This might sound obsessive, but I keep everything in a clear Ziploc bag inside a small stuff sack. The clear bag lets me see what gear repair supplies I’ve got without dumping everything out. The stuff sack keeps sharp objects from poking holes in other gear. I learned that one after a loose needle punched about twelve tiny holes in my sleeping pad.
Label everything with a Sharpie. Trust me on this. When you’re trying to fix gear in dim light after a long day, you don’t want to be guessing which tube contains super glue versus seam sealer for your hiking gear repair needs.
Budget Hacks That Actually Work for Outdoor Equipment Repair
Here’s the thing about expensive gear repair supplies: sometimes they’re worth it, but not always. Dental floss costs $2 and works better than most hiking-specific thread. Clear nail polish can seal small holes in rain gear temporarily during emergency gear fixes. Duct tape wrapped around trekking poles gives you emergency patches without carrying a whole roll for field maintenance techniques.
The one place I don’t skimp anymore is on outdoor gear adhesives and sealants. I tried cheap alternatives for years and they just don’t hold up to real weather conditions during hiking gear repair.
Having a solid camping gear repair kit means the difference between finishing your hike and cutting it short. Start with the basics. Learn what actually breaks on your gear. Then build your kit from there for optimal outdoor equipment care.
Boot and Footwear Repair Techniques
Nothing ruins a hike faster than a boot that’s falling apart on your feet. I found this out the worst way possible during mile 8 of what was supposed to be a 12-mile day hike in Olympic National Park. My left boot’s sole just separated. Like, completely peeled away from the upper. It flapped around like some kind of rubber tongue every time I took a step.
That day turned into a masterclass in emergency boot sole repair. Honestly, it’s probably saved me hundreds of dollars in new boots over the years through proper hiking boot maintenance.
Fixing Sole Separation Before It Gets Worse
The key with boot sole repair is catching it early. When you start seeing that little gap between the sole and upper, don’t ignore it. That’s your warning sign. I keep a tube of Shoe Goo adhesive in my gear closet specifically for this hiking gear repair problem. It’s saved probably four pairs of boots so far.
Here’s the process that actually works for hiking boot maintenance. Clean out all the dirt and debris from the separation using an old toothbrush. Rough up both surfaces with sandpaper, then apply the adhesive. The trick is to clamp or weight the boot while it cures for 24 hours. I use a couple of heavy books and some rubber bands to keep pressure on the repair.
For emergency gear fixes in the field, duct tape wrapped tightly around the boot can get you back to the trailhead. It’s not pretty, but it works. I learned to carry about 3 feet of tape wrapped around my trekking poles after that Olympic disaster requiring hiking gear repair.
Patching Holes and Tears in Uppers
Leather boots are actually easier to repair than most people think when it comes to outdoor equipment repair. Small holes or scratches can be sealed with leather conditioner and some patience. For bigger tears, I use Freesole urethane adhesive. It’s flexible when it dries and actually bonds better than the original material for hiking gear repair.
Synthetic materials are trickier for outdoor equipment restoration. You can’t really “heal” synthetic leather like you can with real leather. For fabric uppers, iron-on patches work surprisingly well if you’ve got access to power. In the field, Tenacious Tape outdoor equipment patches are your best friend for hiking gear repair. Just make sure the area is completely clean and dry before applying.
I made the mistake once of trying to patch a wet boot during emergency gear fixes. The adhesive didn’t stick at all. I ended up with a patch that lasted about 20 minutes before peeling off.
Lace and Hardware Replacement for Hiking Boot Maintenance
This is probably the easiest outdoor equipment repair, but you’d be surprised how many people struggle with it. When laces break, don’t just tie them back together. That knot will drive you crazy and create pressure points. Keep spare laces that are actually the right length for your boots as part of your gear repair supplies.
For eyelets that pull out, you can usually push them back in with needle-nose pliers if the surrounding material isn’t too damaged. If the fabric around the eyelet is torn, reinforce it with outdoor equipment patches before pushing the eyelet back through during your hiking gear repair.
Restoring Waterproofing for Waterproof Gear Repair
Most waterproofing products are honestly garbage when it comes to hiking gear maintenance. I’ve tried probably a dozen different sprays and waxes over the years. Here’s what I’ve learned: Nikwax waterproofing for footwear actually works for waterproof gear repair, but you have to follow the directions exactly. Clean the boots first. Apply the treatment to slightly damp leather. Let them dry naturally with no heat.
For fabric boots, the DWR coating eventually wears off no matter what you do during hiking gear maintenance. When water starts soaking in instead of beading up, it’s time for waterproof gear repair. I do this maintenance every 50 miles or so, depending on conditions.
Emergency Field Fixes for Complete Blowouts
When a boot really fails—like sole completely detached or upper ripped wide open—you need to get creative with emergency gear fixes. Duct tape can hold a sole on temporarily, but wrap it tight and check it every mile or two. Paracord can work as emergency laces if the originals snap during your hiking gear repair needs.
The weirdest field repair techniques I ever saw was a guy who zip-tied his sole back on after the adhesive failed. It looked ridiculous, but it got him 6 miles back to his car without further hiking gear repair needed.
The honest truth is that some boots just can’t be saved through outdoor equipment repair, especially if they’re old and the rubber has started to degrade. But with the right hiking gear repair techniques and materials, you can extend the life of good boots by years. You’ll save yourself from some pretty miserable situations on the trail.
Backpack and Pack Repair Solutions
My old Gregory pack has been with me for about eight years now. Honestly, it’s held together with more patches and hiking gear repair than original fabric at this point. But here’s the thing—I’ve probably saved myself $400+ in replacement costs. I learned backpack fabric repair myself instead of buying new every time something breaks.
The wake-up call came during a section hike on the Appalachian Trail when my main compartment zipper just gave up completely. I’m talking full catastrophic failure. The zipper pull dangled uselessly while all my gear threatened to spill out onto the trail, requiring immediate backpack zipper fix.
Backpack Zipper Fix That Actually Last
Most zipper problems aren’t actually broken zippers—they’re alignment issues or fabric bunching during hiking gear repair. Before you panic, try this: work some bar soap or candle wax along the zipper teeth. I keep a small piece of beeswax in my gear repair kit specifically for this backpack zipper fix. You can also try zipper lubricant like Gear Aid Zip Care for stubborn zippers. It lubricates the zipper and often gets things moving again.
When the zipper pull breaks off entirely during hiking gear repair, you can temporarily replace it with a paper clip bent into shape. Not pretty, but it works for emergency gear fixes. For permanent solutions, zipper pulls are available at most fabric stores for like $2. The tricky part is getting the old one off without damaging the zipper tape.
Full zipper replacement is honestly beyond what most people want to tackle at home for hiking gear repair. I tried it once and ended up making the problem worse. Sometimes it’s worth taking the pack to a local tailor or gear repair shop—usually runs about $30-40, which beats buying a new $200 pack.
Patching Fabric Tears the Right Way with Backpack Fabric Repair
Iron-on patches work great for small holes in outdoor equipment repair, but here’s what the gear companies don’t tell you: they eventually peel off under stress. I learned this when a patch on my pack’s bottom panel peeled away during a river crossing, and suddenly I had water pouring into my pack, requiring immediate hiking gear repair.
The solution is to combine methods for backpack fabric repair. Iron-on patch first, then hand-stitch around the edges with heavy-duty thread. It’s overkill for small holes, but for tears longer than an inch, this double method has never failed me in hiking gear repair.
For field repair techniques, duct tape works temporarily, but don’t leave it on permanently. The adhesive actually weakens some fabrics over time. Tenacious Tape is better for long-term outdoor equipment patches—I’ve got pieces that have been on my pack for three years and still holding strong.
Backpack Strap Replacement Adventures
Replacing shoulder straps sounds intimidating, but it’s actually pretty straightforward if you’ve got basic sewing skills for hiking gear repair. The hardest part is getting the tension right on both sides during backpack strap replacement. I messed this up on my first attempt and ended up with one strap that was an inch shorter than the other. Talk about an uncomfortable hike needing more hiking gear repair.
Most pack manufacturers sell replacement straps and buckles for outdoor equipment repair, but they’re expensive. Generic straps from outdoor repair shops work just as well for about half the price during backpack strap replacement. Just make sure you match the width—25mm straps won’t work on 20mm attachment points.
Side release buckles break all the time, especially the cheap plastic ones requiring hiking gear repair. I keep a couple spare buckles in my gear closet because it’s such a common failure in outdoor equipment repair. The metal ones last longer but add weight, so it’s a trade-off.
Frame Repair Reality Check for Hiking Gear Repair
Internal frame stays (those aluminum pieces) can usually be bent back into shape if they’re not completely snapped during outdoor equipment repair. I use a rubber mallet and work slowly—too much force and you’ll create a weak spot that’ll fail again later, requiring more hiking gear repair.
External frame repairs are more complex for outdoor equipment restoration. Cracked aluminum tubes can sometimes be reinforced with metal sleeves and epoxy, but honestly, if your external frame is breaking, the pack is probably ready for retirement rather than continued hiking gear repair.
Seam Reinforcement Before Problems Start
This is where being proactive with hiking gear maintenance really pays off. High-stress areas like where the shoulder straps attach to the pack body are going to fail eventually. I inspect these spots every few months and add reinforcement stitching before things come apart, preventing major hiking gear repair.
Bar-tacking is your friend here for outdoor equipment repair—those dense zigzag stitches that look like tiny rectangles. A decent sewing machine can do these, or you can hand-stitch a similar pattern. Takes maybe 10 minutes per stress point and prevents catastrophic failures requiring emergency gear fixes.
The bottom line is that a good pack frame and decent fabric can last decades with proper hiking gear maintenance. I’ve seen people throw away packs that needed maybe $20 worth of hiking gear repair, which just seems wasteful. Most problems are fixable if you catch them early and aren’t afraid to get your hands dirty with outdoor equipment repair.
Learning basic hiking gear repair has saved me money and kept me from being stranded with gear failures in the backcountry. Plus, there’s something satisfying about keeping good gear in service instead of adding to the landfill through proper outdoor equipment care.
Tent and Shelter Repair Methods
Last summer I was three days into a solo backpacking trip in the Winds when a sudden gust of wind caught my tent fly and tore a 6-inch rip right down the side. Rain was forecast for that night, and I was miles from anywhere. That’s when I really learned the value of knowing tent patch repair on the spot.
Turns out most hiking gear repair for tents is actually pretty straightforward once you know what you’re doing, but man, figuring out tent patch repair in a panic while clouds are building overhead is not the time to learn.
Tent Patch Repair That Hold Up
Small punctures happen all the time—usually from catching the fabric on a branch or poking it with a trekking pole requiring tent patch repair. For holes smaller than a quarter, Gear Aid Tenacious Tape is honestly magic for hiking gear repair. I keep pre-cut circles in different sizes because trying to cut outdoor equipment patches with cold fingers in dim light is frustrating as hell.
The key to effective tent patch repair is cleaning the area first. Even if it looks clean, wipe it down with a damp cloth and let it dry completely. I learned this when a patch peeled off after one night because I applied it over dirt and pine sap during my hiking gear repair attempt.
For longer tears like my Winds disaster requiring extensive tent patch repair, you need a two-step approach. First, pull the tear closed and apply tape to both sides of the fabric, creating a sandwich. Then, if you’re at home, reinforce it with hand stitching using a curved needle for permanent hiking gear repair. The stitching alone won’t hold in high winds, but the combination is bomb-proof.
Zipper Problems That Ruin Everything
Tent zippers fail at the worst possible times, requiring immediate hiking gear repair. Usually it’s the slider that goes bad—it stops gripping the teeth properly and just slides up and down without actually closing the zipper. Before you panic, try this old trick for outdoor equipment repair: squeeze the slider gently with pliers to tighten it back up. Not too hard, or you’ll crack it, but just enough to restore the grip.
When zipper teeth get bent or broken during your camping trip, you can sometimes work around it by pulling the slider past the damaged section and safety-pinning the gap closed for emergency gear fixes. It’s ugly, but it works for the rest of your trip without extensive hiking gear repair.
I keep a small tube of zipper lubricant in my gear repair kit—it’s basically fancy wax that keeps things moving smoothly for hiking gear maintenance. Regular bar soap works in a pinch for field repair techniques, but don’t use WD-40 or other oils. They attract dirt and make the problem worse over time.
Tent Pole Repair Without the Drama
Aluminum poles bend, carbon fiber poles snap. That’s just how it is with outdoor equipment repair. For aluminum, you can usually bend them back carefully, but once they’ve been kinked, that spot will always be weak requiring future hiking gear repair. I carry a short length of aluminum tubing that fits over my pole sections as an emergency splint for tent pole repair.
Carbon fiber is trickier because it doesn’t bend—it just breaks requiring tent pole repair. The good news is that a clean break can often be repaired with a pole sleeve and some tape using field repair techniques. I’ve seen people use everything from tent stakes to trekking pole sections as emergency splints for hiking gear repair.
The pole repair sleeve that comes with most tents is honestly pretty useless for anything beyond tiny cracks in outdoor equipment repair. Get a proper repair sleeve from a gear shop, like an MSR tent pole repair sleeve, or better yet, carry a spare section if your tent uses common pole diameters to avoid emergency gear fixes.
Tent Seam Sealing That Actually Works
Factory seam sealing eventually fails, especially on cheaper tents requiring tent seam sealing. You’ll notice it when water starts dripping through sewn areas during rain. The fix is tedious but not complicated for hiking gear repair: clean the seams with rubbing alcohol, then apply seam sealer with a small brush for tent seam sealing.
Here’s what I wish someone had told me earlier about tent seam sealing: seam sealer needs to cure for 24 hours before it’s actually waterproof. Don’t seal your tent the morning before a trip and expect it to work that night for hiking gear repair. Ask me how I know this.
McNett Seam Grip is the gold standard for tent seam sealing, but it’s thick and can be hard to apply smoothly. Gear Aid Seam Sure is thinner and easier to work with for hiking gear repair, though it doesn’t last quite as long. For emergency gear fixes, clear nail polish actually works temporarily for tent seam sealing, though it gets brittle over time.
Emergency Field Fixes When Everything Goes Wrong
Duct tape fixes a surprising number of tent problems temporarily through field repair techniques. Torn fabric, broken poles, even zipper issues can be bandaged with tape long enough to get through a trip without extensive hiking gear repair. But here’s the thing—don’t leave duct tape on fabric permanently. The adhesive can damage waterproof coatings.
I once saw a guy repair a broken pole with a tent stake and paracord using creative field repair techniques. He lashed the stake alongside the break and it held for three more days without further hiking gear repair. Not pretty, but creative problem-solving at its finest.
The worst shelter failure I ever dealt with was a completely shredded rainfly in a thunderstorm requiring emergency gear fixes. Emergency bivy and a tarp saved that trip, but it taught me to always carry backup shelter options for extended trips to minimize hiking gear repair needs.
Tarp repairs are usually easier than tent repairs because you’re dealing with simpler materials and less precision in outdoor equipment repair. A piece of Tyvek or even heavy-duty trash bags can patch holes temporarily using field repair techniques. The key is overlapping your patch material and taping it down securely.
Most tent problems are preventable with regular hiking gear maintenance—checking seams, lubricating zippers, and storing gear properly. But when things do go wrong, having the right materials and knowledge can turn a trip-ending disaster into just another story to tell around the campfire through proper hiking gear repair.
Clothing and Fabric Gear Repairs
I’ll never forget the morning I woke up in my sleeping bag and found feathers everywhere. Like, literally floating around my tent like some kind of outdoor pillow fight had happened while I slept. Turns out my down jacket had developed a tiny tear near the shoulder, and every time I moved during the night, more down escaped requiring immediate hiking gear repair.
That was my introduction to the world of outdoor clothing patches, and honestly, it’s probably saved me more money than any other outdoor equipment repair skill I’ve picked up over the years.
Rain Gear Patching That Actually Keeps You Dry
The thing about waterproof fabric is that it’s designed to not let anything stick to it—including patches for waterproof gear repair. This makes repairs tricky, but not impossible. I learned this the hard way when my first attempt at rain gear patching with regular duct tape lasted about 30 minutes in actual rain.
For small punctures in rain gear, Seam Grip is your best friend for waterproof gear repair. Clean the area with rubbing alcohol first (this is crucial), then apply a thin layer and let it cure for 12 hours. It creates a flexible, waterproof seal that’s actually stronger than the original fabric for hiking gear repair.
Bigger tears need outdoor clothing patches, but you can’t just slap them on for rain gear patching. Rough up the fabric around the tear with fine sandpaper first—this gives the adhesive something to grip during waterproof gear repair. Then use Tenacious Tape specifically designed for waterproof fabrics. The clear stuff works on everything, but I keep olive and black outdoor equipment patches because they blend in better for hiking gear repair.
Here’s a mistake I made early on with rain gear patching: trying to patch the outside only. For tears longer than an inch, patch both inside and outside for maximum strength in waterproof gear repair. It adds bulk, but it actually works for hiking gear repair.
Down and Synthetic Insulation Nightmares
Down repairs are honestly nerve-wracking because every second that tear is open, you’re losing expensive fill during hiking gear repair. My solution is to work fast and have everything ready before I start outdoor equipment repair. Curved needle, strong thread, and a small patch of similar fabric.
The trick with down gear for hiking gear repair is to push the filling away from the tear while you’re sewing. I use the blunt end of a chopstick to gently move the down around during outdoor equipment repair. Work quickly but don’t rush—a crooked seam will just tear again under stress requiring more hiking gear repair.
Synthetic fill is actually easier to repair because it doesn’t migrate like down does during outdoor equipment repair. You can usually just pull the tear closed and stitch it up without much prep work for hiking gear repair. The synthetic fibers kind of lock together and stay put.
For both types, I always double-stitch high-stress areas like underarms and shoulders during hiking gear repair. Takes an extra five minutes but prevents re-tears later requiring additional outdoor equipment repair.
Seam Repairs That Don’t Look Terrible
Most seam failures happen at stress points—where sleeves attach to bodies, or where pockets are sewn on requiring hiking gear repair. These areas get the most movement and eventually the stitching gives up. I inspect these spots regularly now because catching problems early makes outdoor equipment repair way easier.
When a seam starts to separate, don’t wait for it to fail completely requiring emergency gear fixes. Re-stitch over the existing seam line using a backstitch—it’s stronger than the original straight stitch most manufacturers use for hiking gear repair. Use thread that matches the original color, or at least comes close.
I keep a Gear Aid outdoor sewing kit in my gear closet with heavy-duty thread in common colors for hiking gear repair: black, olive, navy, and gray. These cover probably 90% of outdoor gear colors for outdoor equipment repair.
DWR Coating Restoration Reality for Waterproof Gear Repair
DWR (Durable Water Repellent) coating eventually wears off all waterproof-breathable fabrics requiring waterproof gear repair. You’ll know it’s failing when water stops beading up and starts soaking into the outer fabric. This doesn’t mean the waterproof membrane underneath has failed, but it makes the garment feel clammy and gross without proper hiking gear repair.
Washing helps sometimes with hiking gear maintenance—body oils and dirt can interfere with DWR performance. Use technical wash like Nikwax Tech Wash for waterproof gear repair, then tumble dry on medium heat. The heat actually reactivates some DWR coatings temporarily.
For permanent restoration requiring waterproof gear repair, you need to apply new DWR. Nikwax TX.Direct Spray-On is what I use for hiking gear repair—follow the directions exactly or it won’t work properly. The spray-on version is easier to apply evenly, but the wash-in version lasts longer in my experience with outdoor equipment repair.
Emergency Trail Fixes That Get You Home
Safety pins are honestly underrated for emergency clothing repairs and emergency gear fixes. A blown seam or torn pocket can usually be pinned closed well enough to finish a trip without extensive hiking gear repair. I keep three different sizes in my first aid kit.
Duct tape works temporarily on most fabric tears for field repair techniques, but it’s not a permanent solution for hiking gear repair. The adhesive can actually damage some technical fabrics if left on too long. Use it to get home, then do a proper outdoor equipment repair.
The weirdest emergency gear fixes I ever saw was a guy who repaired a ripped rain jacket sleeve with dental floss using field repair techniques. Apparently he’d run out of regular thread, but the mint-flavored floss held up for the rest of his week-long trip without additional hiking gear repair.
Tenacious Tape is worth carrying on longer trips because it works on almost everything and doesn’t require any tools for outdoor clothing patches. I keep pre-cut squares in my repair kit—trying to cut patches with cold, wet fingers is not fun during hiking gear repair.
Prevention Beats Repair Every Time
Most clothing failures are preventable with basic hiking gear maintenance. Don’t stuff down jackets into their compression sacks more than necessary—the constant compression weakens the fabric over time requiring hiking gear repair. Wash technical fabrics properly—regular detergent can break down waterproof coatings.
Store gear properly between trips for proper outdoor equipment care. Hanging rain jackets instead of stuffing them in a bag prevents permanent creases that can become weak spots requiring hiking gear repair. Keep zippers closed during storage to maintain their shape and minimize future outdoor equipment repair needs.
The honest truth is that some repairs just aren’t worth doing through hiking gear repair. If a $50 rain jacket develops major tears, it might be time to upgrade rather than spend hours patching it. But for quality gear, learning basic outdoor equipment repair skills can extend the life of expensive items by years through proper hiking gear maintenance.
I’ve probably repaired dozens of pieces of gear over the years using various hiking gear repair techniques, and maybe half of those repairs are still holding strong. The key is using the right materials and outdoor equipment repair techniques for each type of fabric and failure. And don’t be afraid to practice on old gear before attempting repairs on your expensive stuff.
Equipment-Specific Repair Guides
My gear closet looks like a repair shop exploded in it, honestly. After fifteen years of hiking, I’ve probably fixed every piece of equipment I own at least once using various hiking gear repair methods. Some repairs worked great, others… well, let’s just say I learned what doesn’t work the expensive way through trial and error with outdoor equipment repair.
Sleeping Bag Zipper Repair Nightmares
Nothing ruins a cold night like a sleeping bag zipper that won’t close requiring sleeping bag zipper repair. I discovered this at about 2 AM on a October trip when temperatures dropped into the 20s and my bag zipper decided to jam halfway up needing immediate hiking gear repair.
The most common problem is fabric getting caught in the zipper teeth during sleeping bag zipper repair. Don’t force it—you’ll just make things worse. Work the fabric loose gently, then lubricate the zipper with soap or wax for hiking gear maintenance. I keep a small piece of beeswax specifically for this type of sleeping bag zipper repair.
When zipper sliders wear out and stop gripping properly requiring sleeping bag zipper repair, you can sometimes tighten them with needle-nose pliers. Gentle pressure on both sides usually does it for hiking gear repair. Too much force and you’ll crack the slider completely.
For fabric tears in sleeping bags, the repair process is similar to down jackets but trickier because of the curved shape requiring specialized hiking gear repair. Push the fill away from the tear, patch from both sides if possible, and work quickly to minimize down loss during outdoor equipment repair.
Water Filter Reality Check for Hiking Equipment Fixes
Water filters fail at the worst times, usually when you’re already low on clean water requiring hiking equipment fixes. Most problems are actually maintenance issues, not equipment failure needing full outdoor equipment repair.
Ceramic filters get clogged and need regular cleaning with a soft brush as part of hiking gear maintenance. I learned to carry a spare cleaning brush after my original one broke and I spent an hour trying to clean my filter with a stick and pine needles for emergency gear fixes.
Pump seals dry out and crack, especially if you store the filter for months without use requiring hiking equipment fixes. A tiny bit of food-grade silicone grease keeps them working through proper hiking gear maintenance. Don’t use petroleum-based lubricants—they’ll contaminate your water.
Replacement parts are usually available from manufacturers for outdoor equipment repair, but they’re expensive and take time to arrive. For extended trips, I carry backup purification tablets just in case my filter completely fails requiring emergency gear fixes.
Stove Maintenance That Actually Matters
Canister stoves are pretty reliable, but the threads on gas canisters can get gunked up requiring hiking gear maintenance. Clean them with a damp cloth regularly, and check for damaged O-rings as part of outdoor equipment care. A damaged O-ring means gas leaks, which is dangerous.
Liquid fuel stoves need more attention through hiking gear maintenance. The fuel lines get clogged, pumps lose pressure, and burner jets get blocked requiring hiking equipment fixes. I clean mine after every trip now because I once spent an entire evening trying to get a clogged stove working while my dinner got cold needing emergency gear fixes.
Keep spare O-rings and a cleaning needle for jet holes in your gear repair supplies. Most manufacturers sell maintenance kits for outdoor equipment repair, but they’re overpriced for what you get. Generic O-rings from hardware stores work just as well for a fraction of the cost.
Trekking Pole Fixes for Hiking Equipment Troubleshooting
Internal mechanisms wear out over time, especially the twist-lock systems requiring hiking equipment fixes. When poles won’t hold their adjustment anymore, it’s usually because the internal expander is worn out needing hiking gear repair.
I’ve replaced several of these over the years through outdoor equipment repair. It’s not complicated, but you need the right parts. Most major brands sell replacement parts for hiking equipment fixes, though finding them can be frustrating.
For bent sections in hiking equipment troubleshooting, aluminum can usually be straightened carefully. Carbon fiber just breaks cleanly, which is actually easier to repair with a sleeve splice using hiking gear repair techniques. I carry repair sleeves that fit over my pole sections for emergency gear fixes.
Pole tips wear out constantly on rocky terrain requiring regular hiking gear maintenance. Replacement tips are cheap and easy to install, but I go through probably six sets per year of heavy use.
Electronic Gear Headaches and Hiking Equipment Troubleshooting
Headlamps fail when you need them most requiring emergency gear fixes. Usually it’s corrosion in the battery compartment from leaked batteries. Clean corrosion with white vinegar and a cotton swab as part of hiking gear maintenance, but don’t get liquid in the electronics.
Water damage is harder to fix through hiking gear repair. If your headlamp gets soaked, remove batteries immediately and let it dry completely for at least 48 hours before testing. Rice doesn’t actually help much despite what people say for hiking equipment fixes.
LED bulbs rarely fail, but switches wear out requiring hiking equipment troubleshooting. Most headlamps aren’t designed to be user-serviceable, so switch failure usually means replacement time rather than hiking gear repair.
Keep spare batteries in a separate container to prevent corrosion if they leak as part of outdoor equipment care. I learned this when leaked batteries destroyed both my headlamp and backup flashlight on the same trip requiring emergency gear fixes.
The Bottom Line on Hiking Gear Repair
Some equipment is worth repairing through hiking gear repair, some isn’t. A $200 sleeping bag with a broken zipper? Definitely worth fixing through sleeping bag zipper repair. A $15 headlamp with a broken switch? Probably time to upgrade rather than attempt hiking gear repair.
Learning basic hiking gear maintenance prevents most failures. Clean your gear after trips, store it properly, and replace worn parts before they fail completely through outdoor equipment care. It’s way cheaper than emergency replacements and keeps you from being stranded with broken equipment requiring hiking gear repair.
The key is knowing your gear well enough to spot problems early through hiking gear maintenance, before they become trip-ending failures requiring emergency gear fixes.
Field Repair Emergency Techniques
Three miles into day two of a five-day solo trip in the Sawtooths, my pack’s main zipper completely separated requiring immediate emergency gear fixes. I’m talking full catastrophic failure—the zipper pull came right off in my hand, and my gear was threatening to spill out everywhere. This is when I learned that field repair techniques aren’t about making things pretty; they’re about getting home safely through hiking gear repair.
Standing there with a useless pack and four more days to go really taught me the difference between “repair it properly” and “make it work well enough” through emergency gear fixes.
Duct Tape Magic That Actually Works for Trail Emergency Repairs
Duct tape fixes way more problems than it should through field repair techniques, but there’s a right way and wrong way to use it for hiking gear repair. That pack zipper disaster? I ended up taping the entire opening shut and accessing my gear through the top lid only. Not ideal, but it worked for four days without additional hiking gear repair.
The key with duct tape for trail emergency repairs is preparation—it sticks better to clean, dry surfaces. Even in emergencies, take 30 seconds to wipe down the area first for effective hiking gear repair. I learned this when a hastily applied tape patch on my rain jacket peeled off in the first light rain requiring more emergency gear fixes.
For fabric tears, create a “tape sandwich” by applying tape to both sides of the material using field repair techniques. Single-sided patches peel off under stress. I’ve used this technique on everything from tent fabric to backpack straps for hiking gear repair, and it’s surprisingly durable.
Don’t wrap tape too tightly around gear during trail emergency repairs—it can restrict movement and actually cause more damage. I once taped a torn shoulder strap so tight that it cut off circulation to my arm after an hour of hiking requiring additional hiking gear repair.
Getting Creative with Natural Materials for Emergency Gear Fixes
When you’re out of manufactured supplies, nature provides some decent emergency options for field repair techniques. Pine pitch works as a temporary waterproof sealant—I’ve sealed small holes in rain gear with it for hiking gear repair. Heat it slightly to make it workable, but don’t overdo it or you’ll burn yourself.
Straight pine needles make decent emergency sewing needles for lightweight fabrics during trail emergency repairs. They’re not strong enough for heavy repairs, but I’ve closed small tears in shirt sleeves using pine needles and unraveled paracord for hiking gear repair.
Inner bark from dead birch trees is surprisingly strong and flexible for field repair techniques. I once lashed a broken trekking pole back together using birch bark strips when my repair sleeve wasn’t long enough for proper hiking gear repair. It held for 8 miles, which was all I needed.
Sharp stones can substitute for cutting tools in a pinch during emergency gear fixes. Not ideal, but when your knife breaks, you work with what you’ve got for hiking gear repair.
Repair Triage on Multi-Day Trips
When multiple things break during a long trip requiring hiking gear repair, you have to prioritize ruthlessly. Shelter and safety gear get fixed first through emergency gear fixes, comfort items last. That broken camp chair can wait—the hole in your rain jacket cannot.
I use a simple system for trail emergency repairs: critical repairs get done immediately, important repairs happen at lunch breaks or in camp, and minor issues wait until I get home. This saved my sanity during a week-long trip when seemingly everything started falling apart at once requiring constant hiking gear repair.
Time management matters too in field repair techniques. Don’t spend two hours trying to perfectly repair something when a five-minute temporary fix will get you through the trip. I learned this lesson trying to properly patch a sleeping pad hole while losing daylight and falling behind schedule requiring emergency gear fixes.
Knowing When to Cut Your Losses
Some gear failures just can’t be fixed in the field through hiking gear repair. When my stove’s pump mechanism completely failed on day three of a trip, no amount of tinkering was going to fix it requiring emergency gear fixes. I had to switch to cold meals and adjust my water purification strategy.
The decision matrix is pretty simple for trail emergency repairs: if the repair takes longer than hiking out and buying a replacement, or if the repair has a high chance of failing again, it’s time to modify your plans instead of fighting the gear with hiking gear repair.
I’ve seen people waste entire days trying to fix unfixable problems while their hiking partners got increasingly frustrated. Sometimes “good enough” really is good enough for field repair techniques.
Building a Trail Repair Kit That Makes Sense
My current lightweight trail repair kit weighs 3.2 ounces and fits in a small stuff sack. It includes: 6 feet of duct tape wrapped around my trekking poles, pre-cut Tenacious Tape squares, 10 feet of dental floss, one curved needle, safety pins, and a small tube of Seam Grip for hiking gear repair.
This camping gear repair kit handles probably 80% of field repairs I’ve encountered. For more comprehensive repairs, consider a lightweight field repair kit from Adventure Medical Kits. The other 20% either can’t be fixed in the field anyway, or require specialized tools that aren’t worth carrying for hiking gear repair.
Weight matters on longer trips requiring trail emergency repairs. I don’t carry gear-specific repair items unless I’m on a multi-week expedition. For most trips, the versatile basics are enough for emergency gear fixes.
Real-World Emergency Solutions
The most creative field repair techniques I ever saw was a guy who fixed a broken pack frame using a tent pole section and zip ties. It looked ridiculous but worked perfectly for three more days without additional hiking gear repair.
I once repaired a friend’s blown-out boot sole using paracord stitching and duct tape reinforcement through emergency gear fixes. It held together long enough to hike 12 miles back to the trailhead, though it looked like some kind of hiking frankenstein shoe requiring no further hiking gear repair.
The key to successful field repair techniques is managing expectations. You’re not trying to restore gear to like-new condition through hiking gear repair—you’re just trying to make it functional enough to complete your trip safely.
Most importantly, practice these techniques at home first. Learning how to apply patches or use emergency supplies while you’re stressed and tired in the backcountry is not the time to figure out what works for hiking gear repair.
Preventive Maintenance for Gear Longevity
I used to be one of those hikers who’d throw dirty gear in a closet after a trip and forget about it until the next adventure. Then I pulled out my rain jacket for a spring trip and found it covered in mold, with the waterproof coating literally peeling off in sheets. That $300 lesson taught me that taking care of gear through hiking gear maintenance is way cheaper than replacing it.
Now I’ve got a system that keeps my equipment working for years longer than it should through proper outdoor equipment care, and honestly, it’s saved me thousands of dollars over time by preventing major hiking gear repair needs.
Camping Equipment Maintenance Schedule That Actually Works
After every trip, I do a basic gear check for hiking gear maintenance: shake out dirt, hang everything to air dry, and look for obvious damage. This takes maybe 20 minutes but catches problems while they’re still fixable through simple hiking gear repair.
Monthly during hiking season, I do deeper maintenance through outdoor equipment care. Clean and lubricate zippers, check seams for wear, inspect buckles and hardware. I keep a checklist because it’s easy to forget stuff, especially during busy hiking months requiring hiking gear maintenance.
Twice a year—spring and fall—I do complete gear overhauls for outdoor equipment care. This is when I wash everything properly, apply DWR treatments, replace worn parts, and retire gear that’s beyond saving through hiking gear repair. It sounds obsessive, but spreading maintenance out like this prevents the gear graveyard situation I used to deal with.
Outdoor Equipment Storage That Doesn’t Destroy Your Investment
Compression kills gear faster than actual use, affecting outdoor gear longevity. I learned this when my down sleeping bag lost half its loft after being stored compressed for eight months requiring expensive hiking gear repair. Now all my down gear hangs loose in a closet, and synthetic gear gets stored loosely in large mesh bags as part of outdoor equipment care.
Moisture is the other enemy of outdoor gear longevity. Even slightly damp gear will develop mold and mildew in storage. I dry everything completely before putting it away for hiking gear maintenance, even if it means running a fan overnight. The electricity cost is nothing compared to replacing moldy gear.
Temperature matters too for outdoor equipment storage. My garage gets too hot in summer and too cold in winter, so I store expensive items inside the house. Extreme temperatures break down waterproof coatings and make fabrics brittle, requiring premature hiking gear repair.
Hiking Gear Inspection Reality Check
Spring prep is crucial after gear sits all winter requiring seasonal hiking gear maintenance. I check every piece for rodent damage, mold, or deterioration. Mice apparently love the salt residue on hiking clothes—I’ve found chewed holes in shirts that were fine when I stored them, requiring outdoor clothing patches.
Before each hiking season, I set up my tent in the backyard and check for problems as part of hiking gear inspection. Better to find a broken pole at home than on a mountain requiring tent pole repair. Same with sleeping systems—I test zippers, check for holes, and verify that my pad still holds air through proper hiking gear maintenance.
Fall inspections focus on damage from the season’s use for outdoor equipment care. This is when I decide what needs repair over winter and what needs replacement. I keep a running list so I can watch for sales during the off-season for hiking gear repair supplies.
Understanding Wear Patterns and Replacement Timing
After years of hiking, you start recognizing how different gear fails through hiking gear troubleshooting. Boot soles wear on the outside edges first if you supinate, indicating it’s time for new insoles before the sole completely wears through requiring boot sole repair.
Pack shoulder straps show wear where they rub against your body during hiking gear inspection. When the fabric starts looking fuzzy or thin, it’s time for reinforcement before it tears completely requiring backpack strap replacement. I’ve prevented several strap failures by adding bartack stitching to worn areas through proactive hiking gear maintenance.
Waterproof gear fails gradually, then suddenly affecting outdoor gear durability. DWR coatings start beading water less effectively, then one day water just soaks right through requiring waterproof gear repair. Learning to spot the early signs means you can re-treat coatings before they fail completely.
Cost-Benefit Analysis of Repair vs. Replacement
I use a simple rule for outdoor equipment restoration decisions: if repair costs more than 50% of replacement cost, or if the repair is likely to fail again soon, it’s time to buy new. This saved me from throwing good money after bad on a pack that needed $80 in repairs when I could buy a better one for $120.
Quality matters in this calculation for hiking gear repair decisions. A $400 jacket is worth spending $50 to repair properly through outdoor equipment restoration. A $60 jacket with the same damage gets tossed. It sounds harsh, but cheap gear often isn’t worth repairing through hiking gear repair.
Time has value too in outdoor equipment care decisions. If a repair takes me four hours but I can buy a replacement for what I make in two hours of work, the math is pretty clear. This applies especially to complex repairs that require special tools or skills for hiking gear repair.
Extending Gear Life Through Smart Use and Hiking Equipment Care
Rotating gear prevents overuse of favorites, improving outdoor gear durability. I have two rain jackets that I alternate, which means each one lasts twice as long. Same principle applies to boots, packs, and base layers for hiking gear maintenance.
Using gear appropriately prevents premature wear requiring hiking gear repair. I don’t bushwhack in my lightweight rain jacket or use my ultralight tent in high-wind conditions. Having different gear for different conditions means everything lasts longer through proper outdoor equipment care.
Regular maintenance catches small problems before they become expensive ones requiring major hiking gear repair. A loose button costs nothing to fix; replacing a shirt because the button fell off and got lost costs $40.
The Long Game Perspective on Outdoor Gear Longevity
Good maintenance habits compound over time for hiking equipment longevity. My 8-year-old sleeping bag still has most of its original loft because I’ve never stored it compressed through proper hiking gear maintenance. My hiking boots are on their third sole replacement but the uppers are still solid thanks to hiking boot maintenance.
The gear that gets the most use gets the most attention in my hiking gear preservation routine. I probably spend 80% of my maintenance time on 20% of my gear—the stuff I use every trip. This makes sense because these items also represent the biggest investment and have the highest failure cost requiring hiking gear repair.
Building maintenance habits takes time, but once they’re routine, outdoor equipment care becomes automatic. I actually enjoy the ritual now—it’s part of how I process trips and prepare for new adventures through hiking gear maintenance. Plus, well-maintained gear performs better and keeps you safer in the mountains while minimizing hiking gear repair needs.
Conclusion
Mastering hiking gear repair isn’t just about saving money—it’s about developing the self-reliance and problem-solving skills that make you a more confident outdoor adventurer. From simple duct tape fixes on the trail to comprehensive outdoor equipment restoration projects at home, these hiking gear repair techniques will keep your gear performing at its best for years to come.
Remember, every piece of equipment you repair through hiking gear maintenance is one less item in a landfill and more money in your pocket for your next adventure! Start building your hiking gear repair skills today with a basic trail repair kit, and you’ll never be caught off-guard by gear failures again. What hiking gear repair project will you tackle first?