How to Start Hiking: A Complete Beginner’s Guide for 2025
Introduction
Do you wish you could hike those beautiful trails you see in photos? You can! Learning how to start hiking is easy. You need very little gear to begin. The rewards are amazing! A 2024 Outdoor Industry Association report shows hiking grew 23% last year. Now is the perfect time to join in! This guide will show you the hiking basics. You’ll learn what gear you need and how to prepare for your first hike.
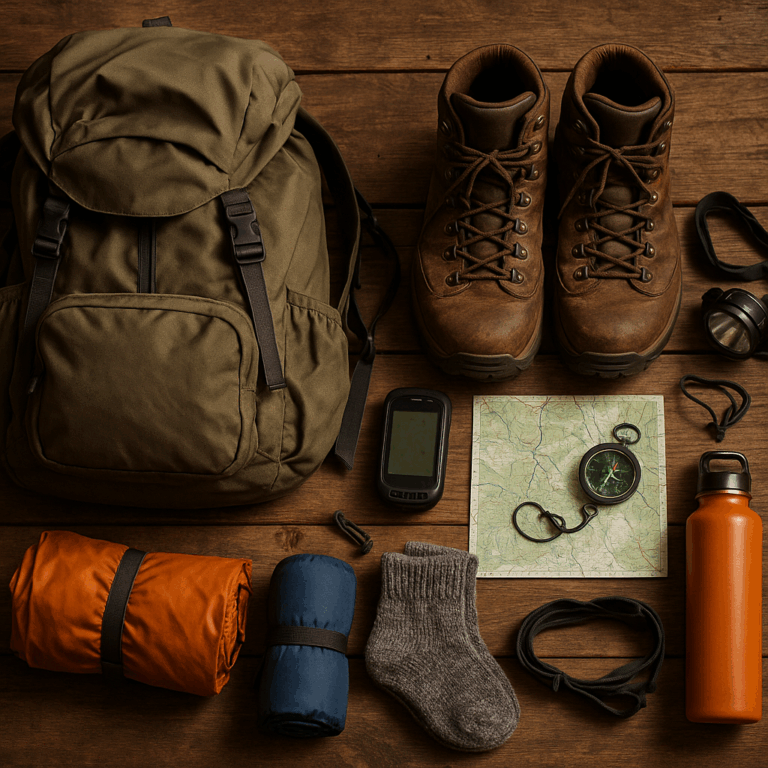
Essential Hiking Gear for Beginners
I remember my first real hike clearly, I didn’t know how to start hiking the right way. I wore a cotton t-shirt, jeans, and cheap sneakers on a trail in the Adirondacks. Big mistake!
Three hours later, I was soaking wet from rain. My feet had huge blisters. My backpack felt like it held bricks instead of just water and snacks.
I learned my lessons the hard way. After 15 years on trails, I know what beginners really need. Fancy stores try to sell you too much when you’re learning how to start hiking.
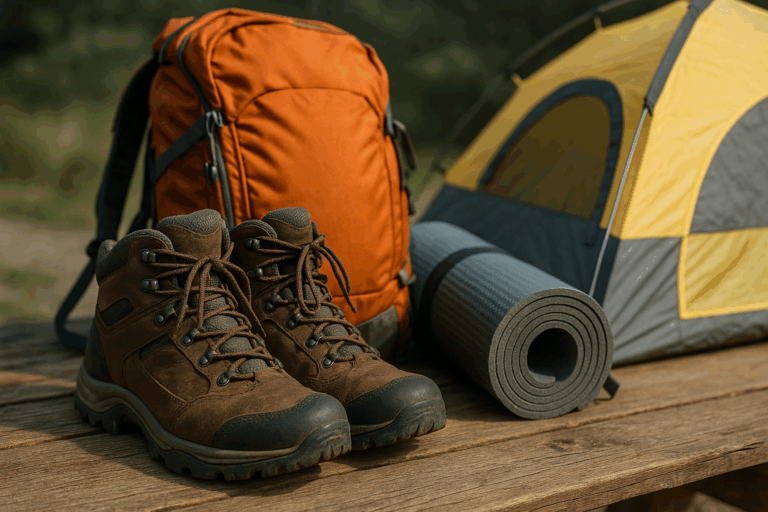
First, footwear makes or breaks your hiking trip. For flat, easy trails, sturdy gym shoes with good tread work fine. Don’t let anyone shame you into buying $200 boots for a 3-mile flat trail! But for rocky or hilly paths, proper hiking shoes are worth buying. Look for ankle support and deep grip on the soles. Brands like Merrell and Keen sell good entry-level options for $70-90 that last years.
REI’s store brand and Columbia make good, cheap hiking shoes. Most beginners do best with waterproof mid-height boots. They work for 90% of the trails you’ll try.
For clothes, layers are key. The worst rookie mistake? Cotton! I’ve been miserably cold in wet cotton shirts. Cotton holds moisture against your skin and takes forever to dry. This can be dangerous in cool weather. Instead, get a moisture-wicking base layer (polyester or wool), a light fleece middle layer, and a waterproof outer shell.
You don’t need to spend a lot when learning how to start hiking. Target’s All in Motion line and Amazon Essentials sell synthetic base layers under $20. Frogg Toggs makes cheap rain gear that packs small and works well. Not fancy, but it does the job!
For backpacks, you don’t need a huge 65-liter pack for day hikes. A simple 20-30 liter pack is plenty. I once bought a technical climbing pack for hiking. All those extra straps just made things harder! Look for a pack with a waist belt, comfy shoulder straps, and a few pockets. The REI Flash 22 (often on sale for $50) is perfect for beginners.
Don’t forget used gear shops and rentals! I’ve found great deals at REI’s used gear sales and sites like Geartrade. Many outdoor shops rent gear too. This is perfect if you’re not sure hiking is for you.
The must-have items? Water (more than you think you’ll need), sun protection (hat, sunscreen, sunglasses), a basic first aid kit, and a map. Yes, even if you use your phone for navigation, bring a paper map or download offline maps. REI offers a great day hiking checklist that covers everything from must-haves to nice-to-haves.
My advice? When learning how to start hiking, keep it simple. Start with the basics. Borrow when you can. Upgrade as you develop your own hiking style. The trail doesn’t care if your jacket is last year’s model or if your backpack isn’t the newest ultralight version. Good gear keeps you safe and comfy – that’s what matters!
Finding the Right Trails for Beginners
Picking the right trail can make or break your hiking experience! When learning how to start hiking, trail choice is key. I learned this when I took my nephew on what I thought was an “easy” trail. It turned into a 7-mile rocky nightmare with too many hills. My poor nephew didn’t want to hike again for a year!
Trail difficulty ratings aren’t the same everywhere. This makes things hard when you’re new to hiking. Most U.S. parks use Easy, Moderate, and Difficult ratings. But “moderate” in the mountains might have 1,000+ feet of climbing. In flatter areas, “moderate” might just mean some small hills.
The best way to judge trail difficulty is to look at three things: distance, elevation gain, and trail surface. For true beginners, I suggest trails under 4 miles round-trip with less than 500 feet of climbing and smooth surfaces. The AllTrails app is great for this info. You can filter by these factors and read reviews from other hikers. The app also notes if trails need permits.
National Park and Forest Service websites have good trail info too. But the best source when learning how to start hiking? The local ranger station. Those folks know which trails are good for beginners. They can point you to hidden gems that aren’t crowded with tourists.
Trail markers confused me at first. Different parks use different systems. Usually you’ll see painted marks on trees or posts. In drier areas, you might see stacked rocks called cairns. The Appalachian Trail Conservancy offers a good guide to trail markers. Before you go, check the park’s website to learn their marking system. Don’t be like me and spend an hour walking in circles because blue and yellow markers were for different trails!
For timing, plan about 30 minutes per mile on flat ground. Add 30 minutes for every 500 feet of climbing. This varies based on fitness and trail type—rocky paths take longer, especially at high altitude. I always add 25% more time to my estimate. Breaks, photos, and “wow” moments add up!
Some of my favorite beginner trails are in state parks, not famous national parks. They’re less crowded, cheaper (often free), and have well-kept trails made for casual hikers. City parks can be great starting points too. Tennessee’s Fall Creek Falls State Park has beautiful waterfall trails under 2 miles. New York’s Minnewaska State Park has great views with gentle slopes. The National Park Service website helps you find parks that might work for new hikers.
Check if you need permits before you go! Some popular trails, even easy ones, need reservations now. Recreation.gov is the main site for U.S. public lands permits. Nothing worse than driving hours to a trailhead only to be turned away because you didn’t know you needed a day-use permit. Most national parks charge entrance fees ($20-35 per car), while state and local parks vary.
Trail etiquette is simple: yield to uphill hikers, keep noise down, and pack out all trash. I once saw someone leave a Gatorade bottle at a scenic spot. Years later, I’m still mad about it! “Leave no trace” isn’t just for hardcore backpackers—it applies to casual day hikes too.
Start small when learning how to start hiking. Build confidence. Remember, the “best” trail isn’t the most famous or Instagram-worthy one—it’s the one that matches your skill level while showing you something beautiful. The mountains have been there for millions of years. They’ll still be there when you’re ready for harder hikes!
Preparing Your Body for Hiking
I thought hiking was just walking on dirt paths. Wrong! My first real hike taught me better when my legs burned halfway up and I couldn’t catch my breath. Hiking uses muscles that normal life doesn’t. When learning how to start hiking, physical prep matters, even for fit people.
The good news? You don’t need a gym to get trail-ready. I use a simple workout that has helped me a lot. Three times a week, I do lunges, step-ups, and squats—about 2-3 sets of 10-15 reps each. I use my stairs at home for step-ups. Adding a backpack with 5-10 pounds during these exercises mimics real hiking. The American Council on Exercise offers a 4-week hiking workout plan perfect for beginners.
Core strength really helps on uneven trails. Planks and bird-dogs are my go-to moves. I do 3 sets of 30-second planks, slowly going longer as I get stronger. These simple exercises have helped me stay stable on rocky trails.
Stretching is not just an option—it’s a must. After ignoring this advice and suffering sore muscles, I now stick to a basic stretch routine. Focus on calves, hamstrings, quads, and hips. Hold each stretch for 30 seconds. Never bounce. The best time to stretch is after your muscles are warm.
Start drinking water well before your hike. I drink about 20 ounces 2 hours before hiking and sip often during the hike. “Drink before you’re thirsty” is good advice—by the time you feel thirsty, you’re already dehydrated. I aim for 16-20 ounces per hour, more in hot weather. The Mayo Clinic explains how heat, humidity, and altitude increase your water needs. Electrolytes help too, especially on longer hikes. Nuun tablets or coconut water work well without the sugar spike of sports drinks.
For food, eat a balanced meal with complex carbs and protein about 2 hours before hiking. Trail snacks should digest easily and give steady energy. I like dried fruit and nuts, plus some protein like jerky or nut butter. I eat a snack every 60-90 minutes, even if I’m not hungry. Waiting until you’re starving can lead to energy crashes that ruin your hike.
Increase your hiking distance slowly when learning how to start hiking. The 10% rule works well—don’t add more than 10% to your weekly hiking distance from week to week. When I rushed this, I hurt my IT band and couldn’t hike for weeks. Not worth it!
Blisters can ruin a great hike. After trying many prevention methods, I find that well-fitted shoes plus liner socks under hiking socks work best. Never wear cotton socks! Use synthetic or wool socks instead. At the first sign of a hot spot, stop right away and apply moleskin or athletic tape. Don’t try to push through—hot spots become painful blisters that take days to heal.
Everyone’s body adapts at different speeds when learning how to start hiking. My friend got trail-ready in half the time I did. My sister needed several months. Listen to your body. Adjust as needed. Be patient. The trails will wait for you! Avoid cotton socks—go for synthetic or merino wool instead as part of your hiking clothes for beginners strategy. At the first sign of a hot spot, stop immediately and apply moleskin or athletic tape. This is one of the most valuable hiking safety tips I can offer: don’t try to push through—those hot spots will become painful blisters that can take days to heal and turn into beginner hiking challenges.
Uphill sections used to destroy me until I figured out proper breathing. The technique that works best is rhythmic breathing timed with your steps. I inhale for 2-3 steps, then exhale for 2-3 steps. This prevents the shallow panting that leaves you oxygen-deprived. When tackling steep sections, the “rest step” technique has been a game-changer—plant your uphill foot, lock your knee straight for a second before stepping—this lets your bones, not muscles, carry the load.
I’ve found that tracking my progress keeps me motivated. Whether it’s noting how much farther I can hike without resting or how much less sore I feel the next day, celebrating these improvements makes the preparation feel worthwhile.
Remember that everyone’s body adapts at different rates when learning how to start hiking. My hiking buddy got trail-ready in half the time it took me, while my sister needed several months of consistent preparation. Listen to your body, adjust as needed, and be patient with yourself. The trails aren’t going anywhere!
Hiking Safety Essentials
I cringe when I think of my early hiking days and the mistakes I made. When first learning how to start hiking, I did everything wrong. I didn’t tell anyone where I was going. I brought just a half-empty water bottle and I wore cotton clothes. It took getting caught in a sudden storm with no shelter to make me take hiking safety seriously.
Always make a hiking plan, even for short “easy” trails. This is key when learning how to start hiking. I write down my planned route, expected return time, and where I’ll park. I text this info to at least two people before I lose cell service. This simple step once saved my friend’s life. He slipped and couldn’t hike out, but his wife knew exactly where to send help.
For day hikes, your plan should include: trail name, trailhead location (with GPS if possible), your planned route with any side trails, when you expect to return, and who to call if you don’t check in. I add an extra hour to my return time to avoid false alarms, but I always check in promptly when I get back.
First aid supplies can’t help if they’re at home! My hiking first aid kit weighs under 8 ounces but covers most trail problems. I pack: bandages in various sizes, gauze pads, adhesive tape, antibiotic ointment, pain relievers, allergy medicine, tweezers for splinters and ticks, and moleskin for blisters. For longer or remote hikes, I add an elastic bandage, butterfly closures for deeper cuts, and antiseptic. The Red Cross has a great hiking first aid checklist.
Weather can change fast, especially in mountains. I’ve gotten sunburned and hailed on during the same hike! Now I check three weather sources before heading out. I always pack a rain jacket and extra warm layer, even when the forecast looks good. In areas prone to thunderstorms, I plan to be below treeline by early afternoon when storms often form. Getting caught above treeline during lightning is scary—avoid it!
Wildlife safety depends on where you’re hiking. In bear country, make noise while hiking (I sing, even though my hiking buddies hate it), keep bear spray handy on your belt (not buried in your pack), and know the different rules for black bears versus grizzlies. Bear spray is only needed in bear country, mostly western U.S. and parts of Canada. Most of the eastern U.S. only has black bears. In snake areas, stay on trails, watch where you put your hands when climbing, and wear proper footwear. Ranger stations have the latest info on wildlife activity. If hiking with dogs, keep them leashed for their safety and to protect wildlife.
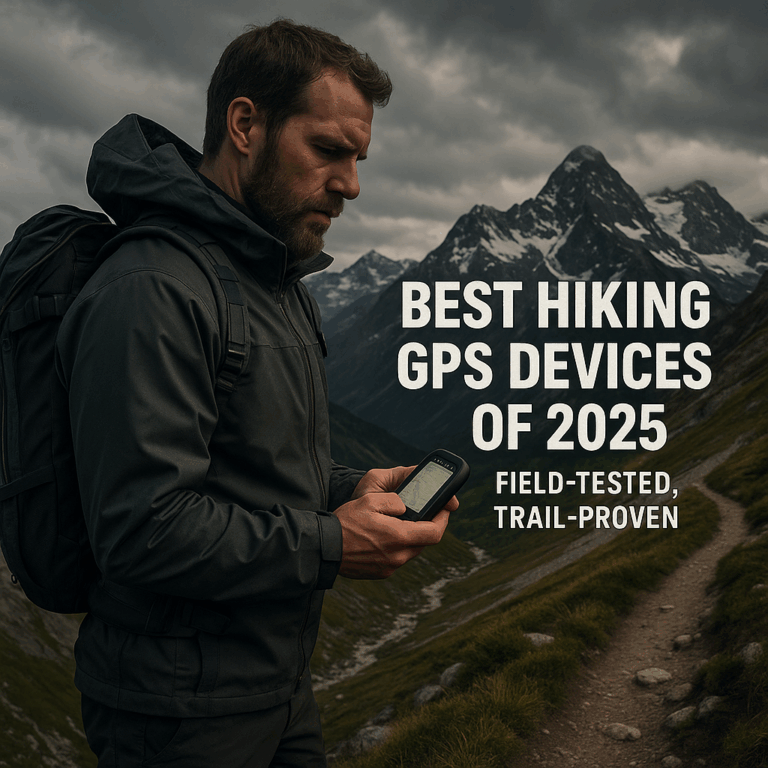
Navigation skills have saved me many times. Phones are handy but not reliable—batteries die, signals drop, phones get wet (I’ve dropped mine in a stream). I always bring a paper map and compass and know how to use them. Check your position often, don’t wait until you’re lost. I use the map to spot landmarks ahead, then confirm I’m on track when I pass them. Hiking apps can help, especially when they let you download offline maps.
If you get in trouble, the universal emergency signal is three of anything—three whistle blasts, three fires, three flashes. The S.O.S. signal is three short, three long, three short. I keep my emergency whistle attached to my backpack strap where I can reach it easily.
The hardest lesson I’ve learned is knowing when to turn back. Missing the summit or viewpoint is disappointing, but pushing ahead in dangerous conditions can be deadly. I’ve turned around due to weather changes, unusual tiredness, gear problems, and once because the trail was simply too hard for me. Every experienced hiker has similar stories—it’s not failure, it’s smart risk management.
Your most important safety gear is your brain! Good judgment, proper planning, and flexibility are what keep you safe on trails. Build these habits on easy hikes so they become automatic when you try harder adventures. When learning how to start hiking, focus on safety from day one. The mountains will still be there next time!
Finding Hiking Partners and Communities
I never thought I’d become a “hiking person.” Then I joined a trail cleanup day. Now I’m hooked! Finding hiking groups changed how I approach hiking.
Local hiking groups are perfect for beginners learning how to start hiking. They offer hikes for all skill levels. My first group hike was with the Appalachian Mountain Club. The leader showed us trail markers. She taught us about local plants. I learned more in one day than in months of hiking alone!
Most cities have hiking clubs that welcome new members. The Sierra Club has beginner hikes in almost every state. REI stores host guided hikes where they often loan gear. The American Hiking Society lists local clubs by area and offers helpful resources. These group hikes help you learn trail skills while staying safe.
Finding hiking groups is easy. Check Meetup.com for hiking communities near you. Look for Facebook Groups about hiking in your area. Many state parks offer ranger-led hikes. These guided walks teach you about nature and basic hiking skills.
Hiking apps help connect people too. AllTrails shows who’s hiked trails recently. Strava has groups where you can find partners who hike at your pace. The Outbound Collective helps plan group adventures.
Some people prefer hiking alone. After a busy week, a quiet trail can be just what you need. If you hike solo, be extra careful about safety. Always tell someone your plan. Check in at ranger stations when you can. Busy trails offer a good balance – you’re alone but others are nearby if needed.
Hiking with kids is special. Children see trails differently. A simple forest becomes magical to them. Start with short hikes under 2 miles. Look for trails with streams or rock formations. Try nature scavenger hunts to keep young kids interested. The “Kids in Parks” program offers family-friendly trails across the country.
Trail volunteer work introduced me to the best hiking teachers. These volunteers know every trail detail and love to share tips. Groups like the Pacific Crest Trail Association host regular work days. You don’t need experience – they teach you everything. Plus, you’ll gain a deeper love for the trails you hike.
Hikers love to help each other. Experienced hikers helped me when I started, and now I help beginners. Last month, I showed a new hiker how to adjust her backpack. The smile on her face when she felt the difference was amazing! Now we hike together every Tuesday.
Finding hiking friends turns a simple outdoor activity into a lifestyle. The people I’ve met hiking have become close friends. As you learn how to start hiking, these connections grow more valuable. We’ve shared sunrises, wrong turns, and many beautiful places. Whether you join a club, use an app, or volunteer, the hiking community will make your adventures better.
Sustainable and Responsible Hiking Practices
I wasn’t always a good practitioner of leave no trace hiking. When first learning how to start hiking, I made mistakes that I’m now embarrassed about. On my first trip, I left orange peels on the trail. I thought they would “just decompose.” I was wrong! Another hiker taught me that even fruit waste harms wildlife and can take years to break down. Trail etiquette for beginners includes proper waste management!
Leave No Trace has seven simple rules that changed how I approach hiking for beginners. The idea is easy: enjoy nature without harming it. This means plan ahead, stay on established trails, manage your waste properly, leave natural objects where you find them, be careful with fires, respect wildlife while birdwatching while hiking, and be kind to other hikers. The official Leave No Trace Seven Principles provide a comprehensive framework for minimizing your impact on natural areas. These principles apply whether you’re exploring easy hiking trails or more challenging routes.
The “pack it in, pack it out” rule means more than just taking your trash when day hiking. Those apple cores and banana peels don’t belong in the woods either! They attract animals and change their diets. I now bring a small sealed bag just for food scraps as part of my hiking backpack essentials. I even pick up other people’s trash when I hike in popular areas – a key practice in supporting conservation efforts through responsible recreation.
Going to the bathroom outdoors needs special care when hiking in different weather conditions and environments. For pee, stay at least 200 feet from water sources. For poop, dig a hole 6-8 inches deep and cover it well after. Take your toilet paper with you in a ziplock bag. In heavily-used areas or sensitive alpine zones, many parks now require you to pack out all human waste using special bags. It’s not glamorous, but it’s necessary to protect water sources and keep trails nice for other hiking for beginners enthusiasts.
Wildlife encounters are magical when practicing proper trail etiquette for beginners. After seeing tourists chase a moose for photos in Yellowstone, I’m extra conscious about giving animals space during my hiking adventures. The rule is: if an animal changes what it’s doing because you’re there, you’re too close. Use binoculars or zoom lenses for hiking photography tips instead of approaching wildlife. Never feed wild animals, even by leaving food scraps. Bears that get human food often become dangerous and may be killed. This applies to hiking with dogs too – keep them leashed and under control.
Plant life needs care too, especially on popular beginner-friendly hikes. Walking off established trails to get that perfect hiking photography shot damages fragile ecosystems that can take decades to recover. I’ve learned to appreciate wildflowers with photos rather than picking them, and I’m careful to shake out seeds from my socks and boot treads before hiking in new areas to prevent spreading invasive species when exploring new nature trails for beginners.
Supporting conservation efforts through your recreation choices makes a huge difference for the future of hiking for beginners. I purchase annual parks passes, knowing the money helps maintain and protect these places. Many parks have ways to volunteer or donate. Even just reporting trail damage or maintenance needs to rangers helps preserve easy hiking trails. When buying hiking essentials and day hiking gear, I look for companies that donate to conservation efforts.
Hiking through sacred lands requires cultural considerations when hiking through protected areas. Many trails cross areas with deep significance to indigenous peoples. Before my trip to Bears Ears National Monument while hiking in national parks, I researched appropriate behavior and learned which areas were open to visitation versus those reserved for traditional practices. I never touch or disturb archaeological sites, rock art, or ceremonial structures, and I keep my voice down in places of spiritual significance. This respect is an important aspect of trail etiquette for beginners.
Small actions multiply when millions practice leave no trace hiking principles. Staying on established trails prevents erosion and protects sensitive vegetation. Resisting the urge to take “just one rock” or wildflower preserves the experience for future visitors exploring beginner-friendly hikes. Planning hikes during less busy times reduces overall impact on nature trails for beginners. Even something as simple as shaking out your boots before leaving a trailhead prevents spreading invasive plant species.
Being a good steward of nature makes my hiking for fitness experiences better, not worse. I feel good knowing my footprints will fade and the trail remains pristine for others practicing hiking for beginners. Understanding how to start hiking responsibly is part of the journey. The joy of finding a clean campsite or untouched vista on beginner-friendly hikes is worth any extra effort. By treading lightly while hiking in national parks and other natural areas, we ensure these beautiful spaces remain accessible for generations of future hikers to discover and enjoy.
Conclusion
Starting your journey of how to start hiking doesn’t require elaborate planning or expensive day hiking gear—just a sense of adventure and the willingness to take that first step on a beginner-friendly hike. By following the hiking essentials and guidelines in this article, you’ll be well-prepared to enjoy the physical, mental, and emotional benefits that hiking for fitness has to offer. Remember that every experienced hiker was once a beginner too, making the same beginner hiking mistakes and facing similar beginner hiking challenges!
Learning how to start hiking is best approached gradually, with realistic expectations. Start with shorter, easier hiking trails with lower trail difficulty ratings, gradually build your hiking endurance through a smart hiking training plan, and soon you’ll be exploring breathtaking landscapes on nature trails for beginners that you once only admired in pictures. Whether you’re interested in birdwatching while hiking, hiking photography tips, hiking with kids, or finding hiking groups to join for companionship, the path begins with those first steps.
So lace up those best hiking shoes for beginners, fill your water bottle following proper hiking hydration tips, grab a map to practice your hiking navigation basics, and hit the trail—your how to start hiking adventure begins now!