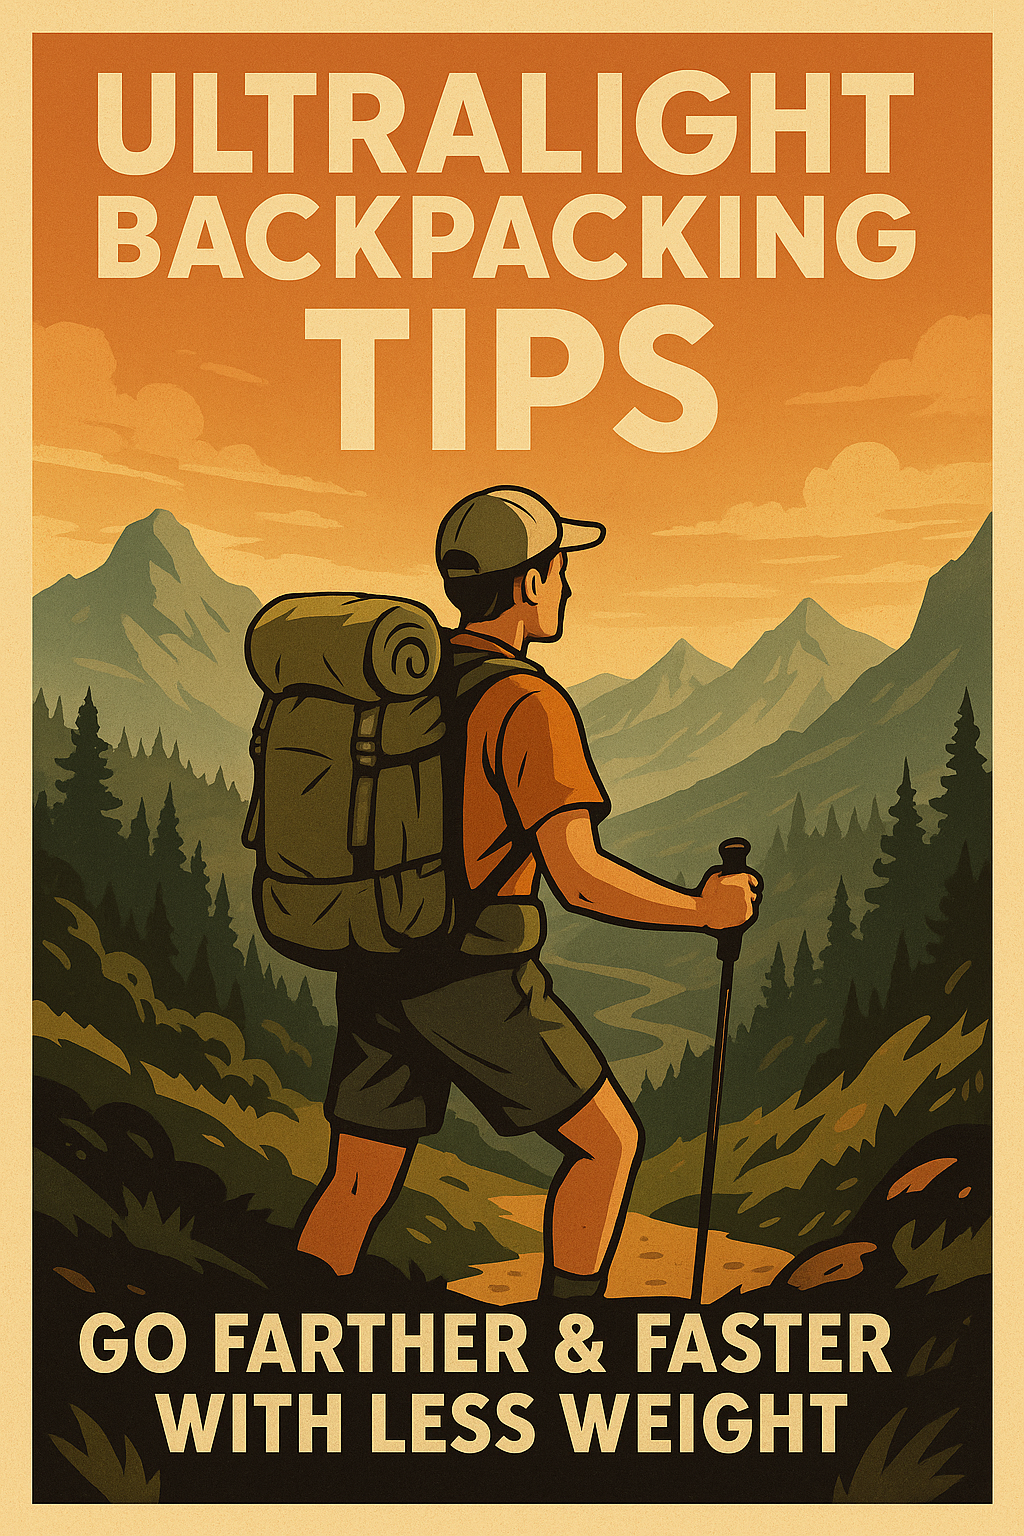
Ultralight Backpacking Tips: Cutting Weight And Having Comfort
Introduction
Did you know that the average backpacker carries 25-30% of their body weight? Ultralight hikers carry just 10-15%! That’s a game-changer! These ultralight backpacking tips can help you achieve those lighter loads.
If you’ve ever finished a long hike with aching shoulders and a sore back, you’re not alone. I’ve been there too. I was struggling up steep trails with a pack that felt like it was filled with rocks.
Ultralight backpacking isn’t just about fancy gear. It’s a mindset that transforms how you experience the wilderness. For comprehensive basics, check out REI’s guide to ultralight backpacking basics. When you shed those extra pounds, every step becomes easier. Every mile becomes more enjoyable.
You’ll cover more ground with less effort. You’ll actually have energy left to appreciate those stunning sunset views! Ready to revolutionize your hiking experience? Let’s dive into these essential ultralight backpacking tips. They will help you go farther, faster, and with less strain on your body.
Essential Ultralight Backpacking Gear Selection
Understanding the Big Three
Man, I wish someone had sat me down five years ago and explained the whole ultralight thing properly. I was lugging around a 45-pound pack thinking I was “prepared.” Really I was just making myself miserable on every single trail.
The lightbulb moment came during a brutal 12-mile day in the Smokies. My buddy Sarah cruised past me with what looked like a tiny daypack. Turns out she was carrying everything I had. But her base weight was 8 pounds compared to my ridiculous 28 pounds.
That’s when I learned about the “Big Three.” Your hiking pack, ultralight shelter, and down sleeping system make up about 70% of your base weight.
Setting Realistic Base Weight Goals
Here’s the thing about base weight targets that nobody tells you upfront. Sub-10 pounds is the gold standard for ultralight gear. But don’t stress if you’re starting at 15-18 pounds.
I dropped from 28 to 12 pounds in my first year and I swapped out my massive Coleman tent for a lightweight tent setup. I also ditched my 4-pound sleeping bag for a 20-degree ultralight sleeping bag that weighs 1.5 pounds.
The lightweight backpack was actually my last upgrade. This sounds backwards but makes sense. You need to know how much volume you actually need before buying a frameless pack. I made the mistake of getting a 35-liter pack too early. I couldn’t fit my bulky old gear.
Multi-Functional Gear Strategy
Multi-functional ultralight gear is where you really start shaving ounces without spending crazy money. My trekking poles double as tent poles. Boom, saved 6 ounces and $40.
I use my phone for navigation, camera, entertainment, and emergency communication. This replaces carrying separate devices. Even my titanium cookware has a tiny serrated edge. It works as a knife for most trail tasks.
For more creative ideas, Bearfoot Theory’s ultralight backpacking tips offer excellent strategies for maximizing gear functionality.
Weight vs. Durability Balance
But here’s where I learned some hard lessons about weight vs. durability with ultralight backpacking tips. I went too aggressive too fast. I ended up with a 0.5-ounce “ultralight tarp” that got shredded by wind on my second trip.
Sometimes that extra ounce or two is worth it. This is especially true for gear that keeps you dry and warm. I now use a 1.2-ounce tarp that’s held up for three seasons.
Seasonal Gear Considerations
Seasonal considerations will mess with your carefully planned backpacking gear list every time. My summer setup in Colorado is completely different from my fall hiking in New England. Summer base weight hits 7 pounds. But add rain gear, warmer layers, and a beefier shelter for shoulder season. I’m back up to 11-12 pounds.
The key is having a “gear closet” mentality. You swap items based on conditions rather than trying to find one setup for everything.
Budget-Friendly Ultralight Options
Don’t let the gear snobs fool you. You don’t need to drop $800 on expensive ultralight gear to go ultralight. I’ve found amazing budget alternatives. They get you 80% of the weight savings for 30% of the cost.
My current ultralight shelter setup cost $120 total (tarp + bivy). It weighs 14 ounces. Yeah, it’s not as convenient as a $400 tent. But it keeps me dry and lets me cover more miles without breaking the bank.
The biggest mistake I see new ultralight hikers make is obsessing over every gram. They ignore the basics like physical conditioning and hiking efficiency. Losing 5 pounds of body weight will make a bigger difference. Improving your pace helps more than upgrading from a 2-pound to 1.5-pound shelter. These ultralight backpacking tips focus on practical weight reduction, not just gear obsession.
Proven Weight-Cutting Strategies for Every Hiker
The 80/20 Rule for Gear Selection
I used to be that guy weighing every single piece of gear on a kitchen scale. I obsessed over whether my toothbrush was 0.2 or 0.3 ounces. Talk about missing the forest for the trees! It wasn’t until I applied the 80/20 rule that my pack weight actually started dropping meaningfully.
The 80/20 principle saved my sanity and my back. About 80% of your pack weight reduction comes from targeting just 20% of your gear. These are specifically the heaviest items. For detailed strategies, see Gossamer Gear’s advice on reducing pack weight. I spent three months shaving grams off small stuff. Then I realized my 4-pound tent was the real culprit.
Swapping that one item for a 1.2-pound tarp-tent combo dropped more weight than six months of micro-optimizations combined.
Water System Optimization
Your water filtration system is usually the second-biggest weight hog. I was carrying a 2-pound gravity filter system plus backup tablets “just in case.” Now I use a 1-ounce Sawyer Mini and aquatabs. This saves over a pound while actually improving my filtration speed.
The math is simple. Target anything over 1 pound first, then work your way down.
DIY Gear Modifications
DIY modifications became my favorite hobby once I got comfortable with basic sewing. I cut the labels off everything. Seriously, those fabric tags add up. I trimmed my toothbrush handle. I even drilled holes in my titanium cookware handle.
But the game-changer was modifying my rain gear. I removed the hood and pit zips I never used anyway. This saved 3 ounces and improved ventilation.
Here’s a controversial ultralight backpacking tip: I cut down my sleeping pad from full-length to torso-length. I use my empty pack as a leg pad. Saved 6 ounces and honestly sleep just as well.
Not everyone’s into this kind of modification. But test it at home first to see what works for your hiking comfort level.
Ruthless Packing Decisions
The ruthless packing phase nearly gave me anxiety attacks initially. Leaving behind that “just in case” rain gear felt terrifying. Then I realized I’d carried them for 500+ miles without ever putting them on. Same with the backup battery pack, extra underwear, and camp shoes. They seemed essential until they weren’t.
My current safety-first rule is simple: if it keeps me alive, dry, or warm, it stays. Everything else gets scrutinized for my backpacking gear list. Do I really need soap when I’m only out for three days? Nope, baby wipes work fine.
Second pair of hiking socks? Only if it’s a week-long trip. That camp pillow seemed necessary until I learned to stuff clothes in my buff.
Proper Load Distribution
Load distribution honestly matters more than total weight sometimes. I learned this the hard way during a Virginia section hiking trip. My poorly balanced 22-pound pack felt heavier than my buddy’s well-organized 26-pound setup.
Keep heavy items close to your back and between your shoulder blades. Don’t put them at the bottom of your pack where physics works against you.
Dense items like food and lightweight water bottles go in the middle of your pack. Put them right against the back panel. Lighter, bulky stuff like your ultralight sleeping bag goes at the bottom. This completely changed how my pack carried, even at the same total weight.
Pre-Trip Weight Planning
Pre-trip preparation is where most people blow it without realizing. I used to pack five days of food for a three-day trip. Why? Because “what if I get lost?”
Now I plan meals specifically. I weigh portions and repackage everything into exact serving sizes. This alone typically saves 1-2 pounds. It’s way better than throwing whole packages of trail mix and energy bars into my pack.
Water planning becomes crucial too for overnight backpacking. Know your water sources. Only carry what you need to the next reliable source. I’ve hiked sections carrying just one liter when I knew there were streams every 3-4 miles. This beats the 3+ liters I used to haul “just to be safe.”
The mental shift from “prepared for anything” to “prepared for likely scenarios” was honestly the hardest part. These ultralight backpacking tips require changing your entire mindset about wilderness preparedness.
Smart Food Planning and Water Management
Proper nutrition planning is crucial for ultralight success. REI’s ultralight meal planning guide provides excellent foundation knowledge for getting started.
Calorie Density Fundamentals
Food planning used to stress me out more than route finding, honestly. I’d show up at trailheads with grocery bags full of random snacks. Then I’d spend the first day reorganizing everything while other hikers were already miles ahead.
My wake-up call came during a four-day loop in Olympic National Park. I realized I was carrying 8 pounds of food. It should’ve been maybe 5 pounds max.
The calorie density game changed everything for me. I started actually reading nutrition labels instead of just grabbing whatever looked tasty. Trail nutrition became a science. Nuts and nut butters became my best friends.
For advanced calorie planning strategies, Backcountry Foodie’s high-calorie meal planning tips are incredibly helpful for longer trips.
Almonds hit about 170 calories per ounce. Those heavy granola bars I loved were barely pushing 110. Olive oil sounds weird to carry. But just two tablespoons adds 240 calories for less than an ounce of weight.
Optimal Calorie-to-Weight Ratios
My current go-to combo runs around 125-130 calories per ounce. Dried fruits mixed with nuts for breakfast. Peanut butter on tortillas for lunch. Dehydrated meals for dinner.
I learned the hard way that going above 135 calories per ounce usually means you’re sacrificing nutrition for pure fat content. This leaves you feeling terrible after day two.
DIY Dehydrated Meals
Dehydrating my own meals was intimidating until I bought a basic $60 dehydrator and started experimenting. Game changer! Store-bought Mountain House runs about $12 per meal and weighs 4-5 ounces. My homemade versions cost maybe $3 and often weigh 2-3 ounces for the same calorie count.
My foolproof technique now is cooking big batches of rice-based meals at home. I spread them thin on dehydrator trays. Then I run them for 8-12 hours until completely dry.
Lentil curry, chicken and rice, even spaghetti sauce work great. They all rehydrate perfectly with just boiling water. The key is keeping fat content low during dehydration since fats don’t preserve well.
For specific meal ideas and recipes, check out Katie Gerber’s healthy 5-day meal plan for backpackers for practical inspiration.
Water Purification Systems
Water filtration had me overthinking for years. I carried a 2-pound gravity filter system plus backup tablets plus UV sterilizer. Some forum post scared me about giardia.
Then I met this section hiking veteran who’d done 1,200+ miles with just a Sawyer Mini and aquatabs as backup. That conversation cost me 90 seconds but saved me 1.5 pounds permanently.
For most North American hiking, a simple squeeze filter like the Sawyer Mini handles 99% of situations. I only carry purification tablets now for really sketchy water sources or if my filter clogs up. The Mini weighs 2 ounces, processes water fast. I’ve never gotten sick using it properly over three years.
Resupply Strategy Planning
Resupply strategy depends totally on your trip length. But I’ve learned some hard lessons about overcomplicating it for long distance hiking. For anything under a week, I just carry everything from the start.
Beyond that, mail drops to post offices or businesses along the trail work better. This beats trying to buy resupply in tiny trail towns where selection sucks and prices are crazy.
My biggest resupply mistake was sending myself way too much food in my first mail drop. I packed like I was still at home instead of thinking about trail appetite and weight restrictions. Now I pack resupply boxes at exactly the same calorie density as my starting food. I include backup meals only if I’m genuinely unsure about timing.
Cooking Gear Minimization
Cooking gear minimization nearly killed my love for hot meals until I found the right balance. I ditched my 12-ounce cookset for a simple 0.8-ounce titanium mug and a tiny ultralight stove weighing 2.5 ounces total.
Honestly, most trail meals just need boiling water anyway. You’re not exactly making gourmet dinners out there.
The breakthrough was realizing I could make great hot meals with just one pot and some creativity. Couscous, instant mashed potatoes, ramen, oatmeal work perfectly in a simple mug setup. I even do “skillet” meals by adding dehydrated veggies and protein powder to instant rice.
Cold-Soaking Techniques
Cold-soaking opened up even more possibilities once I got over the mental block. Overnight oats, rehydrated beans and grains, even some pasta dishes work fine without any cooking gear at all.
This saved me another 3-4 ounces and eliminated fuel weight entirely on shorter trips. These ultralight backpacking tips around food prep can revolutionize your trail weight.
Safety Considerations in Ultralight Backpacking
Learning from Safety Mistakes
I’ll be brutally honest. My first attempt at going ultralight nearly got me hypothermic because I was an idiot about safety gear. I’d read some forum post about a guy hiking with a 6-pound base weight. I thought I could just copy his gear list.
I didn’t consider that he was hiking in July while I was attempting a shoulder-season trip in the Whites. Big mistake.
The wake-up call happened on Mount Washington when weather rolled in faster than forecasted. My “ultralight” rain shell was basically tissue paper. I’d left my insulation layers at home to save 8 ounces.
I spent four hours shivering in the trees waiting for conditions to improve. That’s when I learned there’s a huge difference between being lightweight and being stupid.
The Big Outside’s ultralight safety guide emphasizes this balance between weight savings and safety perfectly.
Non-Negotiable Safety Gear
Here’s my non-negotiable backpacking safety gear list now: proper weather protection, insulation layer, navigation tools, and emergency communication. I don’t care if my rain jacket weighs 12 ounces instead of 6. Keeping dry in bad weather isn’t optional.
For comprehensive safety planning, Safety essentials for backpackers from She Dreams of Alpine provides excellent guidance on essential gear.
Same with my puffy jacket. That 10-ounce down layer has saved my butt more times than I can count.
The PLB (personal locator beacon) debate used to bug me because they weigh 5-7 ounces. But after a close call with a twisted ankle 15 miles from the nearest road, I carry one on any solo trip longer than two days.
Yeah, it’s heavy by ultralight standards. But being able to call for help when cell service doesn’t exist is worth every ounce.
Risk Assessment Protocols
Risk assessment became way more important once I started pushing into more remote areas with less gear. I’ve learned to ask myself some hard questions before every trip: What’s the weather window? How far am I from help? What are the real consequences if something goes wrong?
If the answers make me uncomfortable, I either add safety gear or pick a different route.
Weather Contingency Planning
Weather protection planning with minimal gear requires actually understanding your limitations, not just hoping for the best. I now carry a simple weather radio that weighs 3 ounces. It gives me real-time updates when I’m in questionable conditions.
Cost me $25 and has probably saved me from getting caught in severe weather at least three times.
My emergency shelter setup is just a 2-ounce emergency bivy and some paracord. But I’ve tested it in my backyard during nasty weather to make sure it actually works. Too many ultralight hikers carry survival gear they’ve never used. That’s not being prepared, that’s just carrying dead weight with a false sense of security.
First Aid Kit Optimization
First aid kit optimization was probably the hardest thing to get right. My original kit weighed almost 2 pounds and had stuff for performing surgery in the wilderness skills setting. My current setup weighs 4 ounces. It focuses on the most likely scenarios: blisters, cuts, sprains, and basic pain management.
Here’s what actually makes it into my ultralight first aid kit: medical tape, gauze pads, antiseptic wipes, ibuprofen, antihistamine, and a few bandaids. I replaced the heavy scissors with a tiny razor blade. I use duct tape (which I carry anyway for gear repairs) instead of medical tape for most applications.
Emergency Preparedness Philosophy
The key insight was realizing that most serious wilderness injuries require evacuation anyway. My first aid kit needs to handle minor issues and stabilize major ones until help arrives, not perform miracles. If someone breaks a leg 10 miles from the trailhead, no amount of medical supplies in my pack is going to fix that problem.
Knowledge weighs nothing, though. I invested in a wilderness first aid course that taught me how to improvise with minimal supplies. Turned out I could handle most situations with basic items plus some creativity.
Your trekking poles make great splints. Your pack can stabilize injuries. Even your merino wool base layers can serve as bandages in emergencies.
When Not to Go Ultralight
The hardest lesson was learning when ultralight approaches just aren’t appropriate. Early season hiking with unstable weather? I bring extra layers and don’t worry about the weight penalty.
Solo hiking in remote areas? Emergency communication gear is mandatory. Brand new trail I’ve never hiked before? Maybe I carry a little extra water and food just in case.
Being smart about ultralight hiking means knowing when to compromise on weight for legitimate safety reasons. You don’t just cut everything blindly to hit some arbitrary base weight number. These ultralight backpacking tips must always prioritize safety over weight savings.
Building Your Ultralight Mindset and Skills
Mental Preparation for Minimalism
The mental shift to ultralight hiking honestly broke my brain a little bit at first. I was so used to having a solution in my pack for every possible scenario. Carrying less felt like showing up to a test without studying.
Understanding the psychological aspects is crucial – The Trek’s mental approach to ultralight backpacking offers valuable insights into this mindset shift.
My gear closet was basically a sporting goods store. Suddenly I’m supposed to hit the trail with what looks like a day pack? Took me a solid year to stop second-guessing every decision.
The breakthrough came during a solo trip in the Adirondacks. I realized I’d been hiking for three days without reaching for half the stuff in my pack. That heavy camp chair I’d carried for 20 miles? Never used it.
Extra pair of pants? Didn’t need them. Backup headlamp? My primary one worked fine. It was like carrying around anxiety in physical form.
Developing Essential Outdoor Skills
Developing wilderness skills became way more important once I couldn’t just pack my way out of problems. I had to actually learn how to set up a tarp properly instead of relying on a foolproof tent. Navigation skills became critical when I stopped carrying a GPS unit and backup maps for every possible route variation.
For comprehensive skill development, Backpacker’s ultralight backpacking skills and tips covers essential techniques every ultralight hiker should master.
Fire-starting was huge for me. Instead of carrying a heavy camp stove and tons of fuel, I learned to build cooking fires efficiently and safely. Took some practice in my backyard first. Turns out there’s actually technique involved in getting a small fire hot enough to boil water quickly.
Now I can cook a full meal with just some dry wood and a lighter. This saves 6-8 ounces of stove weight.
Community Resources and Learning
The hiking community online saved me from making so many expensive mistakes. Reddit’s r/Ultralight became my daily reading. I learned more from other people’s gear failures than any manufacturer website.
Seeing someone else’s torn rain jacket or broken trekking pole taught me what corners I could cut safely. It also showed me which ones would bite me later.
Local hiking groups were even better though. I found a group of experienced ultralight hikers who did monthly gear shakedown hikes. We’d test new gear and techniques together.
Having someone with 2,000+ trail miles look at your loadout and point out obvious problems is invaluable. Plus, they shared techniques like using trekking poles as measuring sticks for water depth. They showed me how to improvise guy-lines from dental floss.
Gradual Transition Strategies
My gradual transition took about two years, and I’m glad I didn’t rush it. I started by replacing my heaviest items first – tent, sleeping bag, and pack. I kept everything else the same until I got comfortable with the new setup.
Then I tackled smaller items like cook kit, ultralight clothing, and accessories over several more trips.
The biggest mistake I see beginners make is trying to go from 30 pounds to 10 pounds overnight. You end up with gear that doesn’t work together. Or worse, gear you don’t know how to use properly when conditions get challenging.
I recommend dropping 5-7 pounds per season and really learning each piece of new gear before adding more changes.
Advanced Techniques and Skills
Skills development never stops, even after years of ultralight hiking. I’m still learning new techniques for staying warm with minimal insulation. I’m figuring out how to pack my bag for better weight distribution.
Last month I figured out a way to use my rain jacket as an extra insulation layer. I wear it under my puffy, trapping more warm air without carrying additional weight.
Advanced techniques became fun once I got past the basic weight-cutting phase. Things like strategic layering systems where every piece of clothing works with every other piece. Or learning to time your hiking pace with weather patterns so you need less shelter.
Even food timing matters. Eating your heaviest meals first thing in the morning means you’re carrying less weight during the hardest climbing.
Water Source Planning Mastery
Water source planning got really sophisticated too for weekend backpacking and thru-hiking. Instead of carrying 3 liters “just in case,” I learned to read topographic maps well enough to identify every water source along my route.
Now I rarely carry more than 1 liter at a time. This saves 4+ pounds compared to my old paranoid approach.
Building Confidence Over Time
The mental game is ongoing though. Even now, I sometimes catch myself wanting to pack extra stuff “just to be safe.” The difference is I can usually talk myself out of it. I remember all the times I’ve been fine with less gear, not more.
Confidence builds slowly, but it builds through applying these ultralight backpacking tips consistently.
Ultralight philosophy taught me that most of my “needs” were actually just comfort preferences. I could be way more adaptable than I thought. Turns out I didn’t need a pillow if I got creative with my clothes.
I didn’t need camp shoes if I just took care of my feet better with proper hiking socks. The gear was often solving problems I’d created by carrying too much gear in the first place.
Many ultralight backpacking tips from gear reviews and the hiking community helped me understand that the philosophy isn’t about suffering. It’s about efficiency. When you embrace leave no trace principles and focus on hiking gear selection based on actual needs rather than fears, everything becomes clearer.
The ultralight approach works whether you’re doing overnight backpacking, weekend trips, or planning a major thru-hike. These same ultralight backpacking tips apply to trail runners who want to move fast and light. They also work for traditional hikers looking to reduce their pack weight without sacrificing safety.
Conclusion
Ultralight backpacking transforms your relationship with the wilderness. It’s about freedom, efficiency, and pure hiking joy! By implementing these weight-saving strategies and ultralight backpacking tips, you’ll discover that less truly is more.
Start small with one or two changes. Then gradually build your ultralight skills and confidence.
Remember, the goal isn’t to have the lightest pack possible. The goal is to carry exactly what you need for a safe and enjoyable adventure. Every ounce you shed brings you closer to that effortless hiking experience you’ve been dreaming about.
Whether you’re planning weekend backpacking trips or long distance hiking adventures, these ultralight backpacking tips will serve you well on every trail.
The ultralight philosophy embraces efficiency without sacrificing safety or comfort. From selecting the right lightweight hiking boots or trail runners to perfecting your backpack fitting and gear selection, every choice matters.
So grab your scale, audit that gear closet, and start planning your next ultralight adventure. The trails are calling, and now you’re ready to answer with confidence!