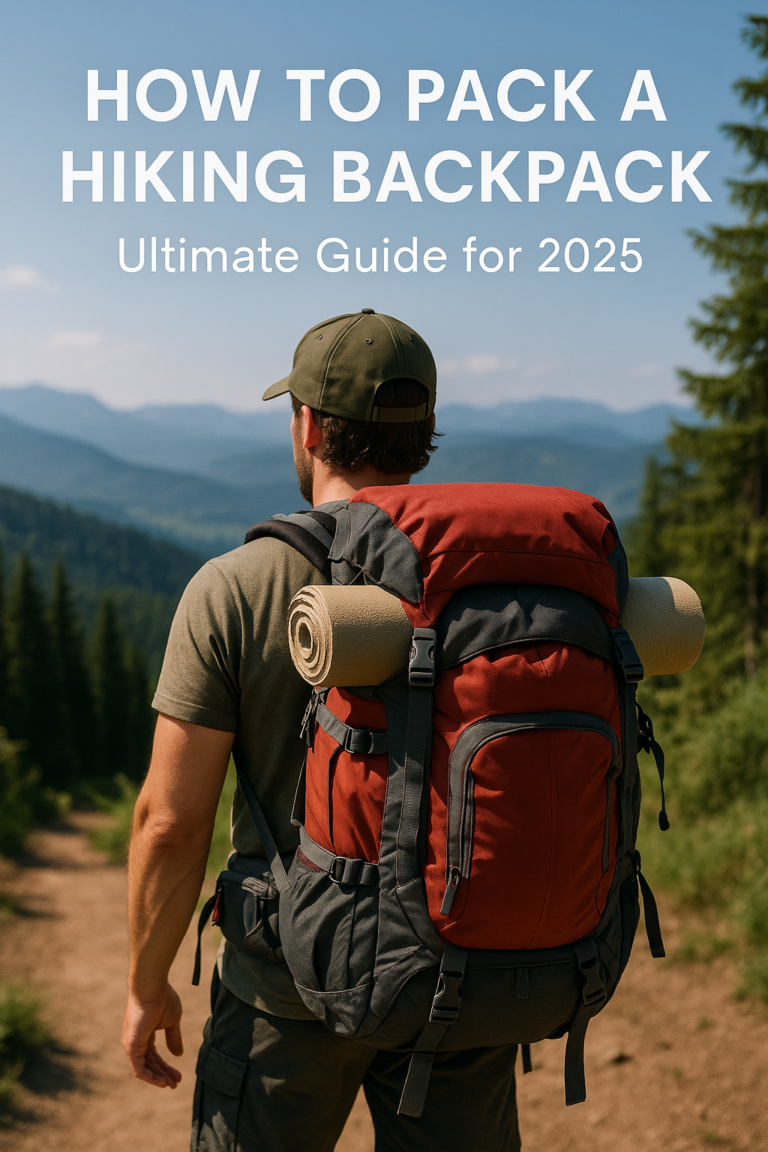
Winter Hiking Equipment: Staying Safe in Cold Weather
Introduction
Did you know that hypothermia can set in when body temperature drops just 2°F below normal? Winter hiking presents incredible beauty—pristine snow-covered landscapes, crisp air, and peaceful solitude that summer trails rarely offer. But venturing into cold weather conditions without proper winter hiking equipment can quickly turn a magical adventure into a dangerous situation!
I’ve learned this lesson the hard way during my years exploring winter trails. The right winter hiking equipment isn’t just about comfort; it’s literally a matter of survival. Whether you’re planning your first snow hike or you’re a seasoned adventurer looking to upgrade your cold weather hiking equipment arsenal, having the proper winter hiking gear can make the difference between an unforgettable experience and a rescue situation.
In this comprehensive winter hiking equipment guide, we’ll cover everything you need to know about selecting, using, and maintaining winter hiking gear that’ll keep you safe, warm, and confident on even the most challenging cold weather trails. From essential winter hiking equipment basics to advanced winter hiking gear, this guide covers the complete winter hiking equipment checklist you need for successful winter adventures.
Essential Winter Hiking Footwear and Traction
Man, I learned about winter hiking equipment the hard way during my first February trek up Mount Washington. My regular hiking boots turned into ice blocks within the first hour, and I spent the rest of that miserable day with numb toes wondering why I hadn’t done my homework first about proper winter hiking boots.
Insulated Hiking Boots: Your Foundation for Winter Adventures
The biggest game-changer in my winter hiking equipment collection was investing in properly insulated hiking boots with waterproof membranes. I now swear by winter hiking boots rated for at least -20°F, though honestly, temperature ratings can be pretty subjective depending on your circulation. My current pair of insulated hiking boots has a Gore-Tex liner and 400g of Thinsulate insulation – sounds fancy, but it basically means my feet stay warm and dry when I’m trudging through snow for hours.
For an expert breakdown of this year’s top-rated winter hiking boots, check out Treeline Review’s guide to the Best Winter Hiking Boots of 2025. Backpacker Magazine also compares some of the best-performing models in their Best Winter Hiking Boots list.
Here’s something I wish someone had told me earlier about winter hiking boot selection: size up by half a size for winter hiking boots. Your feet swell less in cold weather, but you need room for thick sock layers. Plus, tight boots kill circulation, which defeats the whole purpose of insulation in your cold weather hiking equipment.
Microspikes vs. Crampons: Choosing the Right Traction Device
The microspikes hiking versus crampons winter hiking debate used to confuse the hell out of me. After slipping down an icy trail on my butt more times than I care to admit, I figured out the difference in this essential winter hiking equipment. Microspikes hiking are perfect for packed snow and light ice conditions – they’re basically like snow tires for your boots. I use my Kahtoola MICROspikes for about 80% of my winter hikes as part of my core winter trekking gear.
Not sure whether to go with microspikes or crampons? This Reddit hiking gear thread has some great real-world user experiences.
Crampons winter hiking, on the other hand, are serious business. These steel-toothed monsters are what you need for steep, icy terrain or mountaineering. They bite into hard ice like nothing else, but they’re overkill for most winter day hikes. I made the mistake of wearing crampons on a relatively easy trail once and caught them on everything – rocks, roots, even my other leg.
Gaiters for Snow Protection and Warmth Retention
Gaiters winter hiking were another revelation that came way too late in my winter hiking equipment journey. These waterproof sleeves wrap around your lower legs and boot tops, keeping snow from getting inside your boots. I used to come home with soaked socks until I started using knee-high gaiters as part of my essential winter gear. The difference is night and day, especially in deep powder.
Wool and Synthetic Sock Layering Systems
For winter hiking socks, I’ve become obsessed with layering systems. My go-to setup is thin merino wool liner socks underneath thicker wool hiking socks. The liner socks prevent blisters and wick moisture away from your skin, while the outer winter hiking socks provide cushioning and insulation. Avoid cotton socks like the plague – they stay wet and cold, making them terrible for winter hiking equipment systems.
Boot Care and Maintenance in Winter Conditions
Boot maintenance in winter is crucial but often gets overlooked in winter hiking equipment care. I clean my boots after every snowy hike and treat the leather with waterproofing compounds regularly. Salt from roads and trails can really mess up your boots if you don’t stay on top of winter hiking equipment maintenance.
Sizing Considerations for Cold Weather Footwear
Here’s something I wish someone had told me earlier about winter hiking boot selection: size up by half a size for winter hiking boots. Your feet swell less in cold weather, but you need room for thick sock layers. Plus, tight boots kill circulation, which defeats the whole purpose of insulation in your cold weather hiking equipment.
Winter Layering Systems and Clothing
Nothing teaches you about winter hiking equipment faster than being caught in a sudden temperature drop with sweat-soaked cotton against your skin. I remember shivering uncontrollably during what was supposed to be a casual snowshoe hike, realizing I had basically turned myself into a walking refrigerator. That’s when I got serious about understanding how winter hiking clothing systems actually work.
For a full breakdown of winter layering strategy, see Bearfoot Theory’s guide to Cold Weather Hiking Clothes.
Base Layer Materials: Merino Wool vs. Synthetic Options
The whole merino wool versus synthetic debate kept me up at night when I was starting out with winter hiking equipment. After years of trial and error, I’ve landed on this: merino wool for longer trips and synthetic for high-output activities. My Smartwool base layer hiking feels amazing against the skin and naturally resists odor, even after multiple days. But here’s the thing – they’re pricey and take forever to dry.
Synthetic base layers like polyester blends dry super fast and cost way less as part of your winter hiking clothes. I reach for my Patagonia Capilene when I know I’ll be working up a serious sweat on steep climbs. The downside? They can get pretty funky after a day of hard hiking, and the smell seems to stick around even after washing.
Weight matters more than I initially thought in winter hiking layering. Lightweight base layers work great for most winter hiking, but I switch to midweight options when temperatures drop below 20°F or I’m dealing with high winds in my cold weather hiking clothes.
REI also has a great walkthrough on how to layer clothes for cold weather hiking. If you want a deeper dive into why certain layers work better, REI’s layering science article is a solid reference.
Insulating Middle Layers: Down vs. Synthetic Insulation Pros and Cons
This is where I made some expensive mistakes early on with my winter hiking equipment. Down insulation is absolutely incredible when it stays dry – my 800-fill down winter hiking jacket feels like wearing a cloud and packs down to nothing. But get it wet and you might as well be wearing a soggy towel. I learned this lesson during a freezing rain situation in the White Mountains.
Synthetic insulation doesn’t compress as well and weighs more, but it keeps you warm even when damp. My Patagonia Nano Puff has saved my butt more times than I can count when conditions got dicey. The newer synthetic fills like PrimaLoft Gold are getting pretty close to down’s warmth-to-weight ratio in winter hiking equipment.
Here’s my current strategy for winter hiking clothes: down for cold, dry conditions and synthetic for everything else. I also layer different weights – sometimes a lightweight synthetic vest under a down jacket works better than one thick layer in my winter hiking clothing system.
Waterproof and Breathable Outer Shell Selection
Shell jackets were probably my biggest learning curve in winter hiking equipment. I went through three different jackets before understanding that “waterproof” and “breathable” are often at odds with each other in cold weather hiking clothes. My first jacket was basically a plastic bag that kept me dry but turned me into a sweat factory.
Gore-Tex still seems to be the gold standard for winter hiking jacket materials, though it’s expensive as hell. My current Arc’teryx shell has held up through some brutal conditions, but I paid almost $500 for it. For most day hikers, something like a Patagonia Torrentshell gets the job done at a fraction of the cost as part of your essential winter gear.
Pit zips are non-negotiable for me now in winter hiking clothes. Being able to dump heat quickly without taking off layers has prevented so many uncomfortable situations with my winter hiking equipment.
Winter Hiking Pants and Leg Protection Strategies
Legs are tricky because they generate a lot of heat but also take a beating from wind and snow. I typically wear softshell winter hiking pants over lightweight base layer bottoms for most winter hikes. Softshells block wind and light precipitation while still breathing reasonably well in your winter hiking clothing system.
For really nasty weather, I throw waterproof shell pants over the whole system. They’re loud and not super comfortable, but they keep you dry when breaking trail through deep snow or dealing with freezing rain.
Hand and Head Protection: Gloves, Mittens, and Hat Systems
Hands are where I’ve made some of my dumbest mistakes with winter hiking equipment. Winter hiking gloves versus mittens isn’t really a debate – mittens are warmer because your fingers share heat, but gloves give you dexterity. I usually start with liner gloves, add insulated gloves over them, and bring waterproof shell mittens for emergencies as part of my cold weather hiking equipment.
Head protection is easier but just as critical in winter hiking equipment. A simple wool winter hiking hat covers most situations, but I always pack a balaclava for windy conditions. You lose a ridiculous amount of body heat through your head and neck without proper winter hiking accessories.
Emergency Clothing Items Every Winter Hiker Needs
This is the winter hiking equipment that sits in your pack most of the time but saves your life when things go sideways. Emergency bivy sacs weigh almost nothing but can prevent hypothermia if you get stuck overnight. I also carry an extra insulation layer that never comes out unless it’s a real emergency – usually a lightweight synthetic jacket as part of my emergency winter hiking gear.
Chemical hand warmers are cheap insurance in your winter hiking equipment. They don’t last super long, but they buy you time to get to safety if your regular system fails.
Navigation and Safety Equipment
I’ll never forget the panic I felt when my phone died at 15% battery on a white-out day in the Adirondacks. What should’ve been a simple loop hike turned into a four-hour navigation nightmare because I’d gotten lazy about bringing backup systems. That day taught me that winter doesn’t mess around when it comes to winter hiking equipment failure.
You can also use AMC’s Essential Winter Hiking Gear List to cross-check your packing. The Adirondack Mountain Club also offers a solid list for shorter winter day hikes. For government-backed winter hiking tips, the U.S. National Park Service has an excellent safety primer.
GPS Devices and Smartphone Protection in Cold Weather
Cold weather absolutely destroys battery life – it’s not just your imagination. Lithium-ion batteries can lose 50% of their capacity when temperatures drop below 20°F. I learned this the hard way when my iPhone went from 60% to dead in what felt like minutes during a February hike.
Now I keep my phone in an inside chest pocket close to my body heat, and I always bring a power bank that I also keep warm as part of my winter hiking equipment. Those little hand warmer packets work great for keeping electronics functional in a pinch. I wrap them around my phone or GPS winter hiking unit when things get really cold.
Garmin GPS units seem to handle cold better than phones, but they’re not immune. My eTrex has crapped out on me twice in sub-zero conditions. The trick is to let them warm up gradually – bringing a frozen device into a warm environment too quickly can cause condensation inside the unit.
Touchscreens become basically useless with gloves on, which is why I love my old-school Garmin with physical buttons. Yeah, it looks like it’s from 2005, but it works when I need it most as reliable winter hiking navigation equipment.
The American Hiking Society’s Cold Weather Hiking Tips explain how to prevent electronic failures in freezing temps.
Map and Compass Backup Navigation Systems
Paper maps and a compass saved my butt more times than any fancy electronic gadget ever has. They don’t need batteries, they don’t freeze, and they can’t break when you drop them on rocks. But here’s the thing nobody tells you about this essential winter hiking equipment – you actually need to know how to use them properly.
I spent years carrying a compass as a security blanket without really understanding declination or triangulation. Taking a proper land navigation course was one of the best investments I made as a winter hiker. Now I can shoot an azimuth and plot my location even when visibility drops to zero.
Waterproof map cases are essential winter hiking accessories. I’ve watched perfectly good USGS topo maps turn to mush in wet snow. The clear plastic ones work fine, but I prefer the ones with lanyards so I can wear them around my neck.
Emergency Shelter Options: Bivy Sacks and Emergency Tents
Emergency shelter hiking winter are like insurance – you hope you never need them, but you’re screwed without them. I carry different options depending on the trip length and group size. For solo day hikes, a simple emergency bivy weighs almost nothing and can prevent hypothermia if I get injured or lost.
SOL emergency bivies are cheap and compact, but they’re basically one-time use. I’ve upgraded to a proper bivy sack that’s reusable and actually breathable. Yeah, it’s heavier and costs more, but it’s saved me from some miserable nights as crucial winter hiking equipment.
For group situations or longer trips, ultralight emergency tents make more sense. The Rab Latok Mountain tent has gotten me through some gnarly situations. It sets up fast even in high winds and fits two people comfortably.
Snow caves are free shelter if you know how to build them properly, but they take time and energy you might not have in an emergency. Practice this skill on nice days, not when your life depends on it.
Signaling Devices for Winter Rescue Situations
Visibility sucks in winter, which makes signaling way more critical than summer hiking. I always carry multiple signaling options because redundancy saves lives. A simple plastic whistle is lightweight and the sound carries well in cold air, but it requires energy to use when you might be hypothermic.
Personal locator beacons (PLBs) are expensive but they work anywhere with satellite coverage. My ACR ResQLink has a five-year battery life and connects directly to search and rescue services. The newer ones with GPS coordinates make rescues way faster.
Signal mirrors work great on sunny days, but winter often means overcast skies. I still carry one because they weigh nothing, but I don’t count on them as my primary signaling method in my winter hiking equipment.
First Aid Kit Modifications for Cold Weather Injuries
Standard first aid kits don’t cut it for winter conditions. Hypothermia prevention and frostbite prevention are real concerns that require specific supplies and knowledge. I’ve added chemical heat packs, emergency blankets, and glucose tablets to my winter first aid kit.
Medications behave differently in extreme cold. Some pain relievers can become less effective, and liquid medications can freeze. I keep my first aid supplies in an inside pocket when possible.
Treating injuries with numb fingers while wearing gloves is incredibly difficult. I practice basic first aid techniques while wearing winter gloves so I’m not fumbling around during a real emergency with my winter hiking equipment.
Avalanche Safety Gear for Backcountry Winter Hiking
This is serious business that goes way beyond basic winter hiking equipment. If you’re venturing into avalanche terrain, you need proper education first – avalanche safety gear alone won’t save you. I took an AIARE Level 1 course before I felt comfortable carrying avalanche safety equipment.
The holy trinity of avalanche gear is beacon, probe, and shovel. Transceivers like the Ortovox 3+ are digital and easier to use than older analog models, but they require regular practice to stay proficient. Probes need to be at least 240cm long to be effective in most burial scenarios.
Shovels are heavier than people expect, but a good one can mean the difference between a successful rescue and a recovery. The metal blade models work better in hard-packed snow than plastic ones.
But here’s the real talk – if you’re not trained and practiced with this avalanche safety gear, you’re just carrying expensive weight. Take a course, practice regularly, and always check avalanche conditions before heading into the backcountry.
For region-specific advice, the New York State DEC’s Winter Hiking Safety Guide has excellent tips for staying safe in cold-weather backcountry.
Winter Hiking Backpacks and Gear Organization
My first real winter hiking disaster wasn’t from the cold or getting lost – it was from my summer pack completely falling apart during a December trip in Vermont. The zippers froze solid, the hydration tube turned into a useless ice stick, and I couldn’t access any of my winter hiking equipment without taking off my gloves and fumbling around like an idiot. That’s when I realized winter hiking demands a completely different approach to pack selection and organization.
Capacity Considerations for Winter Gear Loads
Here’s the brutal truth about winter hiking equipment – your winter hiking backpack is going to be way heavier and bulkier than summer trips. What used to fit comfortably in a 30-liter daypack now requires at least 45-50 liters. All those extra layers, emergency shelter, and safety gear add up fast in your winter hiking gear.
I made the mistake of trying to cram winter hiking equipment into my regular hiking pack for way too long. Everything was compressed so tight that my down jacket lost its loft, and I couldn’t find anything when I needed it. Now I use a 55-liter winter hiking backpack for day hikes that would’ve been overkill in summer.
The key is getting a pack that can compress down when you don’t need the full capacity. My Osprey Atmos has side compression straps that let me cinch it down for lighter loads, but still expands when I’m carrying overnight gear or group safety equipment.
Volume isn’t everything though – the shape matters too. Tall, narrow packs work better for winter because they don’t catch as much wind, and you’re less likely to snag them on branches when navigating through snow-covered terrain with your winter hiking equipment.
Hydration System Winterization and Insulation
Frozen hydration tubes are the absolute worst part of winter hiking equipment failures. I’ve been there too many times – desperately sucking on a tube that’s turned into a solid ice stick while getting increasingly dehydrated. The solution isn’t rocket science, but it took me forever to figure out the right winter hiking hydration system.
Insulated tube sleeves help, but they’re not magic. I wrap my hydration tube with foam pipe insulation from the hardware store – costs like three bucks and works better than most expensive “winter” tube covers. The key is keeping the tube close to your body heat as much as possible.
Wide-mouth insulated water bottles actually work better than hydration systems in really cold weather as part of your winter hiking equipment. They’re easier to refill, harder to freeze completely, and you can add hot water for extra warmth. I switched to carrying two 32-ounce Nalgenes for most winter trips.
Here’s a trick I learned from a guide in New Hampshire: start your hike with hot water in your bottles. It keeps your hands warm during breaks and takes way longer to freeze than cold water. Plus, you can use them as heat sources in your sleeping bag if you’re camping.
Gear Organization Strategies for Easy Access with Gloves
Trying to dig through a pack while wearing bulky gloves is like trying to perform surgery with oven mitts. Everything in your winter hiking equipment needs to be accessible without removing gloves or taking the pack completely off. This changed my entire approach to winter hiking gear organization.
I use packing cubes now, but not the tiny ones that work for travel. Big, brightly colored cubes that I can grab easily even with thick gloves on. My first aid kit goes in a red cube, electronics in blue, extra layers in yellow. Sounds silly, but when you’re cold and stressed, every second counts with your winter hiking equipment.
Hip belt pockets are absolutely crucial for winter hiking gear organization. I keep hand warmers, lip balm, and snacks in there for easy access. Some packs have removable hip belt pockets that you can take with you during breaks – super handy when you don’t want to set your whole pack down in the snow.
External pockets need to be accessible from the side, not just the top. Top-loading pockets become useless when you’re wearing a helmet or when snow builds up. I specifically chose my current winter hiking backpack because it has large side pockets that I can reach without contorting my body.
External Attachment Points for Winter-Specific Equipment
Winter hiking means carrying snow hiking equipment that doesn’t fit inside your pack. Snowshoes, ice axes, winter hiking poles – all this stuff needs secure attachment points that won’t fail when you’re scrambling over rocks or pushing through thick brush.
Daisy chains and gear loops are your friends, but make sure they’re reinforced. I’ve had cheap gear loops rip off under the weight of wet snowshoes. The loops need to be positioned where they won’t snag on stuff but are still accessible.
Bungee cords work great for compressing bulky gear against the pack, but they can snap in extreme cold. I learned this when my snowshoes went flying down a cliff because a bungee cord shattered like glass. Now I use adjustable straps with buckles as backups for my winter hiking equipment.
Side compression straps aren’t just for making your pack smaller – they’re perfect for securing long items like snowshoes or sleeping pads. Just make sure the straps are long enough to accommodate bulky winter gear.
Pack Material Durability in Cold and Wet Conditions
Cold weather is brutal on pack materials. Zippers seize up, fabric becomes brittle, and waterproof coatings can crack. I’ve been through more packs than I’d like to admit before learning what actually holds up in winter hiking equipment.
Ripstop nylon seems to handle cold better than other fabrics, but it’s not bulletproof. The real killer is the constant freeze-thaw cycle that happens during winter hiking. Water gets into small tears and expands when it freezes, turning tiny holes into major problems.
YKK zippers are worth the extra cost in winter hiking equipment. Cheap zippers fail constantly in cold weather, and there’s nothing more frustrating than a zipper that won’t close when you need to keep your gear dry. I treat all my zippers with zipper wax before winter season starts.
Waterproof ratings matter more in winter because you’re dealing with wet snow that can soak through anything given enough time. My current winter hiking backpack has a 3000mm waterproof rating, which has held up through some pretty nasty conditions.
Weight Distribution Techniques for Snow Hiking
Snow hiking changes everything about how weight affects your movement. The uneven terrain and need for different muscle groups means traditional weight distribution advice doesn’t always apply to winter hiking equipment.
Heavy items still go close to your back, but not as high as summer hiking. A high center of gravity makes you unstable when navigating uneven snow or crossing streams. I keep my heaviest gear in the middle section of my winter hiking backpack now.
Front loading becomes more important in winter because you’re often leaning forward while breaking trail or using adjustable hiking poles winter. A little weight in front pockets helps balance out the load and prevents that backward-pulling feeling.
Hip belts need to be accessible over winter clothing, which means sizing up and getting padded belts that distribute weight over a larger area. Thin hip belts dig in when you’re wearing multiple layers and become really uncomfortable during long days.
The key is testing your loaded pack while wearing all your winter layers before you hit the trail. What feels balanced at home might be completely off when you’re wearing a puffy jacket and shell layer.
Illumination and Power Management
The first time I got caught in complete darkness during a winter hike, my winter hiking headlamp died within twenty minutes of turning it on. What should’ve been a simple navigation back to the trailhead turned into a sketchy, slow crawl using my phone’s flashlight. That night taught me that winter lighting isn’t just about having a light – it’s about having a lighting system that actually works when your life depends on it.
Headlamp Performance in Extreme Cold Temperatures
Cold weather absolutely murders winter hiking headlamp performance, and it’s not just the cold weather batteries. The LED output actually decreases in extreme cold, and plastic housings can become brittle and crack. I’ve watched expensive headlamps fail completely when temperatures dropped below 10°F.
My current go-to is the Petzl Reactik+ because it has a remote battery pack that I can keep inside my jacket. Keeping cold weather batteries close to body heat makes a huge difference – sometimes doubling the runtime compared to having them exposed on your forehead. The cord between the light and battery pack took some getting used to, but it’s worth the awkwardness.
Beam patterns matter way more in winter than summer. Wide flood beams work better for general navigation in snow because they illuminate the terrain around your feet without creating harsh shadows. Spot beams are great for distance, but they can create a tunnel vision effect that makes you miss obstacles.
Red light modes aren’t just for preserving night vision – they’re also easier on cold weather batteries. I use red light for most camp tasks and save the bright white modes for actual navigation or emergencies.
Battery Life Optimization and Backup Power Solutions
Lithium batteries perform way better in cold than alkalines, but they’re also more expensive. I learned this lesson after alkalines died in less than an hour during a February overnight trip. Now I only use lithium AAs for winter activities, and I always carry twice as many as I think I’ll need for my winter hiking equipment.
Rechargeable batteries are tricky in winter. NiMH rechargeables lose capacity fast in cold weather, but lithium-ion ones hold up better. The problem is you need a way to charge them, which brings us to power banks.
I keep power banks inside my jacket during the day and sleep with them in my sleeping bag at night. A cold power bank is basically useless – the internal resistance goes up and the voltage drops. My Anker 10000mAh pack will fully charge my winter hiking headlamp about eight times when it’s warm, but only twice when it’s been sitting in the cold.
Here’s a trick I picked up from ice climbers: carry spare cold weather batteries in a small plastic bottle inside your jacket pocket. Body heat keeps them at optimal temperature, and the bottle protects them from moisture.
LED vs. Other Light Technologies for Winter Conditions
LEDs are pretty much the only game in town now, but not all LEDs are created equal. Cheap LEDs can shift color temperature in extreme cold, making everything look weird and affecting your depth perception on snow. Higher-quality LEDs maintain consistent color output.
Newer high-CRI LEDs are worth the extra cost for winter hiking. They render colors more accurately, which helps you distinguish between ice, wet rock, and snow – potentially life-saving information when you’re navigating technical terrain.
Some headlamps now have warm and cool LED options. Cool white (around 6000K) cuts through fog and haze better, while warm white (3000K) is easier on your eyes during long periods of use. I prefer lights that let me switch between both.
Multiple LED arrays are becoming more common, and they’re great for winter use. If one LED fails, you still have backup light from the same unit. My Black Diamond Storm has a main LED plus four smaller flood LEDs that work independently.
Hands-Free Lighting Options for Technical Terrain
Chest-mounted lights changed my winter hiking game completely. Having light come from your chest instead of your head eliminates the head-bobbing shadows that make it hard to judge terrain. It also means your light doesn’t move every time you look around.
I use a combo setup now – winter hiking headlamp for general use and a chest light for technical sections or when I need to work with my hands. The chest light stays pointed where I’m going regardless of where I’m looking.
Helmet-mounted lights are worth considering if you’re doing any real mountaineering or ice climbing. They’re more secure than headlamps and usually have better mounting systems. Just make sure the mounting hardware doesn’t become brittle in cold weather.
Lanterns might seem old-school, but they’re actually great for camp use in winter. They provide 360-degree lighting that’s way better for setting up shelters or cooking. Just don’t rely on them for navigation – they eat batteries fast and don’t provide directional light.
Solar Charging Limitations and Alternative Power Sources
Solar panels are basically useless for winter hiking in most conditions. Short daylight hours, low sun angles, and frequent cloud cover mean you’ll get minimal power even from high-efficiency panels. I tried carrying a 21-watt solar panel on a week-long winter trip and got maybe two phone charges out of it.
The bigger problem is that solar panels need to be positioned toward the sun, which means stopping frequently to adjust them. When you’re trying to cover ground in limited daylight, those stops add up fast.
Hand-crank generators work better than solar in winter, but they’re heavy and require effort when you might already be tired. I have a small one for emergencies, but it’s not practical for regular use.
The most reliable backup power source is still extra cold weather batteries kept warm. They’re lightweight, predictable, and don’t depend on weather conditions or your energy level.
Emergency Lighting Backup Systems
Redundancy is everything for emergency lighting. I carry three different light sources minimum – primary winter hiking headlamp, backup headlamp, and emergency light source. This sounds excessive until you’re in a situation where your primary light fails and your backup has dead batteries.
Chemical light sticks are underrated for emergency situations. They work in any temperature, can’t break from drops, and provide light for hours without any power source. They’re not bright enough for navigation, but they’ll keep you from walking off a cliff while you sort out your main lighting.
Emergency candles serve double duty – light and heat. A single candle can provide enough light to find gear in your pack and enough heat to warm your hands. I carry a few tea candles in a small metal tin that doubles as a reflector.
Backup lighting systems need to be accessible even when your main pack is buried or lost. I keep a small LED light on my keychain that lives in my pocket, plus a small light attached to my jacket zipper pull. These might seem like overkill, but they’ve literally saved my ass when everything else went wrong.
The key is testing your entire lighting system before you need it. Run through scenarios where your primary light fails, your backup batteries are dead, and your power bank is frozen. What’s your plan then? Because winter doesn’t care about your Plan A when things go sideways.
Food, Water, and Nutrition Systems
My understanding of winter hiking nutrition got a reality check during a brutal February hike in the Green Mountains. By mile four, I was shivering uncontrollably despite wearing every layer I’d brought. Turns out I’d barely eaten 800 calories while my body was burning through 3,500+ just trying to stay warm. That day taught me that winter hiking food isn’t just about preventing hunger – it’s literally fuel for your internal furnace.
Caloric Requirements for Cold Weather Hiking
Winter hiking torches calories like nothing else. Your body burns extra energy just maintaining core temperature, plus you’re working harder to move through snow and carry heavier gear. I used to think 2,500 calories was plenty for a day hike, but I’ve learned to pack closer to 4,000 calories for full winter days with high calorie hiking snacks.
The math gets crazy when you break it down. Just shivering can burn an extra 400 calories per hour. Add in breaking trail through knee-deep snow, and you’re looking at 600-800 calories per hour of hiking. I started tracking this stuff after too many bonk sessions left me feeling like garbage.
Fat becomes your best friend in winter because it provides more than twice the calories per gram compared to carbs or protein. I aim for about 40% of my calories from fat during winter trips, which is way higher than my summer ratio. Nuts, cheese, and chocolate become staples instead of treats.
Timing matters too. I eat something every 30-45 minutes now, even if I don’t feel hungry. Once you get behind on calories in cold weather, it’s really hard to catch up. Your body starts shutting down non-essential functions, and your decision-making goes to hell.
Water Bottle Insulation and Freeze Prevention Techniques
Frozen water bottles were the bane of my early winter hiking experience. Nothing’s more frustrating than carrying three pounds of ice when you’re desperately thirsty. The solution isn’t just better bottles – it’s a whole winter hiking hydration system approach.
Wide-mouth Nalgenes work way better than narrow bottles because they’re harder to freeze completely and easier to break up ice if they do freeze. I fill mine only about 80% full to allow for expansion. Learned that lesson after a completely frozen bottle cracked and leaked all over my sleeping bag.
Insulated water bottle sleeves help, but the real trick is starting with hot water. I fill my bottles with near-boiling water before heading out, and they stay liquid way longer than starting with cold water. Plus, hot bottles double as hand warmers during breaks.
Keeping bottles close to your body works, but it’s not always practical. I tried the inside-jacket method for a while, but having two pounds of water bouncing around inside my coat was miserable. Now I use insulated water bottle sleeves and keep them in side pockets where they get some warmth from my body.
Salt water freezes at lower temperatures, so adding a tiny bit of salt to your water can prevent freezing. Just a pinch – you don’t want to be drinking seawater. Some people use sports drink powder for the same effect, plus you get electrolytes.
Thermos and Hot Beverage Systems for Warmth
A good thermos hiking completely changed my winter hiking experience. Hot beverages aren’t just psychologically warming – they actually deliver heat directly to your core faster than any external heat source. My Stanley vacuum bottle keeps coffee hot for 12+ hours, which means I can have a warm drink even at the end of a long day.
Hot chocolate becomes a legitimate piece of safety equipment in winter. The sugar provides quick energy, the warmth helps prevent hypothermia, and the psychological boost is huge when you’re cold and miserable. I make mine extra rich with whole milk powder and real chocolate.
Soup in a thermos is even better for longer trips. It provides calories, warmth, and salt all in one package. I pre-heat the thermos with boiling water, dump it out, then fill it immediately with hot soup. This keeps it warmer longer.
Here’s something I learned from winter camping gear experience: pre-warming your thermos makes a huge difference. Fill it with boiling water, let it sit for a few minutes, then dump it out and add your actual beverage. The extra step keeps drinks hot for hours longer.
High-Energy Winter Hiking Snacks and Meals
Winter snacks need to be calorie-dense and accessible with gloves on. Energy bars become rock-hard in cold weather and impossible to bite. I switched to softer options like dates stuffed with nuts, or I keep bars inside my jacket to keep them from freezing as part of my winter hiking food strategy.
Nuts and seeds are perfect winter foods – high in fat, compact, and they don’t freeze into inedible chunks. I make trail mix with about 60% nuts, 30% dried fruit, and 10% chocolate. The fat content is way higher than summer mixes, but that’s exactly what you need for high calorie hiking snacks.
Chocolate deserves special mention because it provides quick energy and stays relatively soft in cold weather. Dark chocolate works better than milk chocolate because it doesn’t melt as easily when you bring it inside to warm up. I go through way more chocolate in winter than I’d like to admit.
For longer trips, I’ve gotten into making my own energy balls with dates, nuts, coconut oil, and protein powder. They pack tons of calories into small packages and stay soft even when cold. Way better than commercial energy bars that turn into hockey pucks.
REI’s full Winter Camping Gear Checklist includes tips for food, stoves, and staying hydrated in snow conditions.
Cooking Equipment for Winter Camping Scenarios
Winter cooking is a whole different beast from summer backpacking as part of your winter camping gear. Canister stoves become unreliable below 20°F because the fuel doesn’t vaporize properly. I learned this during a car camping trip when my trusty canister stove wouldn’t light despite being brand new.
Liquid fuel stoves work way better in cold weather as essential snow camping equipment. My MSR WhisperLite Universal runs on white gas, and it fires up even in sub-zero temperatures. The downside is they’re heavier and require more maintenance, but reliability trumps convenience when it’s really cold.
Wind screens become absolutely critical in winter camping gear. Even a light breeze can make cooking impossible and waste tons of fuel. I use a three-panel aluminum windscreen that weighs almost nothing but makes cooking actually possible in breezy conditions.
Insulating your stove from snow makes a huge difference in fuel efficiency. I carry a small piece of closed-cell foam to put under my stove. Snow conducts heat away from the stove base and makes everything way less efficient.
Food Storage Considerations in Cold Temperatures
Food storage gets weird in winter because some things freeze that you don’t expect, while others stay surprisingly soft. Cheese freezes solid and becomes crumbly when it thaws. Bread turns into concrete. But peanut butter stays spreadable even when it’s pretty cold.
I’ve started pre-portioning winter hiking food into daily bags that I keep inside my jacket during the day. This keeps everything at a reasonable temperature and makes it way easier to eat without stopping for long periods. Plus, it’s easier to track calories when everything’s pre-measured.
Frozen energy bars are basically inedible, so I wrap them individually and keep them in inside pockets. Same with any chocolate or gummy snacks. Hard candies actually work better in cold weather than chewy stuff.
For overnight trips, I sleep with my next day’s breakfast inside my sleeping bag. Nothing worse than trying to eat frozen oatmeal or dealing with a fuel bottle that won’t pour because the liquid is too thick. Small things that make a big difference when you’re already cold and tired.
The key is testing your winter hiking food system before you really need it. Try eating your planned snacks when they’ve been sitting in a freezer, cook a meal with your stove when it’s really cold outside. Winter doesn’t give you do-overs when your nutrition system fails.
Conclusion
Winter hiking equipment isn’t just gear—it’s your lifeline to safety and enjoyment in some of nature’s most spectacular but unforgiving conditions. The investment in quality winter hiking equipment pays dividends in comfort, safety, and confidence on the trail. From essential winter hiking boots and cold weather hiking clothes to advanced winter hiking gear like avalanche safety equipment, each piece of your winter hiking equipment serves a critical purpose.
Remember, the best winter hiking equipment is the gear you know how to use properly! Start with day hikes to test your winter hiking gear systems before committing to longer winter adventures. Each piece of winter hiking equipment should work together as part of a complete system designed to keep you warm, dry, and safe. Whether you’re building your first winter hiking equipment collection or upgrading existing cold weather hiking equipment, focus on quality pieces that integrate well with your winter hiking clothing system.
Your winter hiking equipment checklist should include everything from insulated hiking boots and winter hiking socks to emergency shelter and winter hiking navigation tools. Don’t forget about winter hiking accessories like gaiters winter hiking, winter hiking gloves, and a reliable winter hiking headlamp. The right winter trekking gear can transform a potentially dangerous situation into an unforgettable adventure.
Ready to gear up for your next winter hiking adventure? Start building your winter hiking equipment collection gradually, prioritizing the winter hiking essentials first. Invest in professional winter hiking gear that will last for years, and always remember that your winter hiking equipment is only as good as your knowledge of how to use it. Your future self will thank you when you’re standing on a snow-covered summit, warm and comfortable in your winter hiking clothes, watching the sunrise paint the winter landscape in brilliant colors.
Stay safe, stay warm, and enjoy the incredible world of winter hiking with the right winter hiking equipment!