
Best Hiking Gear of 2025: Complete Guide, All Experience Levels
Introduction
Did you know that over 50 million Americans hit the trails each year, yet nearly 70% head out unprepared with inadequate hiking equipment? Don’t become another statistic! Whether you’re planning your first day hike or gearing up for a multi-day backpacking adventure, having the right outdoor gear can make the difference between an unforgettable experience and a dangerous disaster. I’ve spent countless hours on trails from the Appalachian Mountains to the Pacific Crest Trail, and I’m here to share the game-changing best hiking gear that’ll keep you safe, comfortable, and ready for whatever Mother Nature throws your way. Let’s dive into the essential hiking equipment and trail gear that every outdoor enthusiast should have in their wilderness gear arsenal!
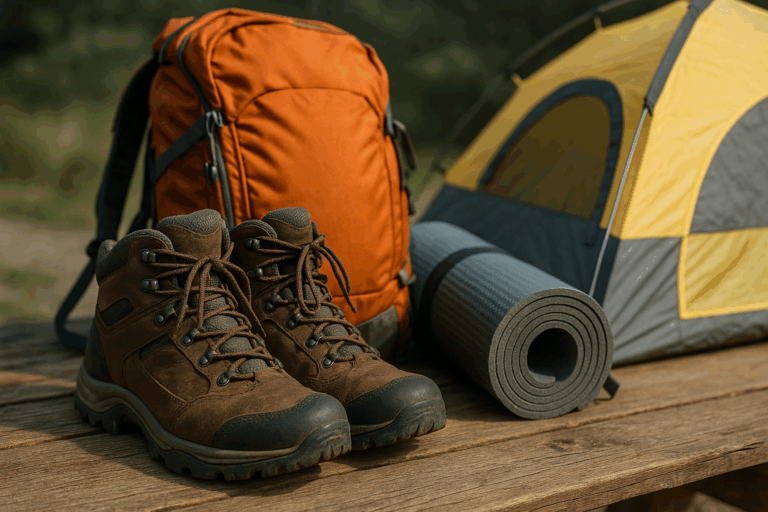
Essential Hiking Footwear: Finding Your Perfect Trail Companion
Man, I cannot tell you how many blisters I’ve nursed because I thought any old sneaker would work on a trail. My first “real” hike was this 8-mile loop in the Smoky Mountains, and I showed up wearing my basketball shoes like some kind of amateur. By mile three, my feet were sliding around, and by mile six, I had blisters the size of quarters.
That painful lesson taught me that hiking footwear isn’t just about looking the part – it’s literally the foundation of every step you take out there.
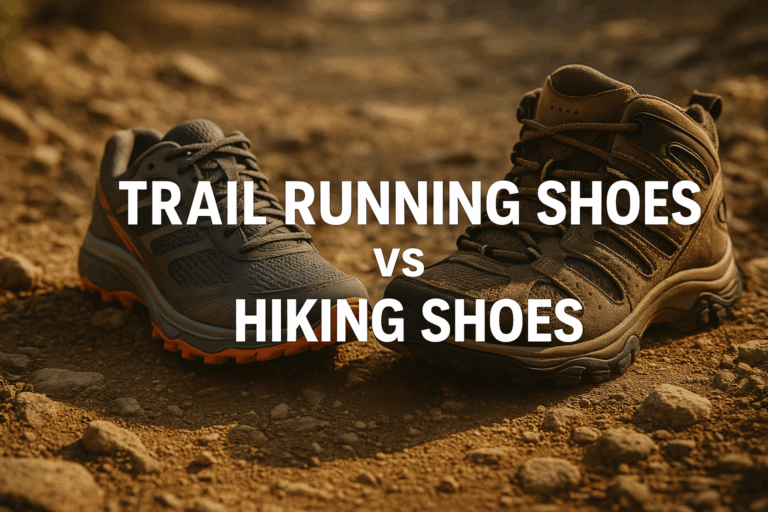
Trail Running Shoes vs. Hiking Boots vs. Hiking Sandals
Let’s start with the big three types of trail shoes, because honestly, I used to think hiking boots were just hiking boots. Trail running shoes are your lightweight option, usually weighing between 1-2 pounds per pair. I love these for day hikes under 10 miles, especially when the weather’s nice and the terrain isn’t too gnarly. They breathe well, dry fast, and don’t make you feel like you’re wearing cement blocks.
Hiking boots are the workhorses of the best hiking gear category. Mid-cut or high-cut designs that typically weigh 2-4 pounds per pair. These babies saved my ankles more times than I can count, especially on that sketchy descent down Angel’s Landing where loose scree was everywhere. The ankle support is no joke when you’re carrying a heavy pack or dealing with uneven terrain.
Then there’s hiking sandals, which I’ll admit I was skeptical about for years. But after trying a pair of Chacos on a desert hike in Utah, I’m a convert for certain conditions. They’re perfect for stream crossings, hot weather hikes, and honestly, they’re what I reach for on easy trails now.
Key Features to Look For in the Best Hiking Gear
Here’s what I wish someone had told me about key features before I wasted money on three different pairs of boots. Waterproofing sounds great until you realize it often means less breathability. I learned this the hard way during a humid summer hike in North Carolina where my “waterproof” boots turned into swamp containers. Now I look for water-resistant uppers instead, unless I know I’ll be dealing with snow or serious stream crossings.
Traction is huge, and I mean the actual tread pattern and rubber compound. Vibram soles are pretty much the gold standard – they grip wet rocks better than anything else I’ve tried. I still remember slipping on wet granite in Yosemite with cheap boots and nearly taking a tumble that would’ve ruined more than just my pride.
Top-Rated Hiking Boot Brands and Recommendations
For brands in the outdoor gear world, I’ve put serious miles on Merrell, Salomon, and Keen boots. My current go-to’s are the Merrell Moab 3 Waterproof for all-around hiking and Salomon X Ultra 3 GTX when I need something more aggressive. Both have held up through hundreds of miles and multiple resoling jobs, making them part of my best hiking gear collection.
Proper Sizing and Break-In Techniques
The biggest mistake people make? Buying boots that fit in the store. Your feet swell during long hikes, so size up a half-size and make sure you’ve got thumb-width space in front of your longest toe. Trust me on this one – cramped toes on mile 12 will make you question all your life choices.
Break-in is real, even with modern boots. Wear them around the house first, then on short walks, then day hikes before attempting anything serious. I once tried to break in new boots on a 15-mile backpacking trip and paid for it with three lost toenails.
When to Replace Your Hiking Shoes
Replace your boots when the tread is worn smooth, the midsole feels compressed, or you start getting foot fatigue earlier than usual. Most hiking boots are good for 500-1000 miles depending on terrain and your hiking style.
Backpack Basics: Choosing the Right Pack for Your Adventure
I’ll never forget my first overnight backpacking trip where I showed up with this ancient hand-me-down pack that probably weighed more empty than my friend’s loaded outdoor backpack. No joke, this thing was like carrying a medieval torture device on my back. By hour two, my shoulders were screaming, and I kept having to stop every twenty minutes to readjust straps that seemed designed to cut off circulation.
That disaster taught me that your hiking backpack is basically your best friend on the trail – or your worst enemy if you choose poorly.
Daypack vs. Multi-Day Backpack Capacity
Let’s talk capacity first, because I used to think bigger was always better. Daypacks typically run 20-35 liters, which is plenty for most day hikes. I’ve got a trusty 28-liter daypack that holds my water, snacks, first aid kit, extra layers, and still has room for whatever random trail gear I pick up along the way. For overnight trips, you’re looking at 40-60 liters, and for extended backpacking, 60+ liters depending on how much backpacking supplies you’re hauling.
Here’s where I messed up initially – I bought a 65-liter pack for day hikes because I thought I needed the space. Wrong move. Bigger packs encourage you to bring more hiking accessories you don’t need, plus they just feel bulky and awkward when they’re not properly loaded.
Essential Backpack Features
Hydration compatibility was a game-changer for me in the best hiking gear category. My current pack has this sleeve specifically for hydration bladders, with a port for the drinking tube. No more stopping to dig out water bottles every ten minutes. I can sip hands-free while hiking, which keeps me way more hydrated than I used to be.
Organization pockets are clutch, and I learned this after spending fifteen minutes digging through my main compartment looking for my headlamp at dusk. Good packs have hip belt pockets for snacks and phone, side pockets for water bottles, and a top lid pocket for trail accessories you need quick access to. Some even have sleeping bag compartments at the bottom, which is brilliant for multi-day trips.
Load Distribution and Weight Management
Load distribution is probably the most important feature nobody talks about enough. The hip belt should carry about 80% of the weight, not your shoulders. I used to think those padded hip belts were just for comfort, but they’re actually doing the heavy lifting. Once I learned to properly adjust my pack so the weight sat on my hips, hiking became so much more enjoyable.
Best Hiking Backpack Brands and Budget Options
For brands, Osprey and Gregory have never let me down in the outdoor equipment world, though they’re pricier. My Osprey Atmos 65 has been through hell and back – multiple resole jobs on my boots, but this pack still looks practically new. REI Co-op makes solid budget alternatives that I’ve recommended to friends who weren’t ready to drop $200+ on their first piece of best hiking gear.
Kelty and Deuter are also worth checking out. Kelty’s great for beginners because their packs are straightforward without too many bells and whistles that can confuse new hikers looking for their first outdoor backpack.
Proper Packing Techniques
Packing technique matters more than most people realize. Heavy stuff goes close to your back and centered between your shoulder blades. I used to throw everything in randomly and couldn’t figure out why my pack felt so unstable. Now I pack my tent and sleeping bag at the bottom, heavy items like food and water in the middle against my back, and lighter hiking accessories toward the outside.
Keep your pack balanced side-to-side too. Nothing worse than feeling like you’re gonna tip over on every switchback because you loaded all your water bottles on one side.
Backpack Maintenance and Care
Maintenance is simple but important. I air out my pack after every trip, spot clean with mild soap when needed, and store it loosely packed so the zippers don’t get stressed. Also, don’t machine wash these things – the waterproof coatings don’t appreciate it, and neither do the buckles.
The investment in good outdoor gear pays off quickly when you’re not miserable on the trail.
Clothing and Layering Systems: Dress for Trail Success
Cotton kills – that’s what my hiking mentor told me after I showed up to a fall hike in North Carolina wearing a cotton hoodie and jeans. Three hours in, when the temperature dropped and a light drizzle started, I was soaked, cold, and basically useless. My cotton hiking clothes held every drop of moisture like a sponge, and I spent the rest of that hike shivering while my buddy stayed comfortable in his fancy synthetic layers.
That miserable experience became my crash course in the three-layer system, which honestly isn’t as complicated as outdoor clothing companies make it seem.
The Three-Layer System Explained
Your base layer is all about moisture management in the best hiking gear system. This sits right against your skin and moves sweat away from your body. I’ve tried everything from cheap polyester shirts to high-end merino wool base layers, and both work, just differently. Synthetic base layers dry faster and cost less, but they can get pretty funky after a few miles. Merino wool costs more but naturally resists odors – I can wear the same merino shirt for three days without offending fellow hikers.
The insulating layer is your warmth generator. Fleece jackets, down vests, synthetic puffy jackets – this layer traps warm air around your body. My go-to is a lightweight fleece because it’s versatile and still insulates even when damp. Down is warmer for the weight, but if it gets wet, you’re basically wearing a soggy pillow.
Best Hiking Pants and Shorts
For hiking pants, I’ve gone through way too many pairs trying to find the sweet spot in outdoor apparel. Synthetic blend hiking pants with some stretch work best for me – they dry fast, move with you, and don’t restrict your stride on steep scrambles. I love my Prana Stretch Zion pants for most conditions. They’ve got this great fabric that feels almost like regular pants but performs way better.
Shorts are trickier than you’d think. Cheap athletic shorts ride up and chafe like crazy after a few miles. I learned to look for 7-inch inseams with built-in liner shorts. Patagonia Baggies are my summer standard – they look casual enough for town but handle trail abuse without complaint.
Moisture-Wicking Materials and Performance
The outer shell protects you from wind and rain. This took me forever to figure out because I kept buying those cheap rain jackets that turned me into a walking greenhouse. Good shells breathe while keeping water out, though that balance is tricky. My current shell is a Patagonia Torrentshell that’s held up through dozens of storms and is definitely part of my best hiking gear collection.
Sun Protection Clothing and UV-Resistant Fabrics
Sun protection became a real priority after I got absolutely torched on a desert hike in Arizona. I’m talking lobster-red despite sunscreen. Now I wear long-sleeve shirts with UPF ratings when the sun’s intense. The fabric itself blocks UV rays, which is way more reliable than remembering to reapply sunscreen every two hours.
Cold Weather Hiking Gear
Cold weather outdoor gear is where things get expensive fast, but it’s worth investing in quality pieces. I’ve got a synthetic insulated jacket that’s been my lifesaver on countless winter hikes. Synthetic insulation works better than down in wet conditions, which is important where I hike since weather can change fast.
Quick-Dry Fabrics vs. Merino Wool
The merino wool versus synthetic debate is real in the hiking clothes world. Merino feels amazing against your skin and naturally fights odors, but it’s fragile and expensive. I’ve torn more merino shirts on thorny bushes than I care to admit. Synthetic fabrics are tougher and dry faster, but they can get pretty rank after long days.
My compromise? Merino base layers for multi-day trips where odor matters, synthetic for day hikes where durability and quick-drying are more important.
Here’s what nobody tells you about layering – you’ll be constantly adding and removing layers throughout the day. Start cool when you begin hiking because you’ll warm up fast. I used to overdress and end up sweating through everything in the first mile.
Also, avoid cotton anything. Cotton hiking socks, cotton underwear, cotton t-shirts – they all become problems when wet. The only cotton I bring is maybe a bandana, and even that’s usually synthetic now.
One last tip that took me years to learn: bring one extra layer beyond what you think you need. Weather changes fast in the mountains, and being slightly overdressed is way better than being dangerously cold.
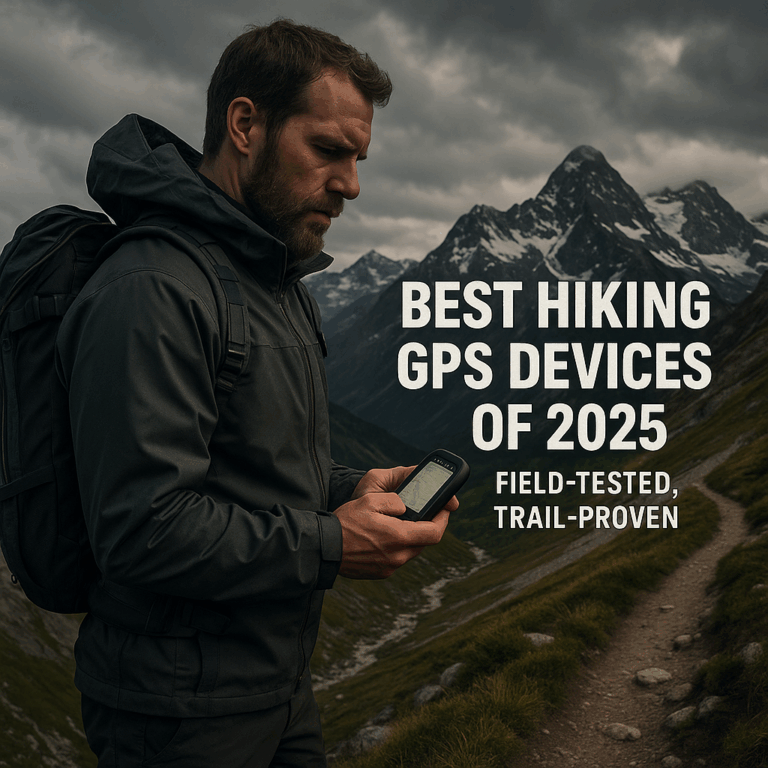
Navigation and Safety Equipment: Never Lose Your Way
I got legitimately lost for about four hours on what was supposed to be a simple day hike in Olympic National Park, and it scared the hell out of me. My phone had died, I didn’t have backup navigation tools, and the trail just seemed to vanish into a maze of elk paths. I ended up backtracking for miles until I found familiar landmarks, but those four hours taught me more about hiking safety gear than any blog post ever could.
Now I’m that guy who probably overplans navigation, but I sleep better at night knowing I won’t repeat that mistake.
GPS Devices vs. Smartphone Apps vs. Traditional Compass
GPS devices versus phone apps is this ongoing debate in the outdoor equipment world. Honestly, I use both. My Garmin eTrex has saved my butt multiple times when cell service disappeared, which happens more often than people think. These dedicated GPS units hold battery for days, work in any weather, and don’t care if you drop them on rocks. But they’re clunky and the interface feels like it’s from 2005.
Smartphone apps like Gaia GPS and AllTrails are way easier to use and have better maps, but phones die fast in cold weather and aren’t nearly as durable. I’ve watched too many people freak out when their phone cracked or died halfway through a hike.
My solution? Download offline maps on my phone for the primary navigation, carry a basic GPS unit as backup, and always bring a paper map with compass. Yeah, it sounds like overkill, but getting lost sucks way worse than carrying an extra pound of best hiking gear.
Emergency Whistle and First Aid Kit Essentials
Speaking of compasses, I finally learned to use one properly after years of just carrying it like some kind of good luck charm. Silva and Suunto make solid baseplate compasses that actually work with topographic maps. The key is practicing in familiar areas before you need it for real.
Emergency whistles seem stupid until you need one. Three sharp blasts is the universal distress signal, and that sound carries way farther than your voice when you’re injured or lost. I keep mine attached to my pack’s sternum strap so it’s always accessible.
First aid kits are personal, but here’s what I’ve learned through experience and unfortunately, some accidents. Basic supplies like bandages, antiseptic wipes, pain relievers, and medical tape handle most trail injuries. But add blister treatment – moleskin or blister bandages are lifesavers. I also carry an emergency blanket, not just for warmth but to treat shock if someone gets hurt.
Headlamps and Flashlight Recommendations
Headlamps changed my hiking game completely. I used to carry this heavy flashlight that ate batteries, until I discovered how much better headlamps are for hands-free lighting. Petzl and Black Diamond make bulletproof models that deserve a spot in any best hiking gear collection, but honestly, even basic ones work fine for most hiking.
The key is having backup batteries and knowing your light’s runtime. I learned this during a night hike when my headlamp died with two miles left to go. Now I always carry a small backup light – usually just a tiny keychain LED that weighs nothing.
Emergency Shelter Options
For emergency gear, space blankets are cheap insurance but they’re basically garbage bags that reflect heat. They work, but they’re loud, tear easily, and don’t breathe at all. Bivy sacks are way better – they’re waterproof, breathable, and actually protect you from wind and rain. My SOL Escape Bivvy has kept me warm during several unplanned overnight situations.
Emergency tents are overkill for day hiking, but if you’re doing serious backcountry stuff, they’re worth considering. They set up fast and give you actual shelter, not just a heat-reflecting wrapper.
Personal Locator Beacons and Satellite Communicators
Personal locator beacons are expensive but potentially life-saving for remote hiking. I finally bought a Garmin inReach after a close call on a solo hike where I twisted my ankle badly and realized nobody knew exactly where I was. These devices let you send GPS coordinates to search and rescue, plus they work as satellite communicators for non-emergency check-ins.
The subscription costs are annoying – around $15-50 per month depending on your plan – but it’s cheaper than a helicopter rescue. Some models like the inReach let you send texts to family, which is nice for longer trips where people worry.
Here’s what I wish someone had told me earlier: all this hiking safety gear is useless if you don’t know how to use it. Practice with your GPS at home, test your emergency whistle, set up your bivy in the backyard. When you’re cold, tired, and stressed on the trail isn’t the time to figure out how your gear works.
Also, tell someone your hiking plans and stick to them. All the fancy adventure gear in the world won’t help if nobody knows where to look for you.
Hydration and Nutrition Gear: Fuel Your Adventure
I bonked hard on a 12-mile ridge hike in Colorado – and I mean completely ran out of gas at mile 8 because I’d only brought two granola bars and thought that would somehow sustain me for six hours of climbing. My legs turned to jelly, my brain got foggy, and I had this moment where I genuinely wondered if I’d have to call for help over some basic nutrition planning. That humbling experience taught me that food and water aren’t just comfort items on the trail – they’re essential hiking equipment for safety.
Water Bottles vs. Hydration Reservoirs
Water bottles versus hydration pack systems is this surprisingly heated debate among hikers. I’ve used both extensively, and honestly, each has their place in the best hiking gear arsenal. Nalgene water bottles are bulletproof – I’ve dropped mine off cliffs, frozen them solid, and they keep working. You can see exactly how much water you have left, they’re easy to clean, and you can use them for hot drinks or soup.
But hydration pack reservoirs changed my hiking habits completely. Having that tube right there means I actually drink enough water instead of rationing sips because I’m too lazy to stop and dig out a bottle. I stay way better hydrated with my 3-liter Osprey reservoir than I ever did with bottles.
The downside? Cleaning these things is a pain, and when they fail, they really fail. I had a bladder burst inside my pack once, soaking everything including my sleeping bag. Now I always check the connections before every hike and replace the bladder every couple seasons.
Water Purification Systems
Water purification was something I ignored until I got violently sick from what I thought was clean mountain stream water. Turns out even pristine-looking water sources can harbor giardia and other nasties that’ll ruin your week. Now I never drink untreated water, period.
Sawyer Mini filters are my go-to for day hikes – they’re tiny, light, and screw right onto standard water bottles. For longer trips, I use a Katadyn Hiker Pro because it pumps faster and handles murky water better. Purification tablets work but taste terrible, and UV sterilizers like the SteriPEN are great but need batteries and clear water to work properly.
Pro tip I learned the hard way: always have a backup purification method. Electronics fail, filters can crack, and tablets can get wet.
Energy Bars, Trail Mix, and Lightweight Meals
Trail food took me forever to figure out in my hiking nutrition strategy. Those fancy energy bars cost a fortune and half of them taste like cardboard with chocolate chips. I make my own trail mix now – almonds, dried fruit, dark chocolate pieces, and sometimes beef jerky mixed in. Way cheaper and I actually want to eat it when I’m tired and hungry.
For longer hikes, I’ve learned that variety matters more than I expected. Your taste buds change when you’re working hard, and foods that seem fine at home can become completely unappetizing on mile 10. I always pack salty and sweet options, plus something with protein.
Cooking Gear for Backpacking
Backpacking stoves are where gear obsession gets real in the camping gear world. I started with a heavy Coleman two-burner that belonged in a car camping setup, not on my back. Now I use a Jetboil for its speed and efficiency – it boils water in under two minutes, which is clutch when you’re cold and tired.
Canister stoves are convenient but don’t work well in freezing temperatures. Liquid fuel stoves like MSR WhisperLite work in any conditions but they’re heavier and more complicated. For most three-season hiking, canister stoves are the way to go.
Cookware is another rabbit hole. Titanium is super light but expensive and doesn’t heat evenly. Aluminum is cheaper and conducts heat better but dents easily. I settled on a simple aluminum pot set from GSI Outdoors that nests together and has served me well for years.
Don’t overthink utensils – a lightweight spork covers 90% of trail eating situations. I carry a small knife for food prep, but those multi-tool combos usually do more than you need.
Food Storage and Bear-Proofing Strategies
Food storage depends entirely on where you’re hiking. Bear country requires hard-sided canisters or proper bear hangs, and the rules vary by location. I learned to hang food properly after a black bear demolished my poorly hung food bag in the Adirondacks. Lost all my food on day two of a four-day trip.
Ursack bags are a good middle ground – they’re lighter than hard canisters but still protect your food from animals. Just make sure they’re legal where you’re hiking, because some parks require hard containers only.
Even on day hikes, store your food properly. I’ve had chipmunks chew through pack pockets to get at energy bars, and marmots are basically furry bandits that’ll steal anything edible.
The biggest lesson I’ve learned about trail nutrition? Bring more than you think you need, especially carbs and electrolytes. Running out of energy on the trail isn’t just uncomfortable – it can be dangerous when you still have miles to go.
Weather Protection and Comfort Items
Mother Nature absolutely schooled me during a “partly cloudy” day hike in the Cascades that turned into a five-hour slog through freezing rain. I had this cheap rain jacket that basically turned into a plastic bag after thirty minutes, my cotton hat was a soggy mess, and I was getting eaten alive by mosquitoes every time I stopped to rest. By the time I got back to the trailhead, I looked like I’d been through a washing machine and felt twice as miserable.
That brutal day taught me that weather protection isn’t about looking cool – it’s about staying functional when conditions go sideways.
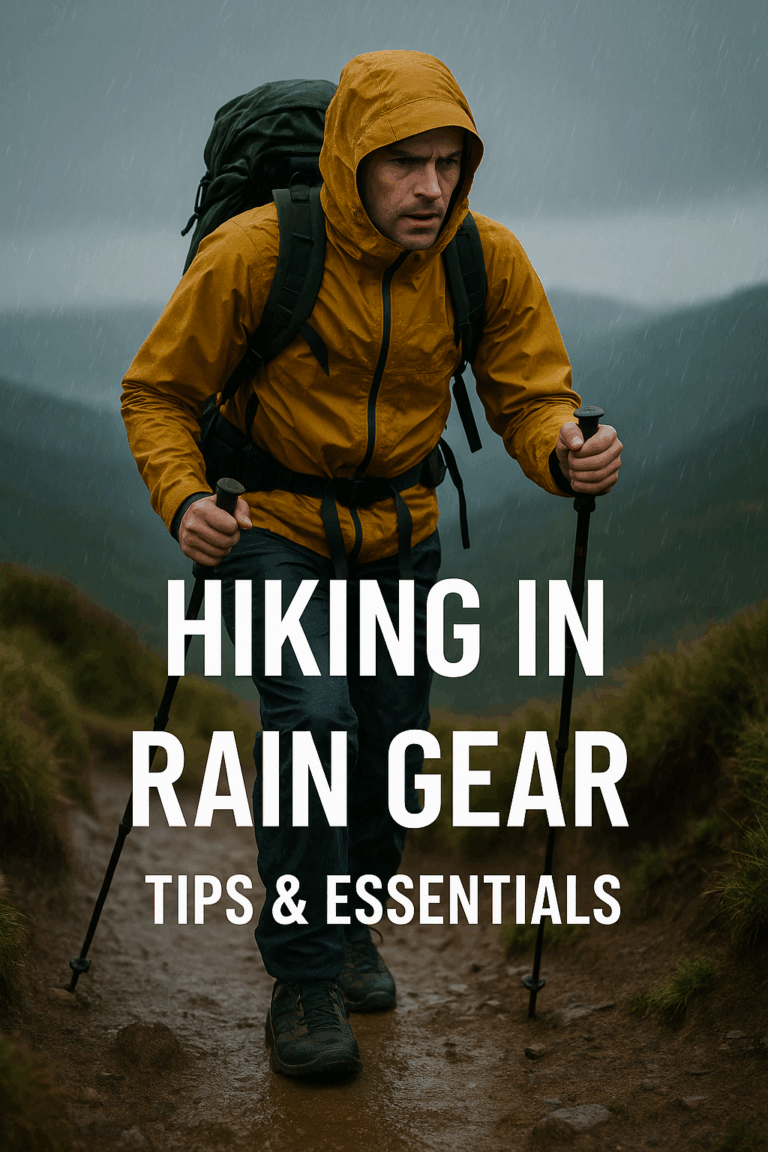
Rain Gear Essentials
Rain gear is where I’ve wasted the most money over the years on subpar outdoor equipment. Those $30 rain jackets from big box stores are basically expensive garbage bags that’ll keep you dry for maybe an hour before they start leaking or turn you into a human greenhouse. I went through three cheap jackets before finally investing in proper weather protection gear.
The key is breathability versus waterproofing, and it’s always a compromise. Gore-Tex is the gold standard but costs serious money. My current Patagonia Torrentshell 3L isn’t perfect, but it keeps me dry without completely soaking me in my own sweat. The pit zips are clutch for temperature regulation – I probably open and close them fifty times during a rainy hike.
Rain pants are even trickier because your legs generate so much heat. I’ve tried everything from lightweight emergency pants to full-zip mountaineering gear. For most hiking, I just accept that my legs will get wet and focus on keeping my core dry. But if you’re dealing with serious weather or bushwhacking through wet vegetation, good rain gear is worth their weight.
Pack covers are simple but effective insurance. A $15 pack cover has saved my gear countless times, though I also line my pack with a garbage bag as backup. Nothing ruins a trip like discovering your sleeping bag is soaked.
Sun Protection: Hats, Sunglasses, and Sunscreen
Sun protection took me way too long to take seriously. I used to think a baseball cap and some random sunscreen was enough, until I got absolutely torched on a desert hike in Utah. We’re talking second-degree burns on my ears and neck because I didn’t realize how intense reflected sunlight off rocks could be.
Now I wear wide-brimmed hats that actually shade my neck and ears. Sunday Afternoons makes great hiking hats that don’t look ridiculous and stay put in wind. For sunglasses, you need UV400 protection minimum – I learned this after getting snow blindness on a spring hike with cheap gas station shades.
Sunscreen is more complicated than most people realize. Chemical sunscreens work great but can sting your eyes when you sweat. Mineral sunscreens with zinc oxide don’t irritate but leave you looking like a ghost. I use mineral on my face and chemical everywhere else, and I reapply way more often than the bottle suggests.
Insect Repellent and Bug Protection
Bug protection strategies vary wildly depending on where you hike. DEET works but melts synthetic fabrics and smells terrible. Picaridin is gentler and doesn’t destroy your gear, but it’s not as effective against everything. I’ve had good luck with 20% picaridin for most conditions.
Permethrin-treated clothing is a game-changer in tick country. You treat your hiking clothes once and they repel insects for dozens of washes. I started doing this after pulling eight ticks off myself after a single hike in Virginia.
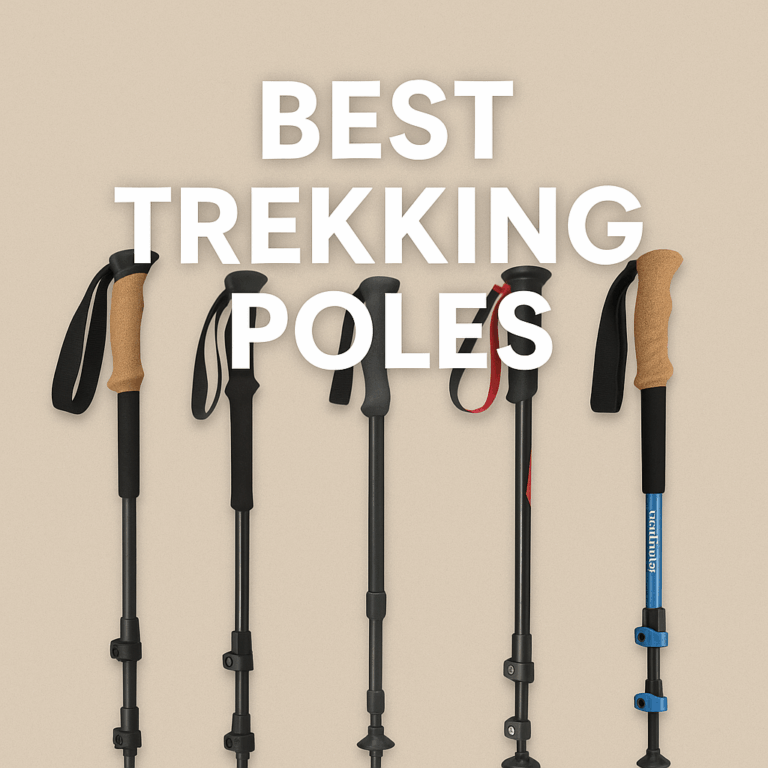
Trekking Poles: Benefits and Selection
Trekking poles were something I resisted for years because I thought they made me look like I didn’t know what I was doing. Huge mistake. These things save your knees on descents, help with balance on sketchy terrain, and take weight off your legs on long climbs.
The key is getting the length right – when you’re standing upright, your elbows should be at 90 degrees with the poles planted. I prefer telescoping poles over fixed length because you can adjust them for steep terrain and pack them smaller when you don’t need them.
Camping Gear Basics
For camping gear, tents are this whole complicated world of trade-offs. Three-season tents handle most conditions hikers encounter, but they vary wildly in weight, space, and durability. My Big Agnes Copper Spur is super light but feels cramped with two people. My REI Half Dome is roomier but weighs twice as much.
Free-standing tents set up anywhere but weigh more. Non-free-standing tents are lighter but need good staking, which sucks on rocky ground. I’ve learned to match the tent to the trip – ultralight for solo adventures, roomier models for car camping with friends.
Sleeping Bags and Temperature Ratings
Sleeping bags are all about temperature ratings and insulation type. Down is lighter and compresses smaller but becomes useless when wet. Synthetic insulation is heavier but works even when damp. I keep both – down for dry conditions, synthetic for potentially wet trips.
Don’t trust temperature ratings completely. A 20-degree bag might keep you alive at 20 degrees, but you won’t be comfortable. I add at least 10 degrees to any rating for actual comfort.
Sleeping Pads and Insulation
Sleeping pads matter more than people realize in the mountain gear world. Cold ground will suck heat right out of you regardless of how warm your sleeping bag is. R-value measures insulation – anything over 4 is good for cold weather, under 3 is fine for summer.
Conclusion: Building Your Best Hiking Gear Collection
The right outdoor gear transforms good adventures into extraordinary ones! From supportive hiking boots that’ll carry you mile after mile to reliable navigation tools that keep you on track, investing in quality hiking equipment is investing in your safety and enjoyment on the trails. Remember, you don’t need to break the bank or buy everything at once – start with the hiking essentials and build your gear collection over time based on your hiking style and favorite destinations.
Whether you’re putting together your first hiking checklist or upgrading your existing adventure gear, focus on the fundamentals: proper trail shoes, a well-fitting outdoor backpack, appropriate outdoor clothing, reliable navigation tools, and essential hiking safety equipment. These core pieces of wilderness gear will serve you well across countless adventures.
The best hiking gear isn’t necessarily the most expensive – it’s the equipment that matches your specific needs, fits properly, and performs reliably when you need it most. Take time to research gear reviews, try on hiking equipment in stores, and don’t hesitate to ask experienced hikers about their hiking recommendations.
Now grab your daypack, lace up those trail running shoes, and get out there to create some amazing memories with your carefully selected outdoor adventure gear! What’s your next trail adventure going to be? With the right hiking supplies and proper hiking preparation, you’ll be ready for whatever the wilderness throws your way!