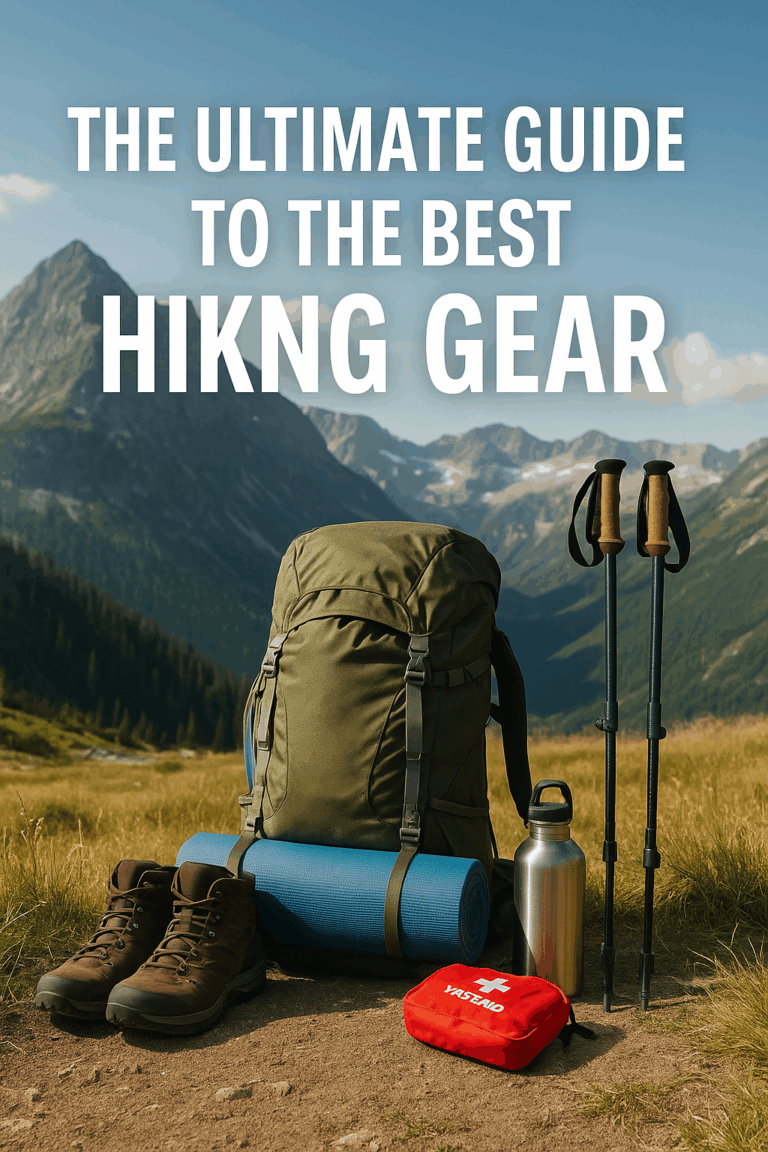
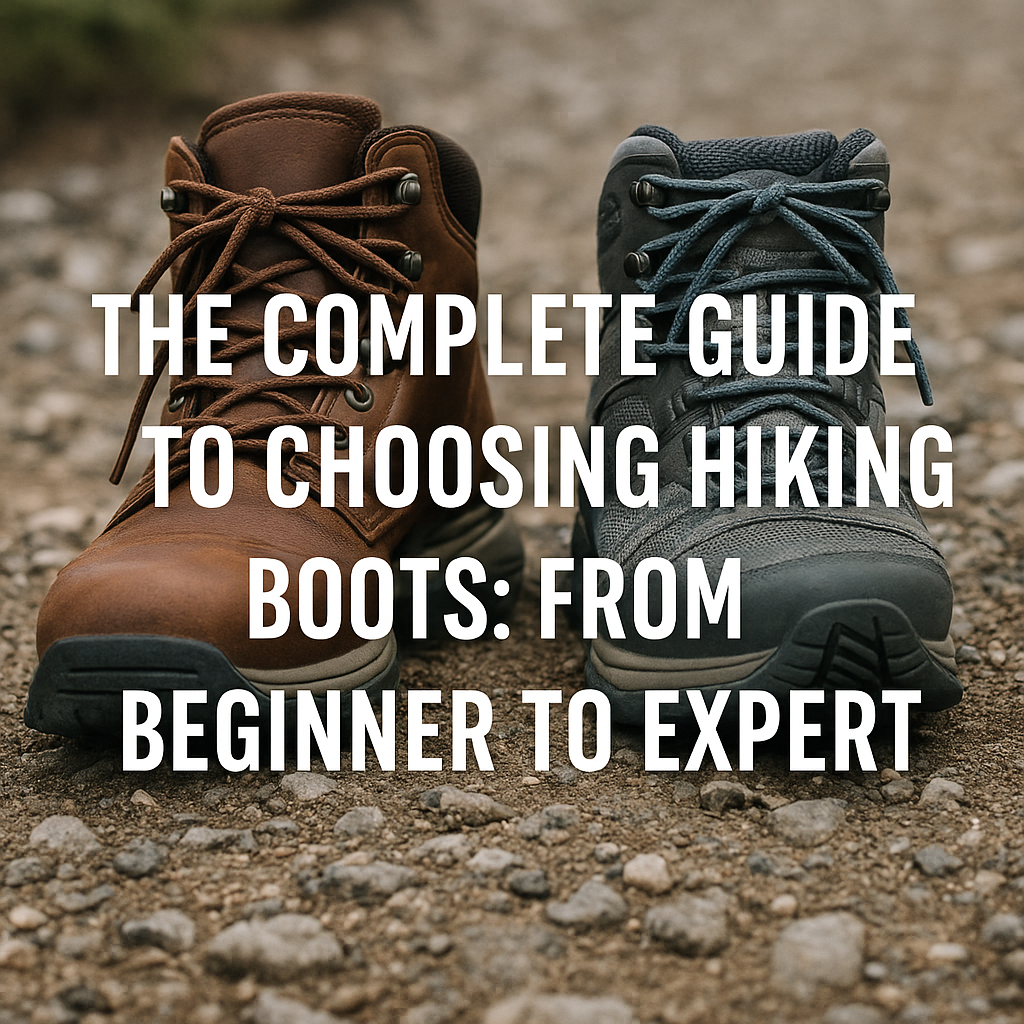
Choosing Hiking Boots for Different Terrain Types
Introduction
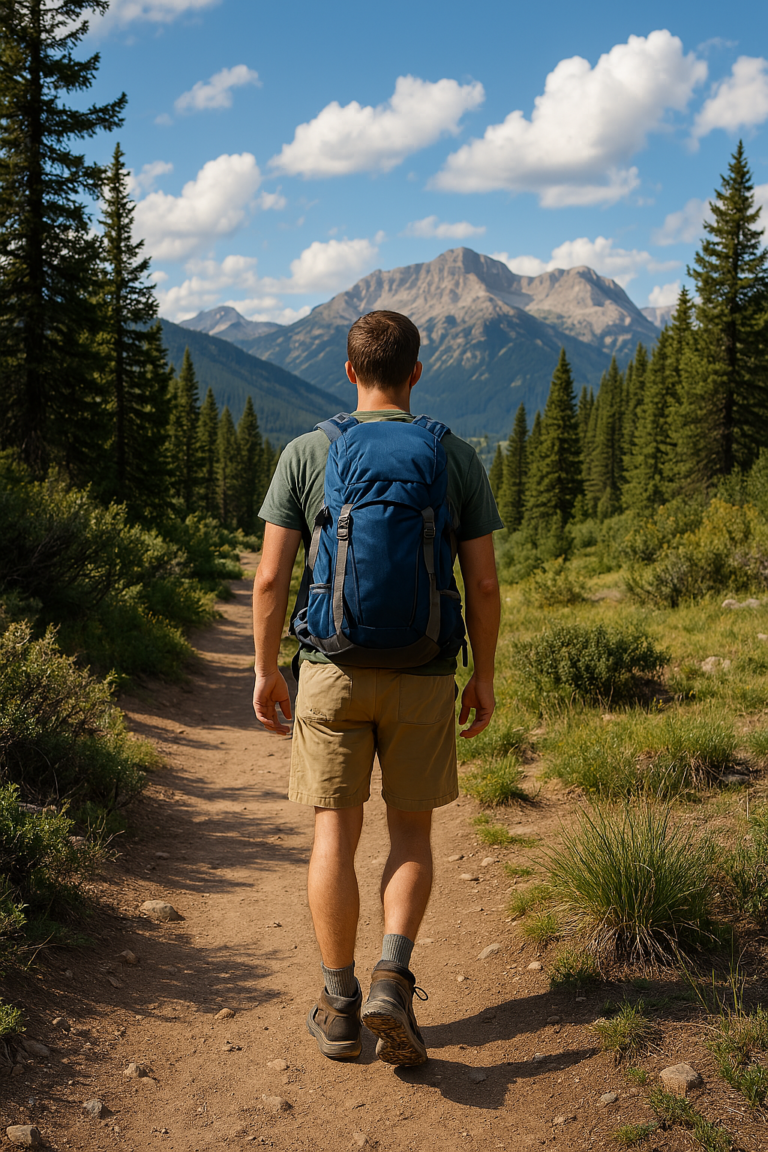
Ready to hit the trails but staring at endless rows of hiking boots wondering which ones won’t leave you with blisters halfway up the mountain? You’re not alone! Did you know that 87% of hikers experience foot problems due to poorly fitted boots? I’ve been there – limping back down a trail because I chose style over substance when choosing hiking boots without proper research.
Choosing hiking boots isn’t just about picking the most expensive pair or the ones that look coolest. It’s about finding your perfect match based on your hiking style, foot shape, and the adventures you’re planning. Whether you’re a weekend warrior tackling local trails or an aspiring thru-hiker dreaming of the Appalachian Trail, this hiking footwear guide will walk you through everything you need to know to make the smartest choice for your feet and your wallet!
Understanding Different Types of Hiking Footwear
Man, I learned this lesson the hard way about three years back when I decided to tackle a 12-mile rocky trail in Colorado wearing my trusty old running shoes. By mile 8, my ankles were screaming and I had more pebbles in my shoes than a zen garden.
That’s when I really dove deep into understanding hiking footwear, and honestly, it’s way more nuanced than most people think. The whole hiking boot selection process involves understanding when each type of footwear works best for different situations.
Trail Boots vs Hiking Shoes vs Trail Running Shoes
Hiking boots are your heavy-duty workhorses. Think of them as the pickup trucks of footwear. I’ve got a pair of leather hiking boots that weigh about 2.8 pounds for the pair, and they’re absolute tanks for multi-day backpacking trips. These mountain boots give you that ankle support when you’re carrying a 40-pound pack over loose scree or crossing streams with slippery rocks.
But here’s what nobody tells you – those same boots will make you miserable on a 3-mile day hike on well-maintained trails. It’s like driving that pickup truck to the grocery store. Overkill and unnecessarily exhausting when choosing hiking boots for simple day hikes.
Hiking shoes hit that sweet spot for most day hikers. They’re basically the SUVs of trail footwear. My Merrell Moabs (which seem to be on every trail these days) weigh about 1.9 pounds and give me enough protection without feeling like I’m wearing concrete blocks. The mid-top design protects against debris and light ankle rolls, but you can still move naturally. For men specifically looking at hiking shoes, Treeline Review’s top picks for men’s hiking shoes in 2025 offers excellent comparisons across different brands and price points.
Trail running shoes changed my game completely for fast-paced hiking and ultralight backpacking. At just 1.2 pounds for my Altras, they let me cover ground quickly without that clunky feeling. The low-top design means zero ankle support, but the trade-off is incredible agility and comfort on smooth trails.
When Terrain Dictates Your Choice
Here’s the thing though – terrain dictates everything when choosing hiking boots. Sharp, loose rock? You need the protection of boots or at least sturdy hiking shoes. Well-maintained forest paths? Trail runners will make you feel like you’re floating. I made the mistake of wearing trail runners on a talus field in the Rockies once, and my feet were absolutely destroyed by small rocks working their way in.
Weight matters more than most people realize during the hiking boot selection process. Every ounce on your feet equals about five ounces on your back in terms of energy expenditure. That’s why ultralight boots have become so popular with serious hikers. When I switched from 3-pound boots to 1.5-pound trail runners for my thru-hiking attempts, the difference in leg fatigue was dramatic.
The Ankle Support Debate
The ankle support debate gets heated in hiking forums, but here’s my take after dealing with two sprained ankles: high-top boots help with stability when you’re tired or carrying heavy loads, but they don’t prevent all injuries. Your hiking technique and core strength matter way more when choosing hiking boots. Low-tops let your ankles strengthen naturally, but you’ve got to build up to more challenging terrain gradually.
Bottom line? Start with mid-top day hiking boots for general hiking, then specialize based on what type of trails you gravitate toward.
Essential Features to Look for in Hiking Boots
I’ll never forget standing ankle-deep in a puddle on the Appalachian Trail, watching water seep through my “waterproof” boots like they were made of paper towels. That $180 lesson taught me that not all waterproofing is created equal, and frankly, sometimes it’s not even what you need when choosing hiking boots.
Waterproof Hiking Boots vs Breathable Options
Gore-Tex and eVent are the big names in waterproof hiking boots, but here’s what the marketing doesn’t tell you – they work great until they don’t. I’ve had Gore-Tex hiking boots that stayed bone dry for two years, then suddenly started leaking after a particular rough scramble tore the membrane. The newer eVent technology breathes better in my experience, but it’s also more expensive and less durable.
But here’s the kicker – I rarely use waterproof boots anymore unless I’m hiking in consistently wet conditions or snow. Why? Because your feet sweat way more than you think, and waterproof membranes trap all that moisture inside. I learned this during a humid summer hike in Virginia where my “breathable” waterproof hiking boots turned into personal foot saunas.
The Breathability Trade-off
The breathability versus weather protection trade-off is real, and most hikers get it backwards when choosing hiking boots. If you’re hiking in dry climates or during summer months, breathable hiking boots with good ventilation will keep your feet more comfortable. Save the waterproof gear for shoulder seasons, snow, or consistently muddy trails.
Hiking Boot Sole Construction and Tread Patterns
Sole construction is where boots either make or break your hiking experience. Vibram sole boots are the gold standard, but even within Vibram there are different compounds. The Megagrip compound on my Salomon boots grips wet rock better than anything I’ve tried, but it wears down faster on rough granite. The harder Vibram compounds last longer but can be slippery on smooth rock when wet. For a deeper dive into sole technology and tread patterns, Outdoor Gear Lab’s comprehensive review of top hiking boots provides excellent technical analysis of different outsole technologies.
Hiking boot tread patterns matter more than most people realize when choosing hiking boots. Deep, aggressive lugs work great in mud and loose dirt but feel clunky on rock slabs. The smaller, closer-together lugs on approach shoe-style soles give you better rock contact but won’t self-clean in muddy conditions. I actually carry different boots for different trail types now – probably overkill, but it makes a huge difference.
For waterproofing and breathability features, RunRepeat’s lab-tested best hiking boots of 2025 offers detailed analysis of how different membrane technologies perform in real-world conditions.
Hiking Boot Materials: Leather vs Synthetic
Upper materials are where personal preference really comes into play during the hiking boot selection process. Leather hiking boots like my old Asolos are bombproof and mold to your feet beautifully over time, but they take forever to break in and are heavy as hell. I spent three weeks with blisters breaking in those leather boots, but now they fit like gloves.
Synthetic hiking boots are lighter and break in immediately, but they don’t last as long. My synthetic Keens started showing wear after about 400 miles, while leather hiking boots easily go 800+ miles with proper care. Nubuck leather splits the difference – easier to break in than full leather but more durable than synthetics.
Ankle Support Features
Ankle support is probably the most misunderstood feature when choosing hiking boots. High-top boots don’t prevent ankle sprains – they just change how your ankle moves when you step wrong. I’ve rolled ankles in high-tops and low-tops alike. The real benefit is stability when you’re tired or carrying heavy loads, plus protection from rocks and debris.
The key is matching features to your actual hiking style when choosing hiking boots, not buying the most feature-packed boot you can find.
Getting the Perfect Fit Every Time
I used to be one of those people who’d grab hiking boots off the shelf, walk around the store for thirty seconds, and call it good. That approach cost me six black toenails on a backpacking trip through Glacier National Park and taught me that boot fitting is basically a science I knew nothing about.
Best Time for Boot Fitting
Timing matters way more than you’d think when choosing hiking boots. Your feet swell throughout the day, sometimes by half a size or more. I learned this after buying boots at 10 AM that felt perfect in the store but turned into torture devices by evening. Now I always shop for boots between 3-6 PM when my feet are naturally swollen from walking around all day. It mimics what they’ll feel like after several miles on the trail. For expert guidance on timing and other fitting considerations, REI’s expert advice on choosing the right hiking boots provides comprehensive fitting tips from industry professionals.
Proper Hiking Socks for Fitting
The hiking socks thing blew my mind when I finally figured it out. I was trying on boots with thin cotton socks – basically setting myself up for disaster when choosing hiking boots. You need to wear the exact same socks you’ll hike in, which for me means merino wool hiking socks that are way thicker than regular socks. This changes your boot size by at least half a size, sometimes more.
Boot Sizing Guide Essentials
I made the classic rookie mistake of thinking “snug” meant “good fit” when choosing hiking boots. Wrong. You need about a thumb’s width of space between your longest toe and the front of the boot. Here’s the test that changed everything for me: put the boots on but don’t lace them up, then kick your foot forward so your toes touch the front. You should be able to slip one finger behind your heel comfortably.
Wide Hiking Boots vs Narrow Hiking Boots
Width is where most people completely mess up when choosing hiking boots. I spent years cramming my slightly wide feet into regular-width boots because I didn’t know wide hiking boots existed. The pain across the ball of my foot during long hikes was unbearable. Brands like Keen and Altra make naturally wider boots, while others offer specific wide hiking boots options. If you feel pressure on the sides of your feet or your pinky toes go numb, you need wider boots.
The other width mistake? Assuming all size 10s are the same when choosing hiking boots. A size 10 Salomon fits completely different than a size 10 Merrell. I actually keep a little notebook with how different brands fit my feet because the variation is huge.
Boot Break-in Period Expectations
Break-in periods are real, but they shouldn’t involve serious pain when choosing hiking boots. Leather hiking boots need 40-60 miles of gradual wear to soften and mold to your feet. I start with 30-minute walks around the neighborhood, then progress to easy day hikes before attempting anything serious. Synthetic hiking boots usually need just 10-20 miles to settle in.
Here’s my break-in routine that actually works: wear new boots for an hour at home with your hiking socks. If you get hot spots or pressure points, return them immediately. Don’t fall for the “they’ll stretch out” myth – good boots should feel comfortable from day one, just a bit stiff.
Common Boot Fitting Tips
The biggest fitting mistake I see people make? Buying boots online without trying them on first when choosing hiking boots. I get it, the selection is better and prices are often lower, but feet are too individual for blind purchases. Even if I’ve worn a brand before, I still try on new models in person.
One last thing – always try on both feet. My right foot is slightly larger than my left, and I fit boots to the bigger foot when choosing hiking boots. This prevents that cramped feeling that ruins long hiking days.
Matching Boots to Your Hiking Style
I used to think one pair of boots could handle everything from grocery store runs to summit attempts. That delusion ended spectacularly during a winter climb in New Hampshire when my lightweight day hiking boots turned my toes into popsicles at 4,000 feet elevation.
Day Hiking Boots Requirements
Day hiking is where most people start, and honestly, you don’t need much when choosing hiking boots for this purpose. My go-to day hiking setup is mid-top boots weighing around 2 pounds with moderate ankle support. The best hiking boots for day hiking, like Merrell Moab 3s, have carried me through thousands of miles because they hit that sweet spot between protection and comfort. You want something that can handle 8-12 miles with a light daypack without feeling like you’re wearing diving weights. For lightweight options perfect for day hiking, Switchback Travel’s guide to the best hiking boots for various styles breaks down the top lightweight choices by hiking style and terrain.
The mistake I made early on was over-booting for day hikes. I’d wear my heavy backpacking boots on 5-mile loops and wonder why my legs felt dead by lunchtime when choosing hiking boots inappropriately. For well-maintained trails with minimal elevation gain, you can honestly get away with sturdy trail running shoes.
Backpacking Boots for Multi-day Adventures
Backpacking changes everything because you’re carrying 30-50 pounds for multiple days when choosing hiking boots becomes critical. Your boots become your foundation, literally. I learned this lesson carrying a 45-pound pack through the White Mountains when my lightweight boots couldn’t provide enough stability. By day three, my ankles were shot and my feet were screaming.
Backpacking boots with full-grain leather and high ankle support become essential for multi-day trips. My Asolo TPS 520s weigh 3.2 pounds but they’ve carried me through week-long backpacking trips without a single ankle roll. The extra weight is worth it when you’re navigating rocky terrain with a heavy pack after hiking 15 miles.
Waterproofing becomes more critical for backpacking too when choosing hiking boots. You can’t always avoid puddles and stream crossings when you’re committed to camping miles from trailheads. I’ve spent miserable nights in wet socks because I chose breathable over waterproof hiking boots.
Technical Hiking and Mountaineering Boots
Technical hiking and mountaineering require specialized boots that most casual hikers never need when choosing hiking boots. My mountaineering boots are basically armor for your feet – they’re crampon-compatible, insulated to -20°F, and built like tanks. But they’re also 4+ pounds and completely overkill for regular hiking.
For rock scrambling and exposed terrain, approach shoes or lightweight mountaineering boots work better than traditional hiking boots when choosing hiking boots for technical terrain. The sticky rubber soles grip rock better, and the lower profile gives you better feel for foot placement.
Urban Hiking and Casual Trail Walking
Urban hiking and casual trail walking is where I actually spend most of my time these days when choosing hiking boots for mixed terrain. Living in a city with great trail access means I’m constantly walking from pavement to dirt trails. Low-top hiking shoes or trail running shoes work perfectly here. My Allbirds Tree Runners handle both concrete sidewalks and packed dirt trails without looking ridiculous in coffee shops.
Season-Specific Boot Considerations
Seasonal considerations matter way more than I initially realized when choosing hiking boots. Summer hiking boots in Arizona require completely different features than fall hiking in Vermont. Hot weather calls for maximum breathability – mesh panels, lighter colors, and definitely no waterproof membranes unless you enjoy foot saunas.
Winter hiking boots get complicated fast when choosing hiking boots for cold conditions. I have three different levels of winter boots depending on conditions: insulated hiking boots for dry snow and mild temps, waterproof insulated boots for wet snow and slush, and full four season boots for serious cold and technical terrain.
Spring hiking is actually the trickiest season for choosing hiking boots. You’ll encounter mud, snow, rock, and everything in between on a single hike. Waterproof hiking boots with aggressive tread patterns become essential, even if they’re not ideal for summer conditions. For comprehensive seasonal recommendations, The Great Outdoors’ guide to the best hiking boots for 2025 provides excellent seasonal guidance for three-season and four-season boots.
The 80% Rule for Boot Selection
The key insight I’ve learned after years of getting this wrong when choosing hiking boots? Match your boots to the 80% rule – choose boots that handle 80% of your hiking, then rent or borrow specialized gear for the other 20%.
Top Hiking Boot Brands and What Makes Them Special
After going through probably fifteen pairs of hiking boots over the past decade, I’ve learned that brand loyalty in hiking footwear is kinda like dating – you gotta kiss a lot of frogs before finding your prince. And sometimes your prince changes depending on what you need when choosing hiking boots.
Premium Hiking Boot Brands
Salomon has this weird thing where their boots fit my narrow feet perfectly but torture my wide-footed hiking buddies when choosing hiking boots. Their Contragrip sole technology is honestly the best I’ve used on wet rock – I’ve literally walked up stream beds in my X Ultra 3s without slipping once. But here’s the catch: they fall apart faster than other premium hiking boot brands. I get about 500 miles before the sole starts separating, versus 800+ miles from comparable boots.
Asolo represents that premium European craftsmanship that either justifies the $300+ price tag or makes you feel ripped off, depending on your perspective when choosing hiking boots. My TPS 520s took three weeks to break in and gave me blisters I’m still traumatized by, but now they fit like gloves and show zero signs of wear after two years. The stitching and leather quality is noticeably better than cheaper boots, but you pay dearly for it.
La Sportiva sizing runs about half a size small compared to most brands when choosing hiking boots. I learned this the hard way ordering online and ending up with boots that cramped my toes. But their mountaineering and approach shoes are absolutely incredible for technical terrain. The sticky rubber compound they use grips better than anything else I’ve tried.
Danner boots are built like heritage furniture – they’ll outlast you if properly maintained, but they’re heavy as hell and take forever to break in when choosing hiking boots for durability. I’ve got a pair of their Mountain Lights that are going on year four with minimal wear, but they weigh 4.2 pounds and feel like wearing anvils on easy day hikes.
Mid-Range and Budget Hiking Boot Brands
Merrell is like the Toyota of hiking boots – not the fanciest, but they just work for most people when choosing hiking boots. My Moab 3s have been through hell and back, and they’re still going strong after 600 miles. The fit runs wider than most brands, which is why they’re everywhere on trails. Their Vibram sole boots last forever, but the uppers can get pretty beat up looking after heavy use. For comprehensive testing results on Merrell and other top brands, REI’s expert-tested list of the best hiking boots of 2025 provides detailed performance analysis from field testing.
I had a love-hate relationship with Keen until I realized they’re basically made for people with duck feet when choosing hiking boots. If you have wide feet and high arches, Keens will feel like they were custom-made for you. If you have narrow hiking boots needs like me, they’ll feel like wearing boats. Their toe protection is legendary though – I’ve kicked more rocks than I care to admit without feeling a thing.
For budget hiking boots, Columbia and Hi-Tec surprise people with their value when choosing hiking boots on a tight budget. My Columbia Newton Ridge boots cost $85 and lasted 400 miles before showing serious wear. They’re not winning any awards for innovation, but they’ll get new hikers on trails without breaking the bank.
Brand-Specific Fit Characteristics
Lowa has this reputation for quality that’s mostly deserved, but their customer service is terrible in the US when choosing hiking boots from this brand. When my Renegades developed a sole separation issue at 300 miles, getting warranty help was like pulling teeth. Great boots, frustrating support experience. For detailed user reviews and experiences with Lowa, Asolo, and other premium brands, Trailspace’s user-reviewed best hiking boots of 2025 offers real-world feedback from actual hikers. Additionally, The Guardian’s tested picks for men’s hiking boots provides professional testing insights on La Sportiva, Merrell, and other top brands.
Hiking Boot Warranty and Customer Service
The hiking boot warranty game varies wildly between brands when choosing hiking boots. Danner will resole their heritage boots for life, which is amazing if you buy their premium lines. Keen used to have incredible warranty coverage but scaled it back recently. Merrell is hit-or-miss – sometimes they’ll replace defective boots immediately, other times they make you jump through hoops.
Best Value Hiking Boot Recommendations
My best hiking boots value picks? Merrell Moab 3s at $130 for day hiking, Salomon X Ultra 3s at $160 for fast hiking, and Asolo TPS 520s at $320 for serious backpacking when choosing hiking boots. Each fills a specific niche without major compromises.
The real secret is that most hikers overthink brand selection when choosing hiking boots. Find boots that fit your feet well and match your hiking style, regardless of the name on the tongue.
Testing and Trying Before You Buy
I’ll admit it – I used to be that guy who’d walk into REI, grab the first pair of boots that looked cool, try them on for maybe two minutes, and walk out thinking I’d nailed it when choosing hiking boots. That approach led to some truly spectacular failures, including a pair of Lowa boots that felt great in the store but turned my heels into hamburger meat after just three miles.
Proper In-Store Boot Fitting Techniques
In-store fittings are where you can really separate the wheat from the chaff when choosing hiking boots, but most people do them all wrong. I spend at least 20 minutes in boots now before making any decisions. Here’s my routine: put them on with proper hiking socks, walk around the store for 10 minutes minimum, then find some stairs or an incline board to test how your feet slide forward and back.
The incline test changed everything for me when choosing hiking boots. Most stores have these angled ramps that simulate uphill and downhill walking. If your toes jam into the front going downhill or your heel lifts going uphill, those boots will destroy you on real trails. I’ve walked away from boots that felt perfect on flat ground but failed this test miserably.
Online Buying Strategies and Return Policies
Online buying is tricky but doable if you’re strategic about it when choosing hiking boots. I always order from retailers with generous return policies – Zappos gives you 365 days, REI gives members a full year, and Amazon is pretty flexible too. The key is ordering multiple sizes and widths if you’re unsure when choosing hiking boots online. Yeah, it ties up your credit card for a bit, but it’s way better than being stuck with ill-fitting boots.
Here’s my online strategy that actually works when choosing hiking boots: order your normal size plus a half size up and down. Try them all on at the end of the day when your feet are swollen. Most online retailers expect this kind of shopping behavior now.
Red Flags for Poor Boot Fit
Red flags are usually obvious once you know what to look for when choosing hiking boots. Any pinching across the ball of your foot means the boots are too narrow – this will not get better with break-in, trust me. If your toes touch the front when you’re standing normally, go up a size immediately. Hot spots during the first 10 minutes of wear are deal-breakers too when choosing hiking boots.
The heel slip test is crucial when choosing hiking boots. Your heel should lift slightly when walking but not slide around loosely. I made the mistake once of buying boots where my heel was sliding a quarter-inch with each step. By mile five, I had blisters the size of quarters.
At-Home Testing Methods
At-home testing is where you can really put boots through their paces without committing fully when choosing hiking boots. I wear new boots around the house for 2-3 hours while doing normal activities. If they cause any discomfort during this low-stakes testing, they’re going back immediately.
My favorite home test when choosing hiking boots is wearing boots while walking on different surfaces – hardwood floors, carpet, stairs, even standing on my tip-toes to simulate rock scrambling. This reveals pressure points that flat store floors miss completely.
Questions to Ask Salespeople
Salespeople knowledge varies wildly, and honestly, some of them know less than experienced hikers when choosing hiking boots. The good ones will ask about your hiking style, typical trail conditions, and foot shape before making recommendations. If someone immediately pushes the most expensive boots without asking questions, find someone else.
The questions that get you better help when choosing hiking boots: “What’s the return policy if these don’t work out?” “How does this brand’s sizing compare to others?” “What boots do you personally hike in?” That last question usually gets you honest opinions instead of sales pitches.
I always ask about common fit issues with specific models when choosing hiking boots. Good salespeople know that certain boots run narrow, or that particular brands have weird arch support, or that some models have durability problems. This insider knowledge is gold.
One last thing – don’t let salespeople talk you into boots that don’t feel right immediately when choosing hiking boots. I fell for the “they’ll break in” line way too many times. Quality boots should feel comfortable from day one, maybe a bit stiff, but never painful or pressured.
The best advice I can give? Trust your feet over anyone’s recommendations, including mine, when choosing hiking boots.
Caring for Your Investment: Boot Maintenance Tips
I used to treat my hiking boots like disposable sneakers – throw them in the closet wet and muddy after hikes, maybe hose them off if they got really gross. That approach killed a $280 pair of Asolos in about six months, and that’s when I realized boot maintenance isn’t optional if you want your investment to last when choosing hiking boots.
Cleaning Different Boot Materials
Cleaning different materials requires totally different approaches, and I learned this the hard way when choosing hiking boots. Leather hiking boots need gentle treatment – I use a soft brush and plain water for basic cleaning, never soap unless absolutely necessary. The oils in leather can be stripped away by harsh cleaners, turning supple leather into cardboard. I made this mistake with my first pair of Danners and they never recovered.
Synthetic hiking boots are way more forgiving when it comes to boot care. You can scrub them with mild soap and they’ll bounce back fine. Nubuck leather falls somewhere in between – it’s more delicate than synthetic but tougher than full leather when choosing hiking boots. The key is using specialized nubuck cleaners and brushes, not regular leather conditioners that can darken and damage the finish.
Proper Boot Conditioning Techniques
Conditioning leather boots became a monthly ritual after I saw what neglect did to my expensive boots when choosing hiking boots for long-term use. I use mink oil on work boots but switched to lighter conditioners like Nikwax for hiking boots because mink oil can over-soften them and reduce support. The rule I follow now: condition when the leather starts looking dry or cracked, usually every 20-30 miles of hiking.
Drying Techniques After Wet Hikes
Proper drying is where most people completely mess up their boot care routine when choosing hiking boots. I used to throw wet boots by the heater or fireplace, which is basically boot murder. Heat warps leather, shrinks materials, and can separate soles from uppers. Now I pull out the insoles and laces, stuff boots with newspaper (changed every few hours), and let them air dry at room temperature. It takes longer but saves hundreds of dollars in replacement costs.
Boot dryers are worth the investment if you hike frequently in wet conditions when choosing hiking boots. Mine cost $30 and gently circulates warm air without damaging heat. Just don’t use them on high settings – I accidentally cooked a pair of trail runners that way.
When to Resole vs Replace Boots
Resoling versus replacing is a decision I wrestle with regularly when choosing hiking boots for longevity. Generally, if the uppers are still in good shape and you love how the boots fit, resoling makes sense. It costs $80-120 but gives you essentially new boots. I’ve resoled my Danners twice now and they’re still going strong.
But here’s the thing – not all boots can be resoled when choosing hiking boots initially. Glued-on soles (common on cheaper boots) can’t be replaced, while stitched construction (like Goodyear welts) can be resoled multiple times. This is why spending more upfront on durable hiking boots with quality construction often saves money long-term.
Storage Tips for Boot Longevity
Storage seems simple but there’s actually a right way to do it when choosing hiking boots for the long haul. I keep my boots in a cool, dry place with cedar shoe trees inside to maintain their shape. Plastic bags are boot killers – they trap moisture and can cause mold. I learned this after finding fuzzy green stuff growing inside boots I’d stored improperly.
For long-term storage when choosing hiking boots seasonally, I clean and condition them thoroughly, then store with moisture-absorbing packets. Boots stored in basements or attics without climate control can develop problems you won’t notice until it’s too late.
Troubleshooting Common Boot Problems
Common problems I’ve learned to troubleshoot when choosing hiking boots: sole separation usually starts at the toe and can be temporarily fixed with shoe goo, but it’s really a sign that boots are done. Worn-down heel counters make boots feel sloppy and unstable – this usually means replacement time.
Broken eyelets can be replaced by cobblers for about $10-15, but it’s often a sign that the boots are wearing out overall when choosing hiking boots. I’ve had good luck with temporary eyelet repairs using paracord, but it’s not a permanent solution.
Boot Lacing Techniques for Better Fit
Boot lacing techniques can dramatically improve comfort when choosing hiking boots. The heel lock lacing method prevents heel slippage, while skipping eyelets can relieve pressure points. I use different lacing patterns depending on whether I’m going uphill (tighter around the ankle) or downhill (looser to prevent toe jamming).
The biggest boot maintenance mistake I see people make? Waiting too long to address small problems when choosing hiking boots. A loose thread or small separation that gets fixed immediately might cost $20. Ignoring it until it becomes a major failure can mean losing $300 boots entirely.
Special Considerations: Women’s and Men’s Hiking Boots
Women’s Hiking Boots vs Men’s Hiking Boots
When choosing hiking boots, it’s important to understand that women’s hiking boots and men’s hiking boots are designed differently beyond just sizing. Women typically have narrower heels, higher arches, and different calf muscle attachment points that affect how boots should fit and support the foot.
Women’s hiking boots often feature:
- Narrower heel cups for better fit
- Different last shapes that accommodate wider forefeet relative to heel width
- Lower volume throughout the boot
- Softer midsole materials to accommodate lighter body weights
Foot Care and Blister Prevention
Foot care becomes crucial when choosing hiking boots for long-distance hiking. Blister prevention starts with proper boot fit, but also involves hiking socks selection, boot insoles, and sometimes custom orthotics for hikers with specific foot issues.
I learned the hard way that hiking blister prevention requires a multi-pronged approach when choosing hiking boots. Moisture-wicking socks, proper boot fit, and gradually building up mileage all play crucial roles.
Boot Insoles and Custom Orthotics
Boot insoles can transform the fit and comfort of your boots when choosing hiking boots. The factory insoles in most boots are basic and can be upgraded significantly. I use Superfeet insoles in most of my boots for better arch support and shock absorption.
For hikers with specific foot issues, custom orthotics can be game-changers when choosing hiking boots. However, you need to factor in the additional volume they’ll take up when sizing your boots.
Hiking Boot Weight Considerations
Hiking boot weight matters more than most people realize when choosing hiking boots. Ultralight boots have revolutionized long-distance hiking, but they require trade-offs in durability and protection. The key is finding the sweet spot between weight savings and the protection you need for your specific hiking style.
Seasonal Boot Selection: Summer vs Winter
Summer hiking boots require maximum breathability when choosing hiking boots for hot weather. Look for mesh panels, lighter colors, and avoid waterproof membranes unless you’re hiking in consistently wet conditions.
Winter hiking boots are a completely different category when choosing hiking boots for cold weather. Insulated hiking boots with ratings down to specific temperatures become essential, along with compatibility with boot gaiters and possibly crampons for serious winter hiking.
Conclusion: Making Your Final Boot Selection
Choosing hiking boots doesn’t have to feel overwhelming! Remember, the best hiking boots are the ones that fit your feet, match your hiking goals, and keep you comfortable mile after mile. Take your time with the selection process when choosing hiking boots – your feet will thank you on every future adventure.
Start with understanding your hiking style, then focus on hiking boot fit above all else when choosing hiking boots. Don’t be swayed by flashy features you don’t need, but don’t skimp on the essentials either. Most importantly, invest in quality boots from reputable hiking boot brands and take proper care of them with regular boot maintenance.
Whether you end up with lightweight hiking boots for day hiking, waterproof hiking boots for wet conditions, or durable hiking boots for serious backpacking, the key is matching your choice to your actual hiking needs. Remember the 80% rule when choosing hiking boots – get boots that handle 80% of your hiking, then rent or borrow specialized gear for the other 20%.
Ready to find your perfect pair? Visit a specialty outdoor retailer this weekend, armed with the knowledge from this hiking footwear guide. Your next epic hiking adventure is just a great pair of boots away when you make the right choice in choosing hiking boots!