Hiking Navigation Techniques: Maps, Compass, and GPS Tools
Introduction
Did you know that over 3,000 hikers get lost in national parks every year? That’s nearly 8 people per day who find themselves lost on what should have been fun outdoor trips! But here’s the thing – with the right hiking navigation techniques, you can explore trails with total confidence and never become another statistic.
Whether you’re a weekend warrior tackling local trail navigation or an experienced backpacker planning multi-day wilderness navigation adventures, mastering outdoor navigation is super important for your safety and fun. In our digital world, many hikers only use smartphone navigation apps – but what happens when your battery dies or you lose signal in remote wilderness areas?
I’ve spent over ten years guiding hikers through tough terrain, teaching wayfinding techniques and wilderness skills. I can tell you that the most confident adventurers are those who’ve learned multiple hiking navigation techniques. From old-school map reading skills and compass navigation to modern GPS hiking technology and time-tested natural navigation methods, this complete guide will give you everything you need to navigate any trail like a pro!
Essential Map Reading Skills for Hikers
I’ll never forget getting lost on what should have been an easy day hiking navigation challenge. I had my GPS watch and trail app, but when the batteries died, I was stuck with just a wrinkled topographic map I barely knew how to read.
That scary day taught me something important about outdoor navigation. Digital tools are nice, but you need solid map reading skills. Trust me, you don’t want to learn these hiking navigation techniques the hard way.
Understanding Topographic Maps and Contour Lines
Those squiggly brown lines on topographic maps used to confuse me big time. But they’re actually super important for wilderness navigation – they show you how steep or flat the terrain features are. Each contour line connects spots that are the same elevation above sea level.
For a comprehensive visual guide to all the symbols you’ll encounter on topographic maps, check out the official USGS Topographic Map Symbols guide. This PDF reference is invaluable for learning to read terrain features accurately.
Here’s the wayfinding technique I wish someone told me earlier: when the lines are bunched up close together, that means steep ground. When they’re spread out, it’s pretty flat. Most maps use 40 feet between each contour line, but always check to be sure.
I remember looking at one section where the lines were almost touching. I thought “how hard can this terrain navigation be?” Well, that tiny bit on the map turned into an 800-foot elevation gain in half a mile. My legs were screaming.
Figuring Out Distance and Elevation Gain
Most people mess up when trying to guess how long a hike will take using basic hiking navigation techniques. The straight distance between two points doesn’t tell you much when trails zigzag up mountains during backcountry navigation.
For trail navigation, I use a simple string trick. I lay string along the trail on the map, then measure it against the distance scale. It sounds old-fashioned, but it works way better than guessing for accurate route planning.
Calculating elevation gain is trickier but essential for hiking preparation. You can’t just subtract your starting height from where you end up. You need to add up all the climbs along the way. I count every contour line the trail crosses going uphill, multiply by 40 feet, then add them all up.
Finding Important Terrain Features
Water navigation sources show up in blue on topographic maps, which makes sense. But here’s something that got me in trouble during wilderness navigation – dashed blue lines mean streams that might be dry. I’ve planned whole hikes around water that wasn’t there in late summer.
Ridgeline navigation and valley navigation patterns make sense once you learn to spot them. Ridges look like upside-down Vs pointing uphill. Valleys look like regular Vs pointing downhill. When you’re tired and everything looks the same, these landscape reading skills help you figure out where you are.
Picking the Right Map Scale
For day hiking navigation, I like 1:24,000 scale topographic maps. They show lots of detail for trail navigation – buildings, trail markers, even big rocks sometimes. For longer wilderness navigation trips, 1:63,360 scale maps cover more area but don’t show as much detail.
Reading Grid Lines and Coordinates
Learning to read grid references might seem too technical, but they’re really useful wayfinding techniques for finding exact spots. This is especially important in emergency navigation situations. Most GPS hiking devices can show both latitude/longitude and UTM coordinates, so knowing both gives you more navigation options.
The secret is navigation practice. Start with familiar local trail navigation and compare what you see to what’s on the map. It’s like learning any new outdoor skill – hard at first, but really rewarding once you get these hiking navigation techniques down.
Don’t make the same navigation mistake I did. Spend time with maps before you need them. Your future self will thank you when you’re standing at a trail junction with dead batteries and perfect confidence in your outdoor navigation abilities.
Compass Navigation Fundamentals Every Hiker Should Know
My first real hiking compass was this cheap plastic thing I bought at a gas station before a camping trip. Figured a compass is a compass for basic orienteering, right? Wrong. That little piece of junk led me in circles for two hours before I realized the needle was sticking and giving me totally wrong bearings for my compass navigation.
That frustrating experience taught me that not all compass types are made the same. If you’re serious about wilderness navigation, you need to understand how these orienteering basics actually work.
Compass Types and Picking the Right One
Most hikers should get a baseplate compass for their hiking navigation techniques toolkit. These have a clear plastic base with rulers on the sides and a rotating dial with degrees marked around it. They’re perfect for map and compass work and pretty cheap too.
I use a Silva or Suunto hiking compass now, and they’ve never let me down for wilderness navigation. The needle moves smoothly and settles fast. You want one with a magnetic declination adjustment feature – more on that later. Some fancy compass types have mirrors for rescue signaling, which is nice but not required.
Avoid button compasses or those tiny keychain ones for serious backcountry navigation. They’re just not accurate enough when you really need precise compass navigation.
Taking and Following Bearings
A bearing calculation is basically the direction you want to go, measured in degrees. True north is 0 degrees, east is 90, south is 180, and west is 270 for basic orienteering basics.
Here’s how I take a bearing to a landmark I can see during trail navigation. First, I point the compass at my target. Then I turn the dial until the red part of the needle lines up with the red arrow in the compass housing. The number at the top of the dial is my bearing calculation.
Following that bearing is the reverse process for these hiking navigation techniques. I set the dial to my bearing number, then turn my whole body until the red needle sits inside the red arrow again. The direction arrow on the baseplate now points where I need to go.
This compass navigation seems easy until you’re tired and stressed during wilderness navigation. Practice these wayfinding techniques in your backyard first.
Finding Your Location with Triangulation
Triangulation sounds fancy, but it’s just using two or three known landmarks to figure out where you are during wilderness navigation. This orienteering technique has saved me more times than I can count.
First, I take a bearing to a mountain peak or other landmark I can identify on my topographic map. Then I take a bearing to a second landmark in a different direction. On the map, I draw lines from these landmarks at the reverse bearings. Where the lines cross is roughly where I’m standing.
The key word is “roughly.” This triangulation method gets you close, but it’s not perfect for precision outdoor navigation. Weather, terrain features, and human error all affect GPS accuracy.
Magnetic Declination – The Thing That Trips Everyone Up
Here’s where most people get confused about compass navigation. Your hiking compass points to magnetic north, but topographic maps show true north. These two norths are in different places, and that difference is called magnetic declination.
Where I hike in Washington, magnetic declination is about 15 degrees east. That means I need to add 15 degrees to my compass bearing when using it with map reading skills. In some places, you subtract instead of add for proper hiking navigation techniques.
Every topographic map shows the magnetic declination for that area. Some compass types let you set this adjustment once and forget about it. Trust me, learn this orienteering concept well or you’ll end up miles off course during wilderness navigation.
Back-Bearings for Double-Checking
A back-bearing is just the opposite direction of where you came from during trail navigation. If you hiked on a bearing of 90 degrees, your back-bearing would be 270 degrees for this compass navigation check.
I use this wayfinding technique to make sure I’m still on track. Every so often, I turn around and take a bearing back to where I started. If it matches my expected back-bearing, I know I’m going the right direction.
Emergency Navigation Without a Map
Sometimes you’re stuck with just a hiking compass and no map during emergency navigation. It’s not ideal, but you can still use basic compass navigation.
The most important thing is establishing a handrail – a long, obvious terrain feature like a road or river that you can’t miss. Before leaving this handrail, note the bearing back to it. No matter how lost you get, you can always follow the reverse bearing to get back to safety.
The biggest navigation mistake people make is overthinking compass navigation. These hiking navigation techniques are pretty simple once you practice with them. Start easy, maybe in a local park where getting lost isn’t dangerous.
For those wanting to dive deeper into wilderness navigation, I highly recommend NOLS Wilderness Navigation, 3rd Edition. It’s the gold standard for comprehensive navigation training and covers advanced techniques you’ll eventually want to master.
GPS Technology and Digital Navigation Tools
My first GPS hiking device was this chunky Garmin that looked like a brick from the 90s. Cost me over $300 and took forever to find satellites. But man, I thought I was so high-tech compared to my dad’s old compass navigation and map reading skills combo.
Then came the day it completely failed me on a multi-day wilderness navigation trip. Dead batteries, cloudy skies blocking satellites, and suddenly I’m standing there with an expensive paperweight. That’s when I learned that GPS hiking is amazing when it works, but you better have backup navigation systems.
Best GPS Hiking Devices Right Now
The Garmin GPSMAP 67i is my current go-to device for wilderness navigation. Battery lasts about 15 hours with GPS running, has two-way satellite messaging for emergency navigation, and the screen stays readable in bright sunlight. Costs around $450, which sounds steep until you consider what rescue helicopter rides cost.
For budget-conscious hikers, the Garmin eTrex 32x does the job for under $200. It’s not fancy, but it holds waypoint navigation data, shows basic maps, and runs on AA batteries you can buy anywhere for extended backcountry navigation.
Garmin pretty much dominates the GPS hiking space, though Suunto makes some solid units too for outdoor navigation. I’ve tried cheaper knock-offs from Amazon, and they’re just not reliable enough for serious wilderness navigation.
Smartphone Navigation Apps That Actually Work
Your phone can be an incredible tool for hiking navigation techniques if you set it up right. Gaia GPS is my favorite navigation app – costs about $40 per year but gives you access to tons of different topographic maps. The interface makes sense and downloading offline maps is super easy for wilderness navigation.
AllTrails is great for finding new trails and reading reviews, but the trail navigation features are pretty basic. Good for day hiking navigation, not so much for complex route planning.
I also keep the Avenza Maps app as backup navigation. It’s free and works with PDF maps you can download from the USGS website. Not as user-friendly as paid navigation apps, but it’s saved me when other apps crashed during outdoor navigation.
Downloading Offline Maps and Waypoint Navigation
Here’s something that bit me early on – downloading offline maps eats up phone storage fast during hiking preparation. A single detailed map area can be several hundred megabytes. I learned to clean out old map downloads regularly and only keep what I need for upcoming wilderness navigation.
Waypoint navigation markers are your breadcrumbs in the digital world. I mark key spots like water sources, camp sites, trail markers, and emergency exits. Give them clear names like “Last Water – Mile 8” instead of generic labels you’ll forget later during backcountry navigation.
Making Batteries Last on Long Trips
Battery conservation becomes critical on trips longer than a day or two for reliable GPS hiking. I’ve developed some hiking navigation techniques that really work.
First, airplane mode saves tons of power but still lets GPS function for outdoor navigation. Your phone constantly searches for cell towers, which drains battery fast. Turn off that search and you’ll double your GPS hiking time.
Screen brightness kills batteries too during smartphone navigation. I keep mine as dim as possible while still being readable.
For extended wilderness navigation, I carry a 20,000 mAh power bank. That’s enough to fully charge my phone about 4-5 times.
When GPS Accuracy Lets You Down
GPS accuracy depends on satellite signals, and mountains, dense forests, and bad weather all mess with that signal during outdoor navigation. I’ve seen my GPS hiking device show me 100 feet off the actual trail more times than I can count.
The worst spots for GPS accuracy are narrow canyons and thick forest navigation. Sometimes you’ll get readings that are totally wrong, showing you moving when you’re standing still.
Cold weather kills battery life fast and can make touchscreens unresponsive during winter navigation. I learned to keep my devices warm inside my jacket and always carry backup power for reliable hiking navigation techniques.
Mixing Old School with New Tech
The smartest hikers I know use GPS hiking and traditional compass navigation together. I always carry a paper map and hiking compass as backup navigation, even on day hikes.
GPS hiking is great for confirming your location, but reading terrain features on a topographic map gives you better situational awareness during wilderness navigation. You can see the bigger picture – what’s upstream, where the nearest roads are, how the weather might affect different route planning.
Technology should make your outdoor navigation better, not create new ways to get lost.
Natural Navigation Techniques Using Environmental Clues
I learned natural navigation the hard way during a solo hike when my GPS hiking device died and I’d left my compass navigation tools in the truck. Standing there in thick forest with absolutely no idea which way was which, I started noticing things I’d walked past for years without really seeing.
That panic-inducing day turned into one of my best learning experiences about wayfinding techniques. Nature gives you tons of outdoor navigation clues if you know what to look for.
Sun Compass and Shadow Methods
The sun rises in the east and sets in the west – everyone knows that basic natural navigation fact. But here’s the useful part: around noon, it’s due south if you’re in the northern hemisphere. This works pretty well most of the year for basic direction finding, though it shifts slightly with seasons.
The shadow stick method saved my bacon more than once during emergency navigation. I plant a straight stick in the ground and mark the tip of its shadow with a rock. Wait 15-20 minutes and mark the new shadow tip. Draw a line between the two marks – that line runs east to west, with the first mark being west.
I’ve also used my analog watch as a rough sun compass for wilderness navigation. Point the hour hand at the sun, and halfway between the hour hand and 12 o’clock is south. This natural navigation trick works better in winter when the sun stays lower in the sky.
Landscape Reading and Terrain Features
Terrain features tell stories if you pay attention during wilderness navigation. South-facing slopes get more sun, so they’re usually drier with different vegetation. North-facing slopes stay cooler and damper, often with more moss and different tree types.
Ridgeline navigation patterns are like natural highways – they usually run in consistent directions within a region. Once you figure out the main ridge pattern in an area, you can use them for general direction finding even when you can’t see landmarks.
Valley navigation almost always leads somewhere – usually to bigger valleys or eventually to roads and civilization. Following water downstream has gotten me back to familiar territory several times when I was turned around during wilderness navigation.
Star Navigation for Night Hiking
I’ll be honest – star navigation seemed impossible until I learned just a few key wayfinding techniques. You don’t need to know the whole night sky for basic night hiking navigation, just how to find Polaris, the North Star.
Find the Big Dipper first – it looks like a ladle and is pretty easy to spot during night hiking. The two stars at the end of the dipper’s bowl point to Polaris. That star sits almost exactly due north and barely moves all night.
On clear nights, Polaris has saved me from walking in circles more than I care to admit during night hiking navigation.
Weather Patterns as Direction Finders
Wind patterns can be surprisingly consistent in many areas for natural navigation. Where I hike in the Pacific Northwest, afternoon winds usually come from the west off the ocean. Morning breezes often flow downhill as cold air settles.
Snow sticks around longer on north-facing slopes and in areas protected from sun during winter navigation. Even in late spring, I can sometimes figure out which way is north by looking at where snow patches remain.
Following Animal Highways
Game trails aren’t random – animals are practical creatures who take efficient routes between food, water, and shelter. These trails often lead to water navigation sources or cross ridges at the easiest spots.
Deer trails usually meander quite a bit, but they connect important areas during wilderness navigation. I’ve followed them to find water when my topographic map showed streams that had dried up.
Plants and Trees as Natural Compasses
The moss-grows-on-the-north-side thing is mostly wrong, at least where I hike. Moss grows where it’s damp, which could be any side depending on local conditions during forest navigation.
But trees do show directional clues if you know what to look for during landscape reading. Branches often grow bigger and fuller on the south side where they get more sun. The difference isn’t always obvious, but it’s there if you look at several trees.
Water Navigation Always Flows Downhill
This sounds obvious, but water flow patterns give you tons of navigation information. Small streams join bigger streams, which eventually reach roads, towns, or major landmarks.
Following water downstream has gotten me unlost several times during emergency navigation. Even tiny seasonal streams often connect to trail systems or old logging roads eventually.
Putting Natural Navigation Together
The trick with natural navigation is using multiple clues together for reliable wayfinding techniques. One indicator might be wrong, but if the sun position, slope aspect, and water flow all suggest the same direction, you’re probably on track.
I still carry modern GPS hiking tools, but understanding these natural signs makes me way more aware of my surroundings during outdoor navigation. It’s like learning to read a language that’s been there all along.
Start practicing these hiking navigation techniques on familiar trails where getting lost isn’t dangerous. Once you develop this awareness, wilderness navigation becomes more interesting even when your GPS is working perfectly.
For comprehensive training on natural navigation and other outdoor skills, REI’s Intro to Navigation series offers excellent resources to expand your wayfinding knowledge beyond what any single article can cover.
Pre-Trip Planning and Route Preparation Strategies
I used to be that guy who’d show up at the trailhead with just downloaded directions on my phone and a vague idea of where I was going. Worked fine until I got caught in an unexpected storm on what I thought was an easy day hiking navigation challenge. Spent six miserable hours bushwhacking in the rain because I had no backup route planning.
That soggy wake-up call taught me that good wilderness navigation starts at home, not at the parking lot. Now I spend almost as much time on trip planning as actually doing them.
Finding Real Info About Trail Conditions
AllTrails reviews are okay for basic trail navigation, but they’re often outdated or written by people with totally different skill levels than you. I’ve learned to dig deeper for accurate conditions during hiking preparation.
Local ranger stations give the best current info for wilderness navigation, especially about trail closures, snow levels, and recent washouts. I call them a few days before big trips, and they’ve saved me from driving hours to find impassable trails.
Mountain Project and regional hiking forums have more detailed reports from experienced hikers. These folks usually mention specific problem spots and navigation challenges you won’t find in guidebooks during route selection.
Making Route Planning That Actually Works
My trip planning used to be pretty basic – start here, end there, see you later. Now I create detailed timelines with multiple bailout routes built in for safe wilderness navigation.
I break longer hikes into segments with estimated times for each section during hiking preparation. This helps me track progress and identify if I’m falling behind schedule early enough to make good decisions.
Bailout routes are crucial, especially on multi-day wilderness navigation. For every major trail junction, I note where alternate routes lead and how they connect to roads or other trails during route planning.
Navigation Checkpoints That Matter
Random waypoints don’t help much when you’re lost during emergency navigation. I pick landmarks that are easy to spot and confirm my location – distinctive rock formations, trail junctions, creek crossings, or viewpoints.
These checkpoints become my progress markers too during trail navigation. If I’m not hitting them on schedule, I know something’s wrong with my route or timing.
I write brief descriptions of what each checkpoint should look like during hiking preparation. “Large boulder with white streak, trail splits left toward ridge” is way more helpful than just marking a dot on the topographic map.
Weather Makes Everything Harder
I learned to check weather forecasts for multiple elevations along my route during trip planning. Conditions at the trailhead can be totally different from what you’ll face at higher elevations during alpine navigation.
Snow levels matter huge even in late spring for winter navigation planning. I’ve turned back from hikes because snow made navigation too risky, even though the weather seemed fine when I started.
Wind forecasts are important too, especially on exposed ridges during route selection. Strong winds make map reading nearly impossible and can blow you off course if you’re following compass bearings.
Emergency Contact Planning Done Right
Leaving a note saying “gone hiking, back Sunday” doesn’t help anyone rescue you during emergency navigation. My emergency contacts get detailed route plans with specific timelines and instructions.
I tell them exactly where I’m parking, which trails I’m taking, where I plan to camp each night, and when they should start worrying. This info goes to someone responsible who will actually follow through if I don’t check in.
For remote wilderness navigation, I carry a satellite communicator now. It costs about $15 per month for the service, but being able to send “I’m okay” messages or call for help anywhere has changed how I approach solo hiking.
Navigation Gear That Won’t Let You Down
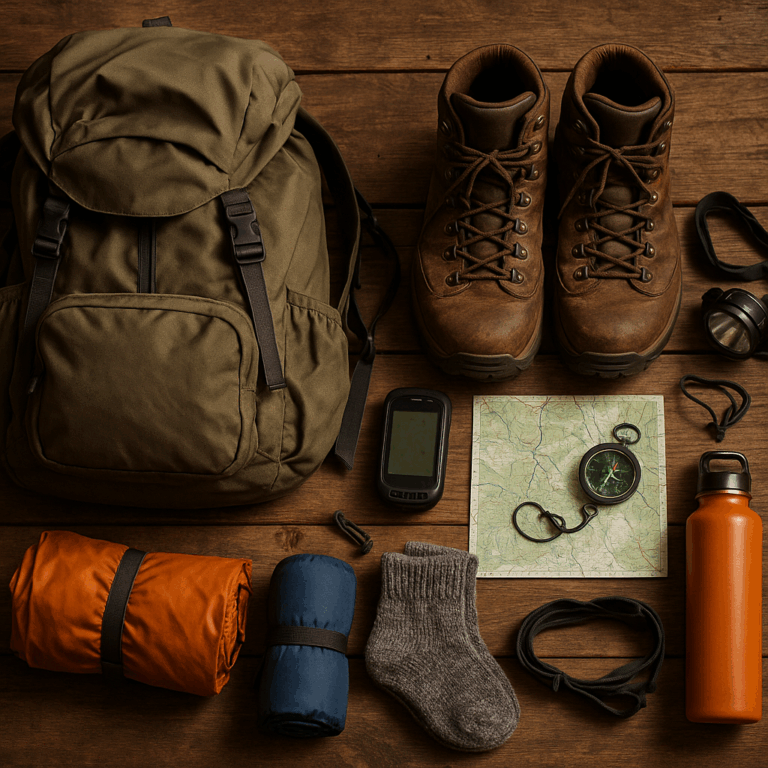
My navigation gear kit has gotten more sophisticated over the years, but it’s built around redundancy, not fancy gadgets for reliable outdoor navigation.
Topographic maps are still my foundation – usually USGS 7.5-minute quads for the areas I’ll be hiking. I laminate them or keep them in waterproof cases because wet paper maps are useless during wilderness navigation.
Two compasses travel with me now – my main baseplate hiking compass and a small backup button compass. I’ve had compass bubbles develop air bubbles or needles get stuck at the worst possible times during backcountry navigation.
GPS hiking device with fresh batteries, plus a smartphone with offline maps downloaded. Different devices sometimes show different locations, so having multiple references helps identify problems during outdoor navigation.
The time you spend on trip planning at home might be the most important part of your whole wilderness navigation experience. It’s certainly saved my butt more than once.
Advanced Wayfinding Skills for Challenging Terrain
There’s nothing quite like the feeling when the fog rolls in and suddenly you can’t see 20 feet ahead during wilderness navigation. I remember being on a ridge in the Olympics when thick clouds swallowed everything – landmarks, trail markers, even the ground more than a few steps away just vanished.
That day taught me the difference between regular trail navigation and the advanced hiking navigation techniques you need when conditions get nasty. These wayfinding skills have kept me safe in situations where basic map and compass work just wasn’t enough.
Low Visibility Navigation and Fog Navigation
Fog navigation is probably the trickiest condition I’ve dealt with during wilderness navigation. Everything looks the same, sounds get muffled, and you lose all sense of direction really fast.
My go-to technique is following handrails – natural terrain features that guide you in the right direction during low visibility navigation. Ridge lines, creek beds, or distinct slope angles become your guide rails when you can’t see landmarks.
In snow, I’ve learned to look for subtle terrain changes that show up even in whiteout conditions during winter navigation. Wind patterns create consistent snow formations that can indicate direction.
For night hiking navigation, I keep my headlamp on red light to preserve night vision. Takes about 20 minutes for your eyes to fully adjust to darkness, but then you can see way more than you’d expect.
Bushwhacking Navigation and Off-Trail Hiking
Bushwhacking navigation is part art, part science, and part stubborn determination. The key is picking good lines before you need them and sticking to your plan even when it gets rough during off-trail hiking.
I always identify catching features – big obvious terrain features like roads, rivers, or ridges that I can’t possibly miss during wilderness navigation. Before leaving the trail, I figure out which direction will definitely get me back to safety if everything goes wrong.
Terrain association becomes super important during off-trail hiking. I’m constantly checking how the land around me matches what my topographic map shows. Does this creek bend the right way? Am I climbing or descending like I should be?
Water Navigation Crossings That Won’t Kill You
Rivers have ended more hikes than I care to admit, usually because I didn’t plan for how different they’d look from what the topographic map showed during water navigation.
I always scout crossings from upstream first during water navigation. Water looks different from above – you can spot deep pools, find the shallowest route, and check for stable rocks or logs.
Early morning crossings are usually easier because snowmelt hasn’t peaked yet during wilderness navigation. I’ve turned back from afternoon crossings that would have been manageable at dawn.
My crossing technique is pretty conservative now during water navigation. I face upstream, use a stick for balance, and untie my pack straps so I can ditch the weight if I fall. Swift water is no joke.
Desert Navigation Tricks
Desert navigation messed with my head at first. Everything looks the same, landmarks are miles apart, and there’s way less margin for error with water and exposure.
Washes (dry creek beds) are like highways during desert navigation, but they can be confusing because they all look similar. I’ve learned to pick distinctive terrain features along wash routes – unusual rock formations, vegetation changes, or where side canyons join.
Heat shimmer makes distance judgment really hard during desert navigation. That peak that looks close might be hours away. I rely more on my topographic map and less on visual estimates in hot conditions.
Alpine Navigation Above Treeline
High altitude alpine navigation has its own problems. Weather changes fast, and there’s nowhere to hide when it gets bad.
Whiteout conditions in alpine areas are incredibly dangerous during winter navigation. I’ve practiced navigation techniques on familiar peaks so I’d be ready when visibility drops to nothing on unfamiliar terrain.
Altitude affects your thinking too during alpine navigation. I make more navigation mistakes when I’m tired and oxygen-deprived. Having systems and checklists helps when your brain isn’t working at full capacity.
Leading Groups Without Losing Anyone
Group navigation is way harder than solo wilderness navigation. Everyone has opinions, people move at different speeds, and group decision-making takes forever.
I’ve learned to establish navigation roles before we start any trail navigation. One person navigates, others watch for hazards or keep track of time. Too many navigators leads to confusion and arguments.
Regular group check-ins work better than waiting until someone’s lost during wilderness navigation. Every major landmark or trail junction, we stop and confirm everyone knows where we are and where we’re going.
When Everything Goes Wrong
Getting truly lost is scary, but panic makes everything worse during emergency navigation. The first thing I do is stop moving and think through what went wrong.
The STOP acronym works: Sit, Think, Observe, Plan. I retrace my steps mentally, figure out where I last knew my location for sure, and plan how to get back to that point during emergency navigation.
If I can’t backtrack safely, I look for high ground to get a better view of the surrounding area during wilderness navigation. Sometimes getting elevation reveals landmarks that weren’t visible from below.
In really bad situations, following water downstream eventually leads to bigger waterways and usually to roads or civilization during survival navigation. It’s not fast, but it’s generally safe and predictable.
These advanced hiking navigation techniques take practice, and you don’t want to learn them when your life depends on it. I started practicing advanced wayfinding skills on familiar trails during good weather.
The goal isn’t to eliminate all risk – that’s impossible in challenging terrain. The goal is developing skills and judgment so you can handle problems when they come up during wilderness navigation.
Navigation Safety Protocols and Emergency Procedures
I’ll never forget the moment I realized I was actually lost during what should have been routine trail navigation. Not just “hmm, where’s the trail” confused, but genuinely have-no-idea-where-I-am lost. My stomach dropped and my heart started racing as I stood there spinning in circles, trying to spot anything familiar.
That terrifying experience taught me that getting lost doesn’t happen all at once during wilderness navigation – it’s usually a series of small navigation mistakes that pile up. Learning to catch those early warning signs has probably saved my life more than once.
Catching Navigation Problems Before They Get Big
The first sign I’m getting off track is usually when terrain features don’t match what I expect from my topographic map during trail navigation. Maybe I’m climbing when I should be going downhill, or I haven’t hit a creek crossing that should have happened by now.
Time estimates are another early warning during hiking navigation techniques. If I planned 30 minutes to reach a landmark and it’s been 45 minutes with no sign of it, something’s wrong with my outdoor navigation. I used to just keep pushing forward thinking “it’s got to be around the next bend.” Big navigation mistake.
That nagging feeling in your gut is worth listening to too during wilderness navigation. Your subconscious picks up on things before your logical brain does. When something feels off, it usually is.
Weather changes can throw off navigation fast during outdoor navigation. I’ve had perfectly clear trails become invisible when fog rolled in or fresh snow covered all the trail markers.
The Lost Hiker Protocol That Actually Works
When I realize I’m lost, my first instinct is always to keep moving and try to “find” the trail during emergency navigation. That’s exactly the wrong thing to do. The STOP protocol has saved me from making bad situations worse.
Stop means literally stop walking during emergency navigation. Don’t take another step until you’ve figured things out. I’ve seen people wander miles in the wrong direction because they panicked and kept moving.
Sit down for real during this lost hiker protocol. This forces you to slow down and think instead of just reacting. Plus, you’ll be easier for rescuers to spot if you stay in one place.
Think through what happened during your wilderness navigation. When did I last know exactly where I was? What direction have I been traveling? Are there any landmarks I remember passing?
Observe your surroundings carefully for trail markers. Look for trail signs, blazes, or cairns you might have missed. Check for man-made sounds like traffic or aircraft that might indicate direction to roads.
Plan your next move based on what you’ve learned during emergency navigation. Sometimes the best plan is staying put and waiting for help.
Rescue Signaling When You Need It
Modern emergency communication has changed everything about backcountry safety and wilderness navigation. My satellite communicator cost $400 but it’s worth every penny for the peace of mind during remote area navigation.
Cell phones work in more places than people think for emergency navigation, but you need to know how to use them effectively. Getting to high ground or ridge lines often picks up signal. I’ve made emergency calls by hiking uphill for 10 minutes to get one bar of service.
The universal distress signal is three of anything – three whistle blasts, three shouts, three flashes of light for rescue signaling. Keep doing sets of three with minute-long breaks in between. This pattern tells rescuers it’s an emergency, not just noise.
If you have a mirror or shiny object, reflected sunlight can be seen for miles during rescue signaling. I practice signaling techniques on clear days so I know how to aim the reflection effectively.
Deciding Whether to Stay or Go
This decision has kept me awake at night more than once during wilderness navigation planning. Do I stay put and wait for rescue, or try to get myself out of trouble?
Weather is usually the deciding factor during emergency navigation. If conditions are getting worse or I’m not dressed for an overnight stay, I might need to move toward safety. But if weather’s stable and I’ve told someone my plans, staying put is often smarter.
Injury changes everything too during survival navigation. A twisted ankle might mean staying put is the only safe option, even if I think I know which way to go.
My general rule is this: if I’m confident about the direction to safety and conditions allow safe travel, I’ll try self-rescue using my hiking navigation techniques. If there’s any doubt about either factor, I stay put and call for help.
Survival Navigation When Everything’s Gone Wrong
Sometimes you end up in true survival situations where normal hiking navigation techniques don’t apply. Getting out alive becomes more important than getting out fast during survival navigation.
Following water downstream is my go-to survival navigation technique. Streams eventually reach bigger waterways, which usually lead to roads or towns. It’s not quick, but it’s reliable and gives you water along the way.
In really bad weather, finding or building shelter becomes priority number one during survival navigation. I’ve spent unplanned nights in the woods because moving in dangerous conditions was riskier than just waiting it out.
Learning From Navigation Mistakes
Every navigation mistake teaches you something if you’re willing to admit what went wrong during your wilderness navigation. I keep a hiking journal and write down problems I had, even minor ones.
The pattern I’ve noticed in my navigation mistakes is usually overconfidence combined with not paying attention to small warning signs. I get focused on reaching my destination and ignore clues that I’m going off course during trail navigation.
Sharing close calls with other hikers helps everyone learn better hiking navigation techniques. Most experienced hikers have stories about getting lost or making navigation errors. These stories aren’t embarrassing – they’re valuable lessons.
Prevention Beats Everything
The best emergency navigation procedure is not having emergencies in the first place. That means better trip planning, carrying redundant navigation gear, and turning back when conditions get sketchy.
I’ve learned to set turn-around times and stick to them, even when I’m close to my goal during wilderness navigation. Missing a summit beats spending the night lost in bad weather.
Emergency procedures are like insurance – you hope you never need them, but you’re really glad they’re there when things go sideways during outdoor navigation. The mountains don’t care about your schedule or your ego, so it pays to be ready for when things don’t go according to plan.
Most importantly, don’t let fear of getting lost keep you from exploring. With proper preparation and safety protocols, you can handle navigation emergencies and still have amazing adventures in the backcountry using solid hiking navigation techniques.
Conclusion
Learning hiking navigation techniques isn’t just about reaching your destination – it’s about turning every outdoor adventure into a confident, safe, and deeply rewarding experience. From reading topographic maps like a pro to using smartphone navigation effectively (while knowing what to do when it fails), these wayfinding skills will serve you well on countless trails ahead.
Remember, the best wilderness navigation experts aren’t born – they’re made through navigation practice and experience! Start with familiar local trail navigation, slowly building your outdoor navigation skills before tackling more challenging terrain. Always carry backup navigation gear, and never rely on just one method.
Ready to take your hiking adventures to the next level? Start practicing these hiking navigation techniques on your next trail outing, and you’ll be amazed at how much more connected and confident you feel in the wilderness during your outdoor navigation journey. Your future self will thank you when you’re standing confidently at that epic summit viewpoint instead of wondering which way leads back to the trailhead!
Whether you’re planning day hiking navigation adventures in your local state park navigation areas or multi-day wilderness navigation expeditions in remote forest service navigation territories, mastering these wayfinding techniques will transform your outdoor experience. From national park navigation to backcountry wilderness area navigation, these skills work everywhere.
Don’t wait for an emergency navigation situation to test your skills. Start with navigation training on familiar trails, take an orienteering course, or join a hiking navigation class to build your wilderness skills systematically. Many outdoor retailers offer compass courses and GPS training workshops, while mountaineering clubs provide hands-on navigation practice opportunities.
The investment in learning proper hiking navigation techniques pays dividends every time you step onto a trail. Build your navigation confidence through deliberate practice, and soon you’ll be ready for any wilderness navigation challenge that comes your way!

